Creating the Custom firmware for ESP32 MCU using SDK
The Software Development Kit (SDK) developed by the 2Smart Cloud team is the most functional tool for writing firmware for ESP32 microcontrollers. The firmware functionality created on such a base is much more comprehensive than in the case of ESPHome. In addition, the development of the SDK is a higher priority for the team, so all new features of the platform will primarily appear in this base. This means that developers who have chosen the SDK firmware option will be able to use the innovations of 2Smart Cloud in their products faster.
The basic principle of the SDK-based firmware is that the code for integrating the device with the platform has already been written. It is enough for the developer to describe the logic of his product.
How to create SDK-based firmware
Use the documentation in the 2Smart Cloud Github to write the code. Pay attention to the ready-made SDK-based firmware examples, use them as firmware templates for your devices, and change and modify the code as you need.
1 - Specify the data required to connect to the platform in the firmware code of your device.
When using the step-by-step assistant, the data is automatically opened when selecting Custom firmware:
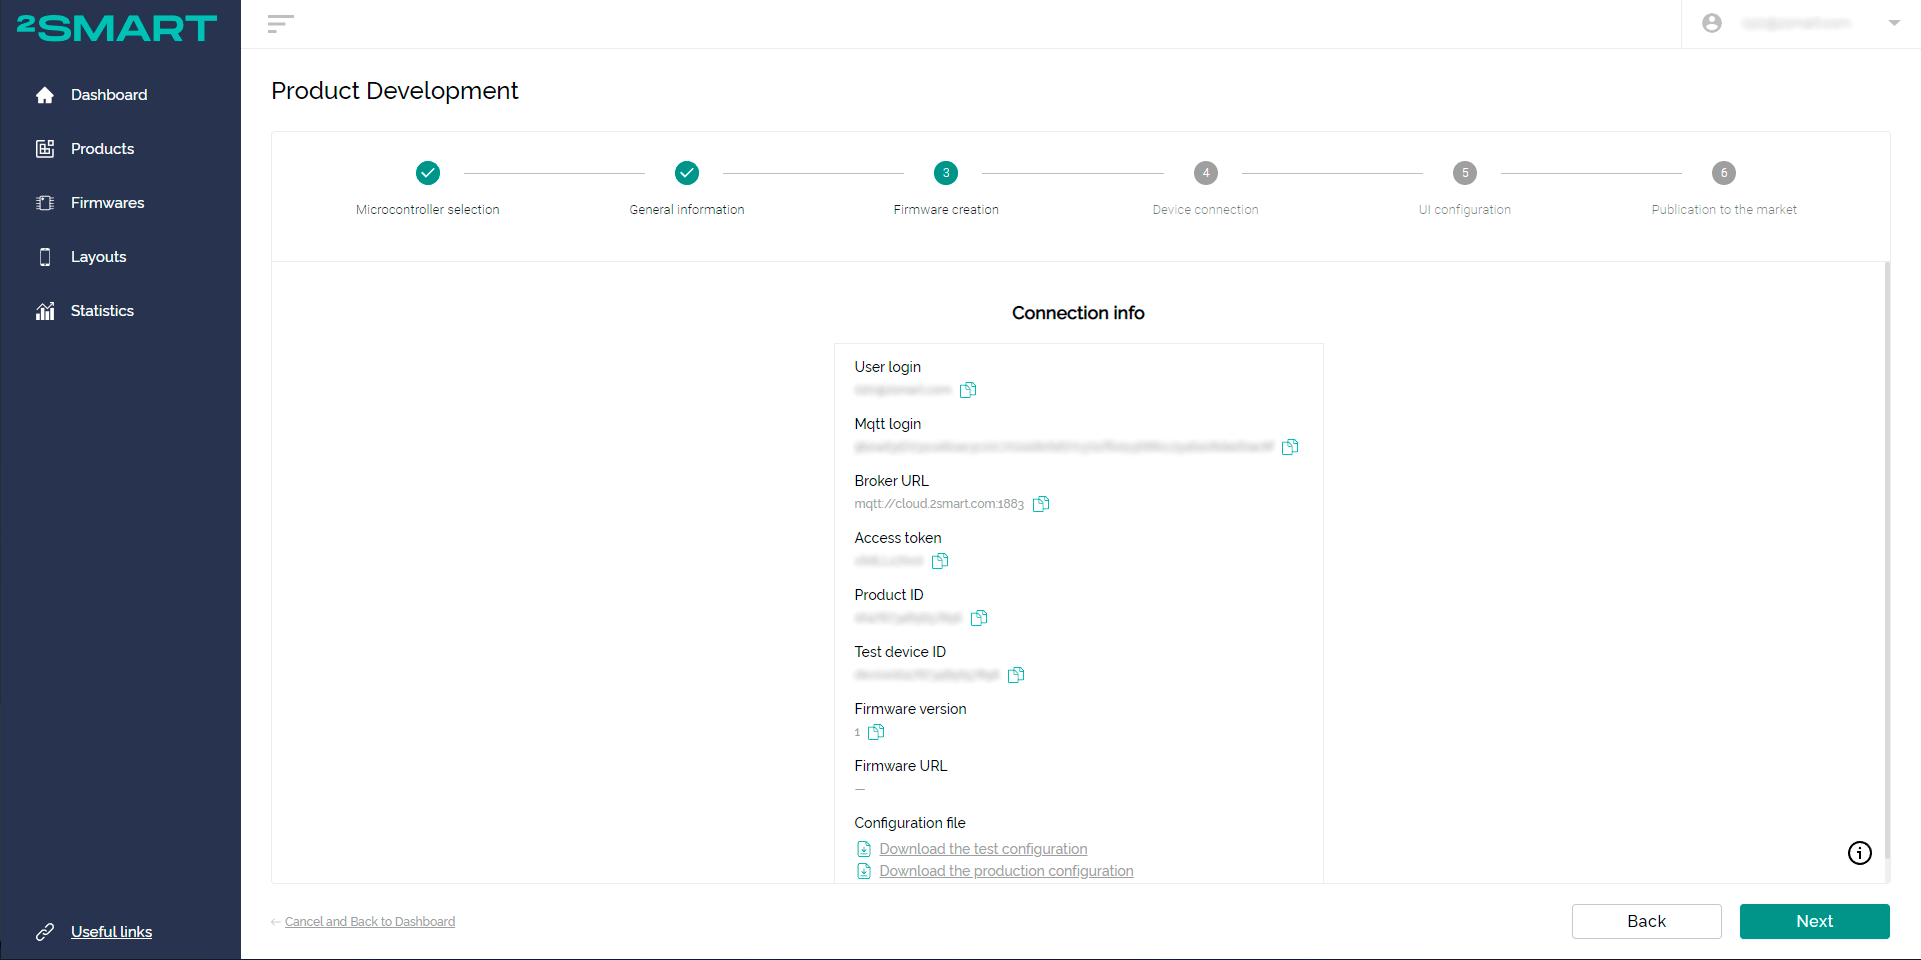
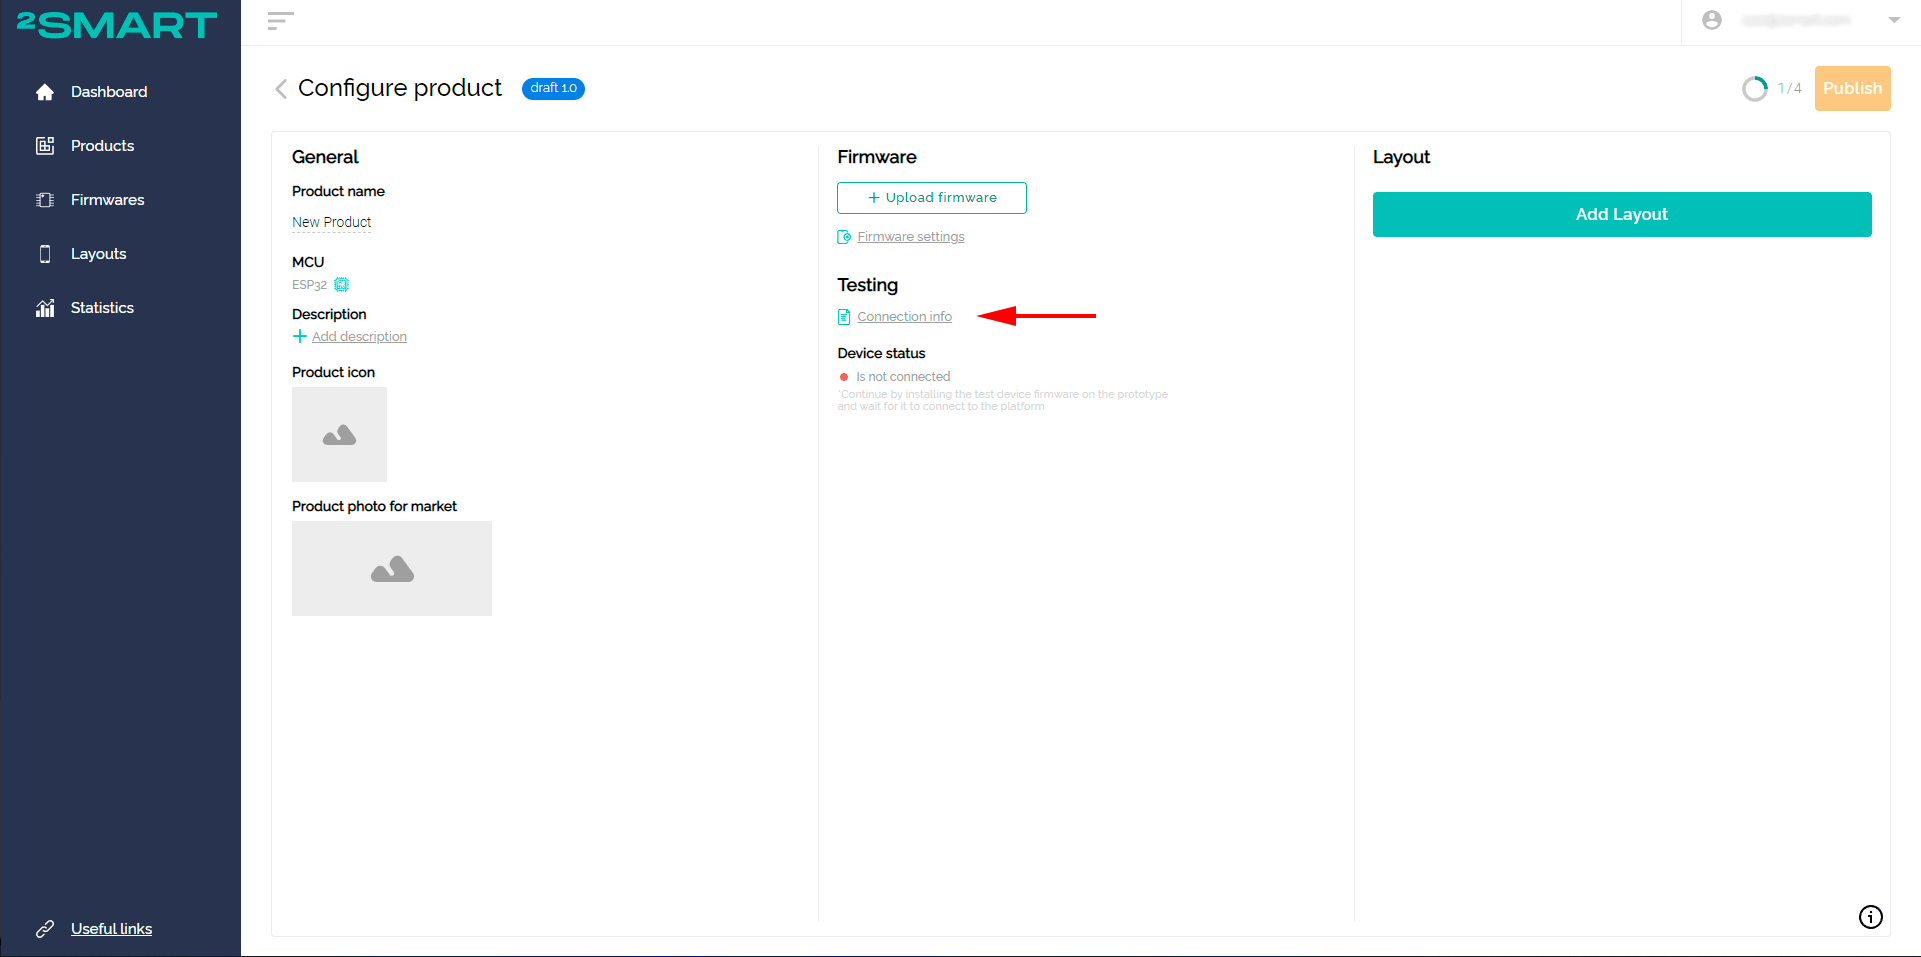
When using the product page, click on the “Connection Info” link:

2 - Go to the downloaded firmware repository, open the Firmware/src/main.h file and make the following changes:
- copy the Product ID and paste it into the firmwareName and ProductID fields,
- enter the name of your device's hotspot instead of the default one in the device Name field,
- if you are creating a new product, make sure that its version specified in device_version equals 1.

3 - Save the changes in the firmware code and use it to flash your device.
Please note! If the firmware is already written to the microcontroller, do not forget to remove it according to the documentation.

4 - After successful flashing, the device will open a Wi-Fi hotspot with the same name specified for the device in the firmware code. Connect to this network.
5 - Follow the link http://192.168.4.1/ to open the device's web interface. Use the login “admin” and password “admin” to log in (if necessary, you can change the default values in the settings).

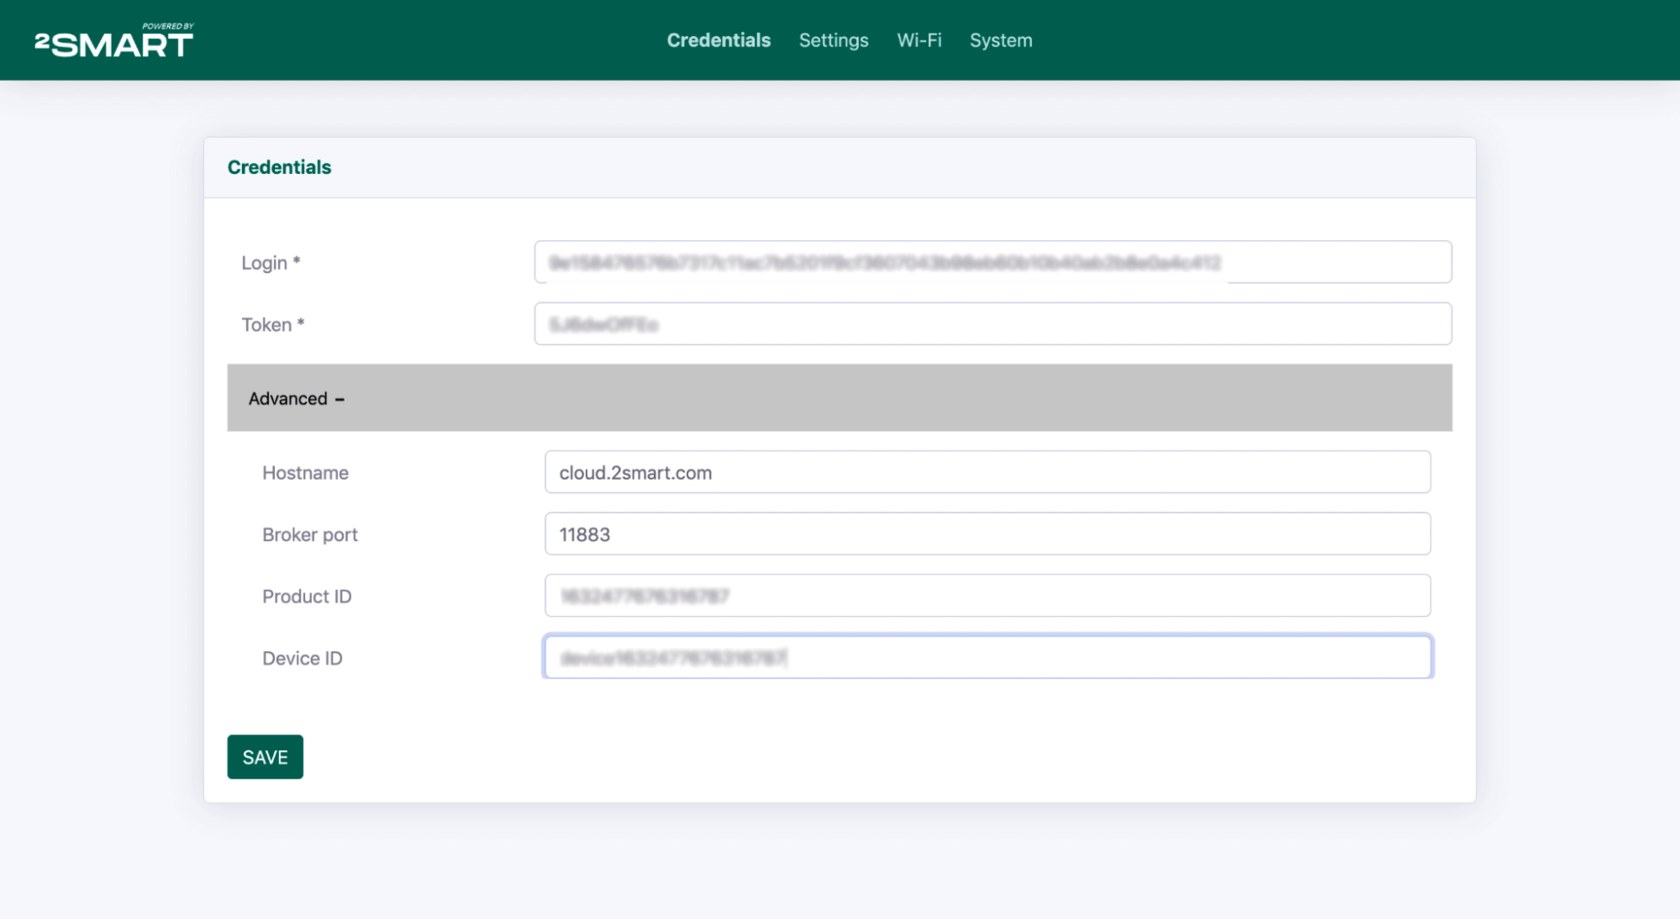
6 - Copy the values from the “Connection Info” window to the fields on the Credentials tab:
- in the Login field – the “User login” value,
- in the Token field – the “Access token” value,
- in the Hostname field (under the Advanced spoiler), enter the value “cloud.2smart.com ”,
- in the Broker port field, enter the value “11883”,
- copy the “Test device ID" value in the Device ID field.
After filling in all the fields, click Save.
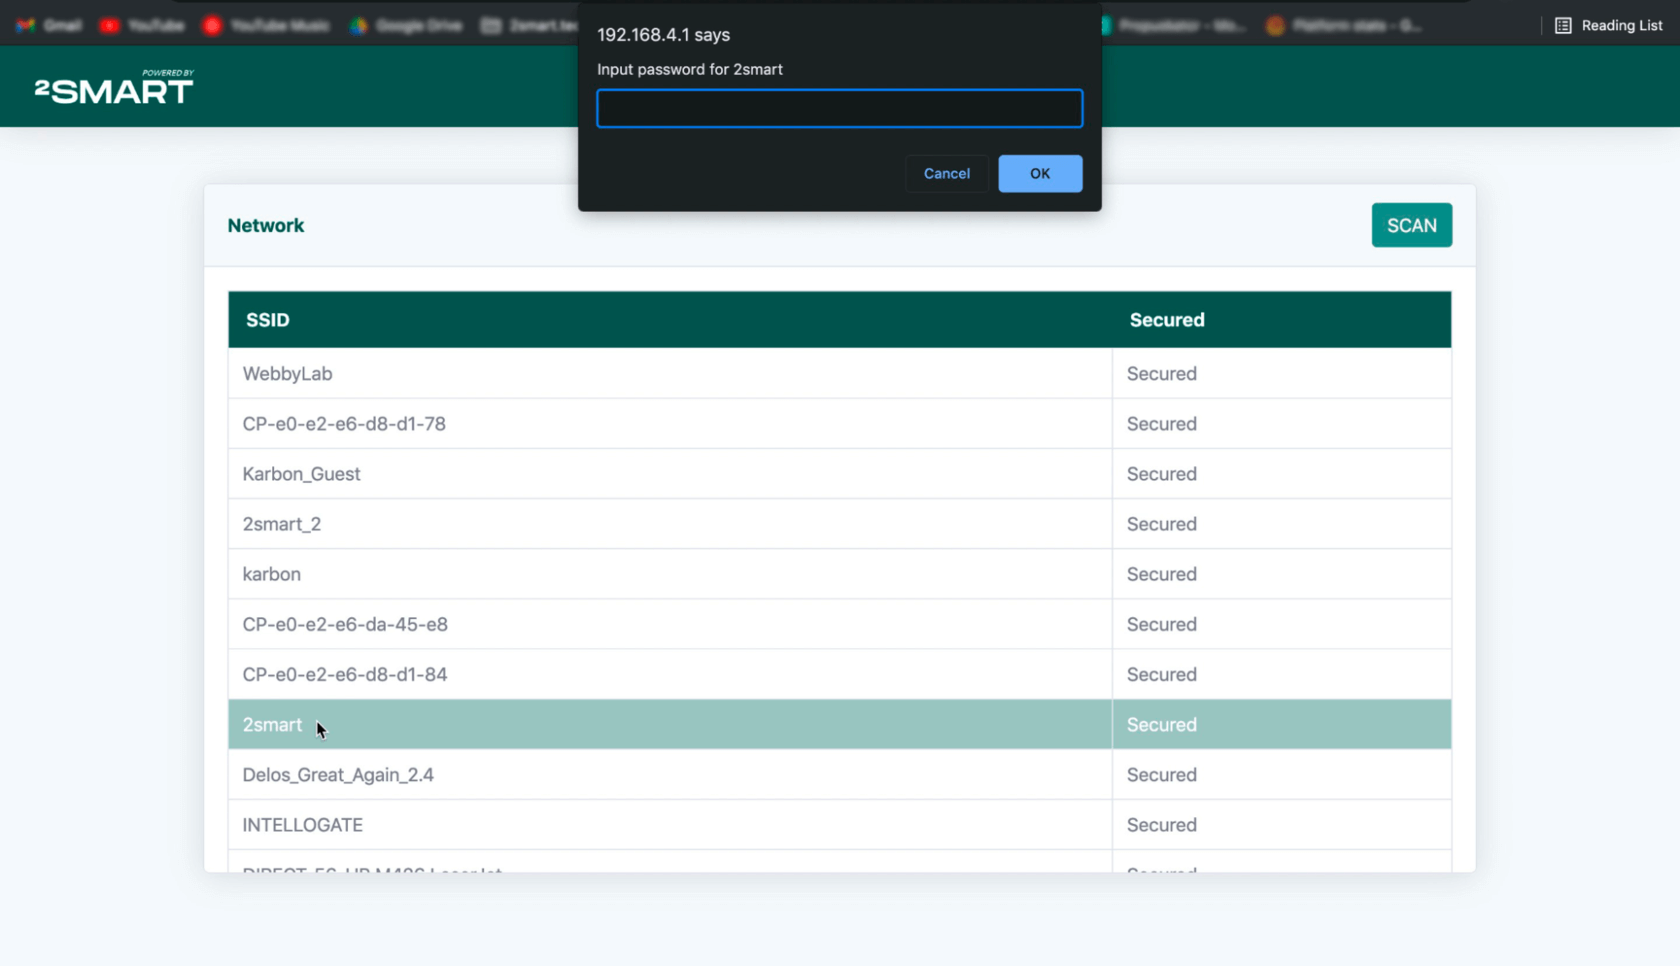
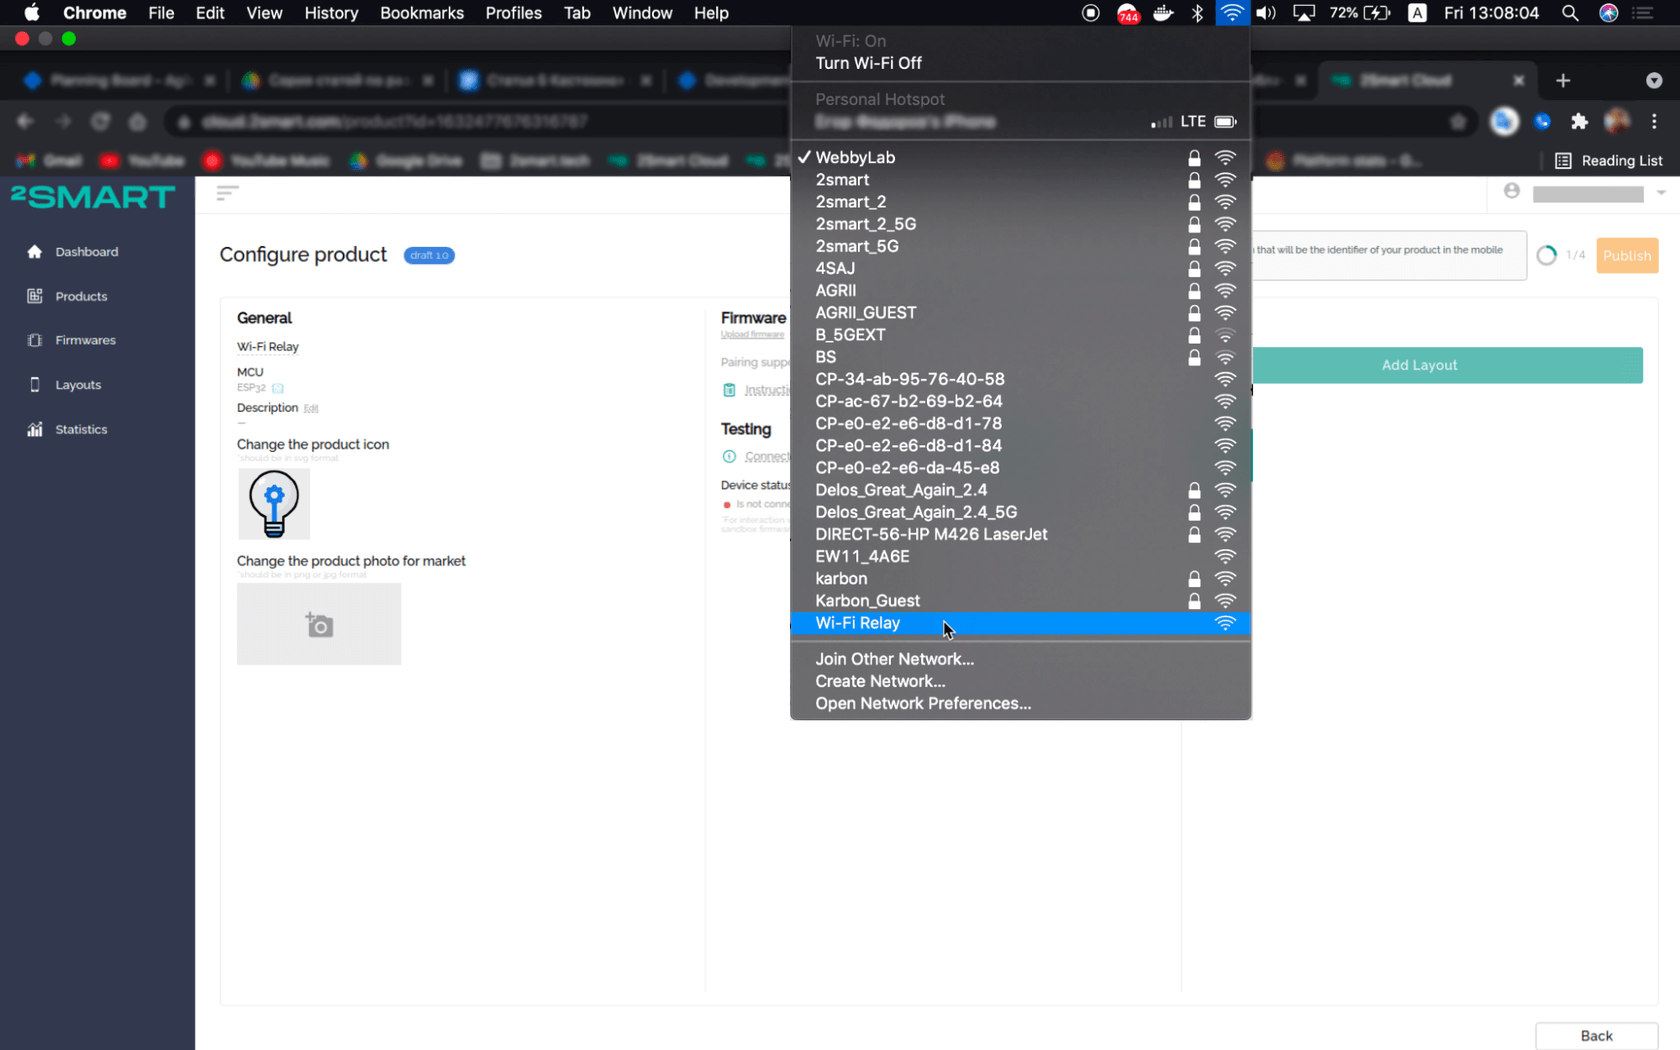
7 - Make sure your computer is still connected to the device's Wi-Fi hotspot. Go to the Wi-Fi tab and click Scan.
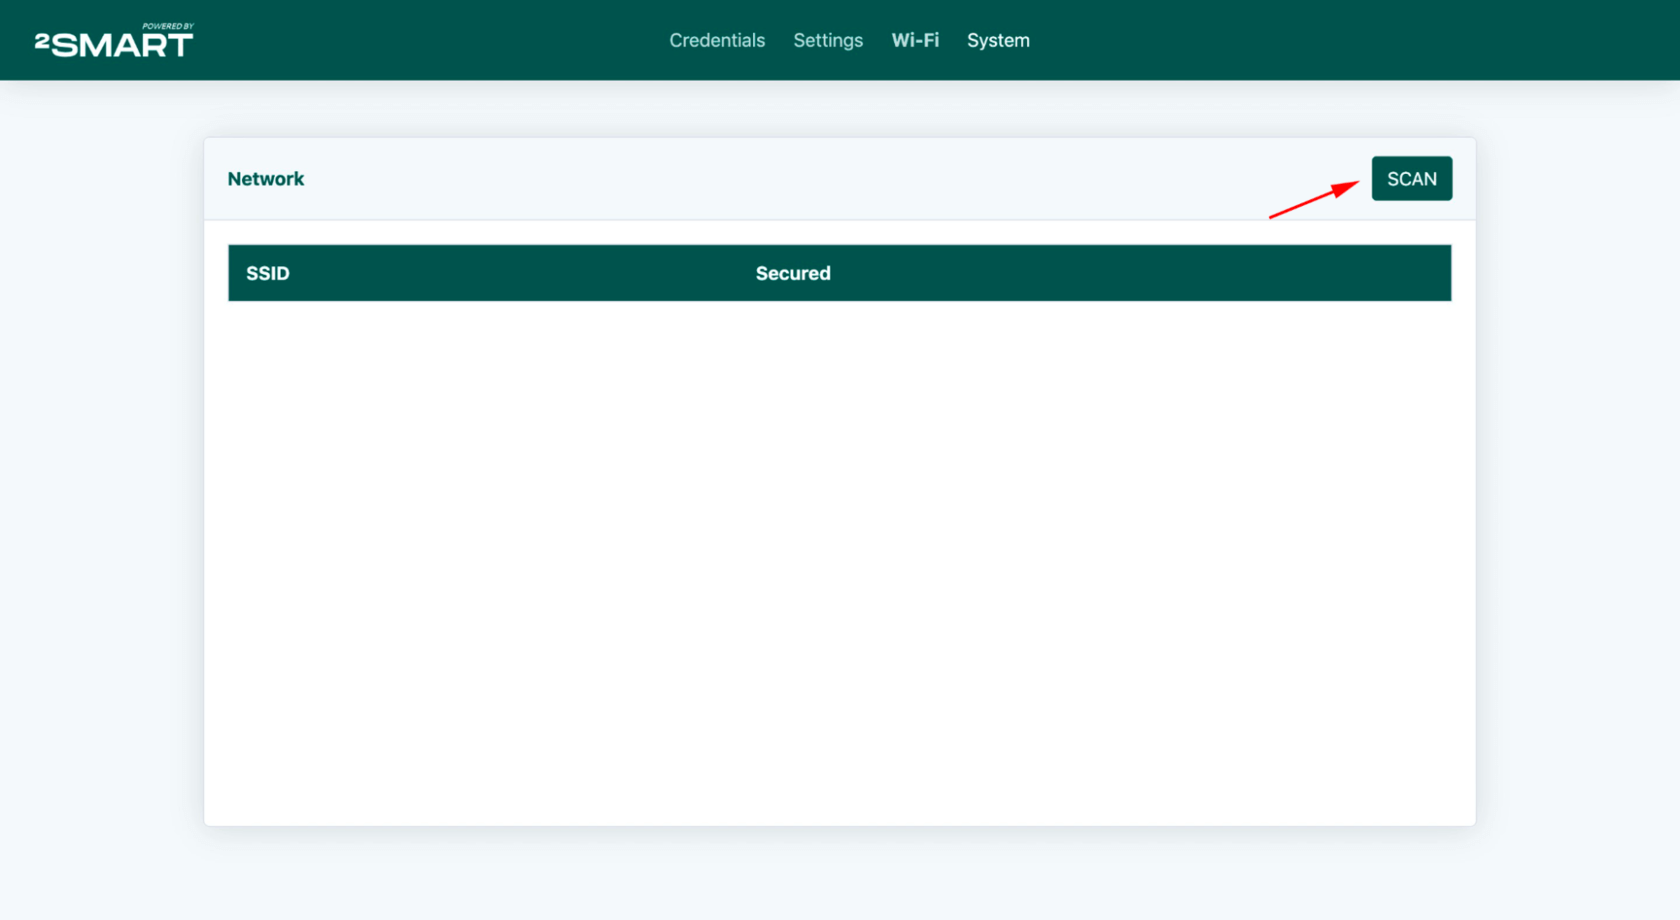
8 - Select your Wi-Fi network from the list and enter a password to access it. This is required for your device to connect to the platform.
Please note! ESP32-based devices support only Wi-Fi networks with a frequency range of 2.4 GHz!