Step Five: Mobile application interface
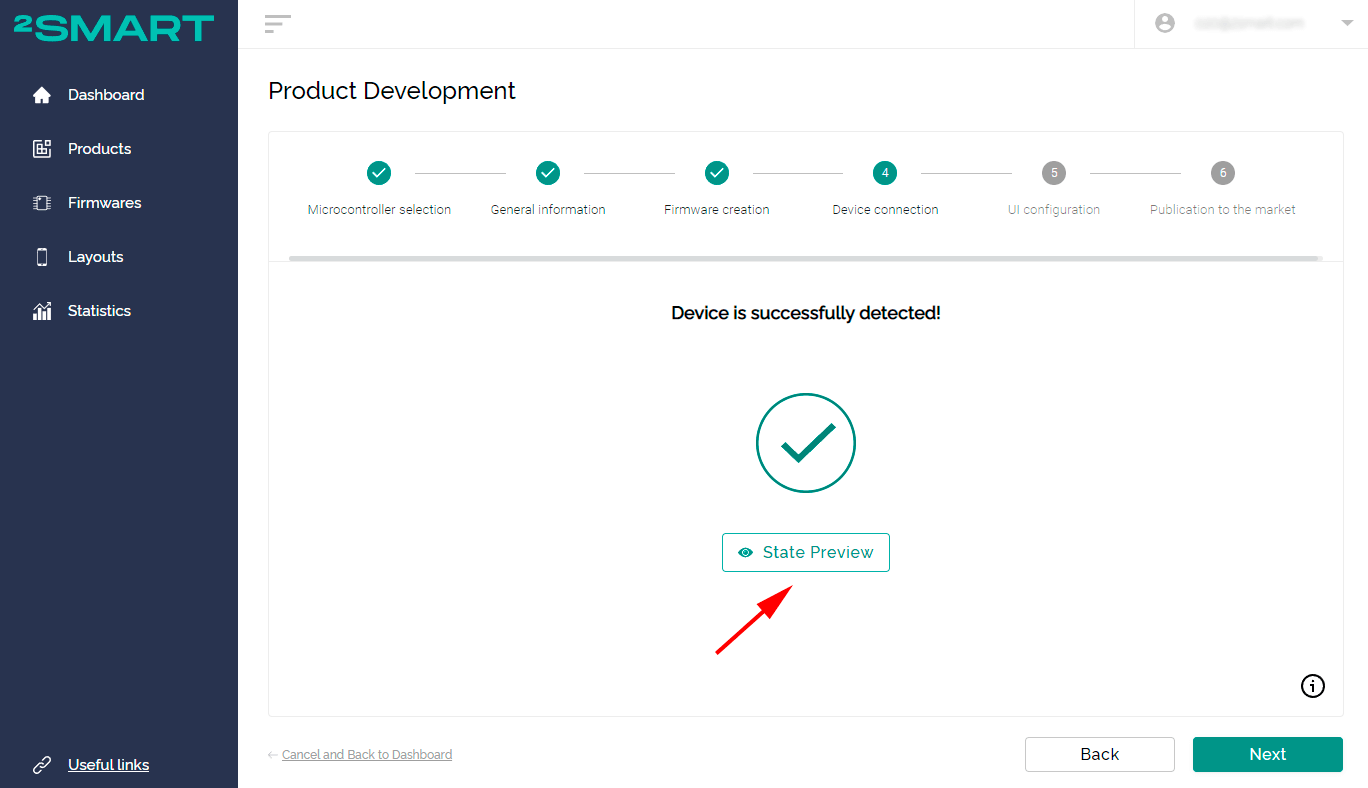
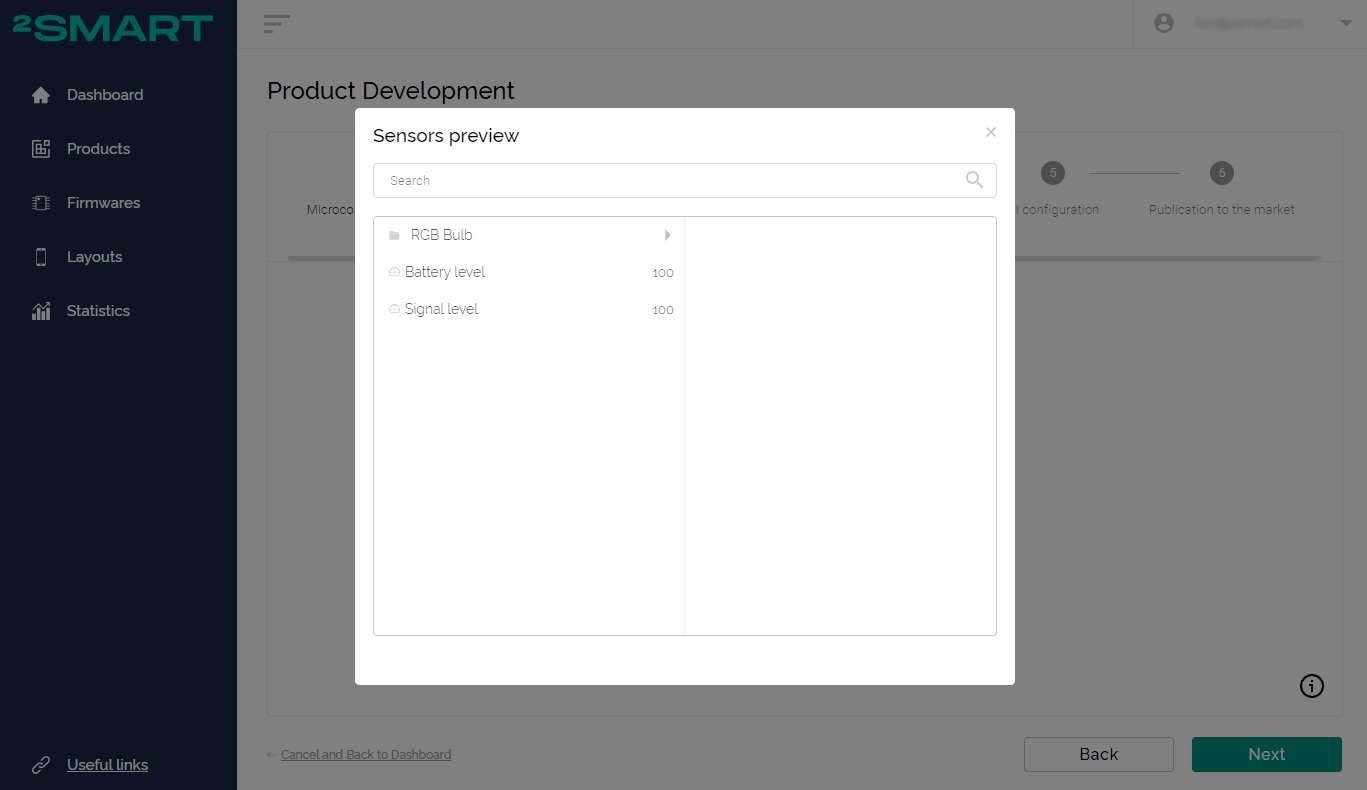
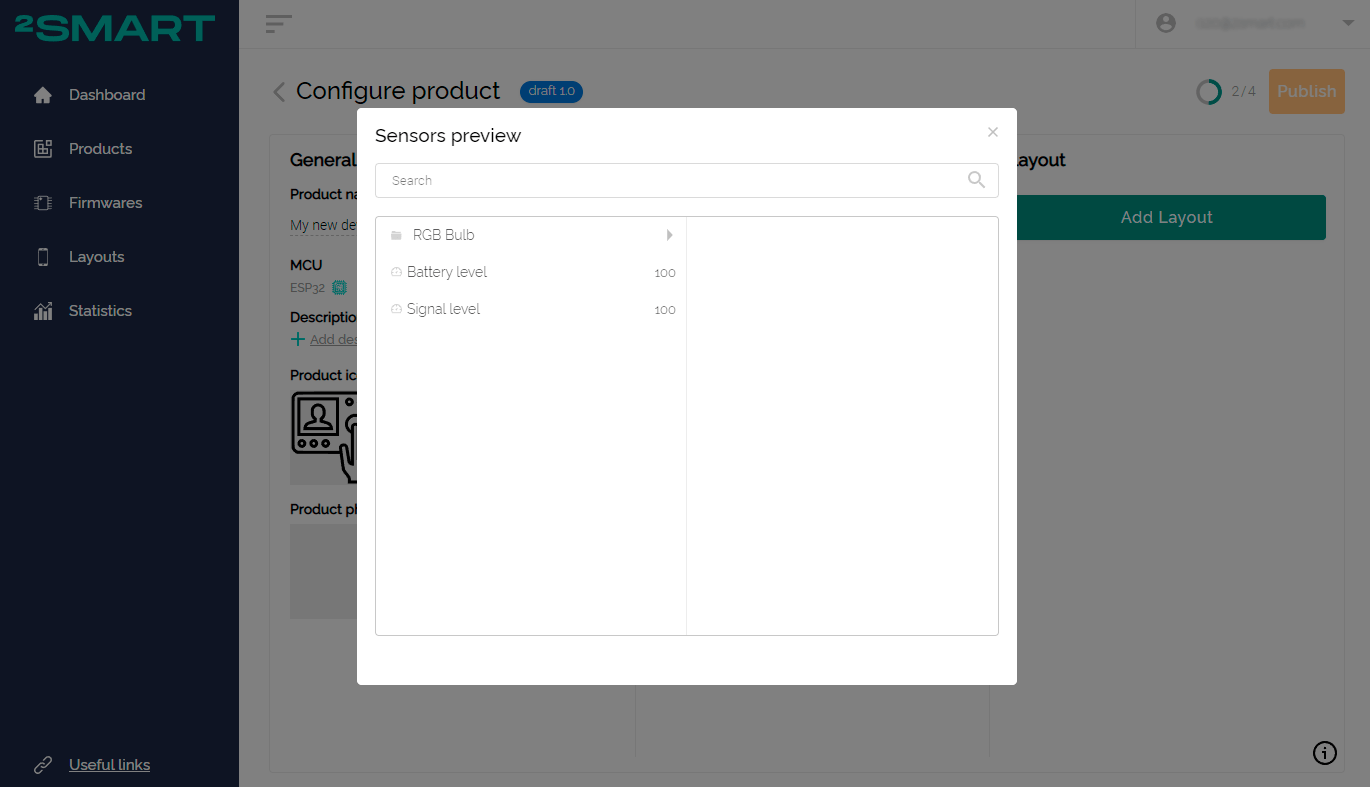
After connecting the prototype to the platform, the data of all device sensors will be available.
The “State Preview” button will appear in the step-by-step assistant:
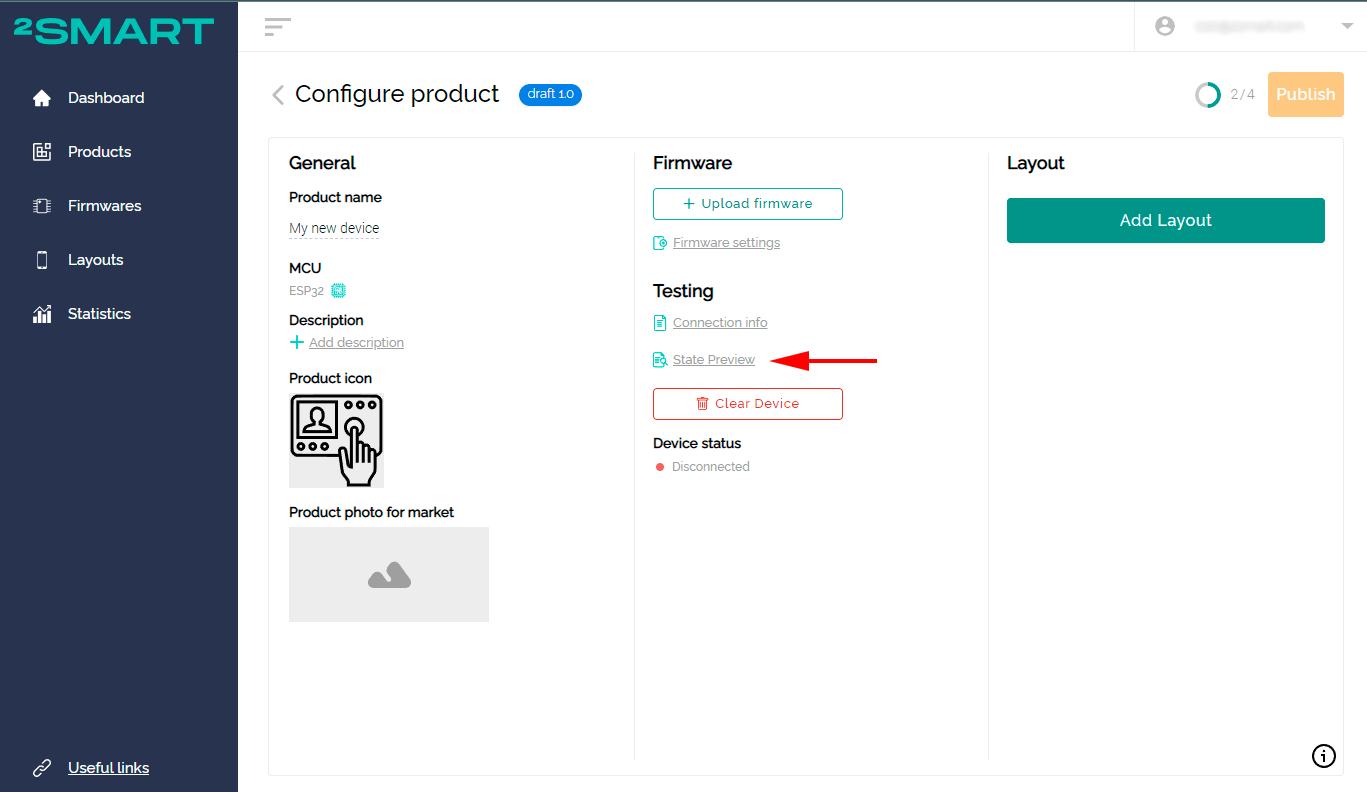
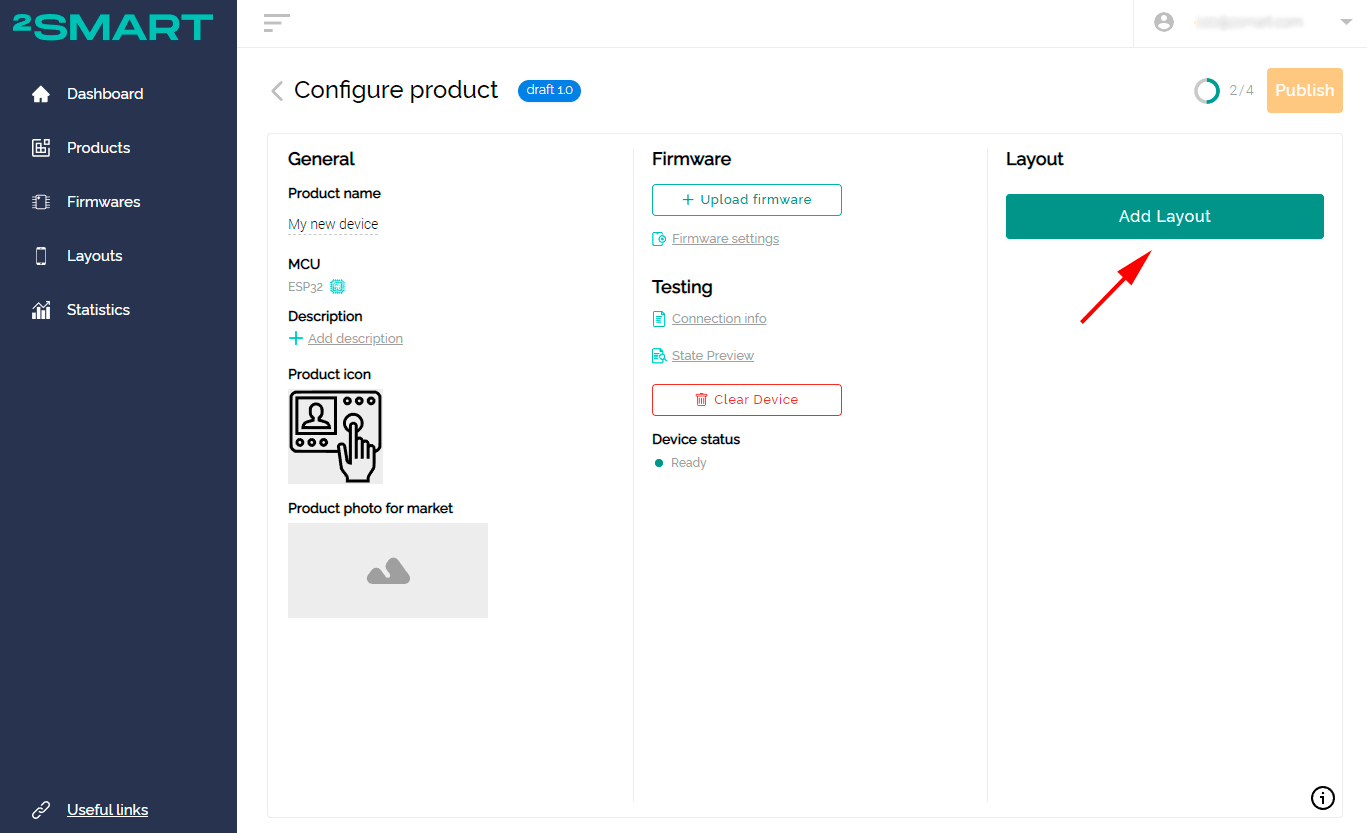
On the product page you will see a similar link:
Now you can configure the mobile application to control the device.
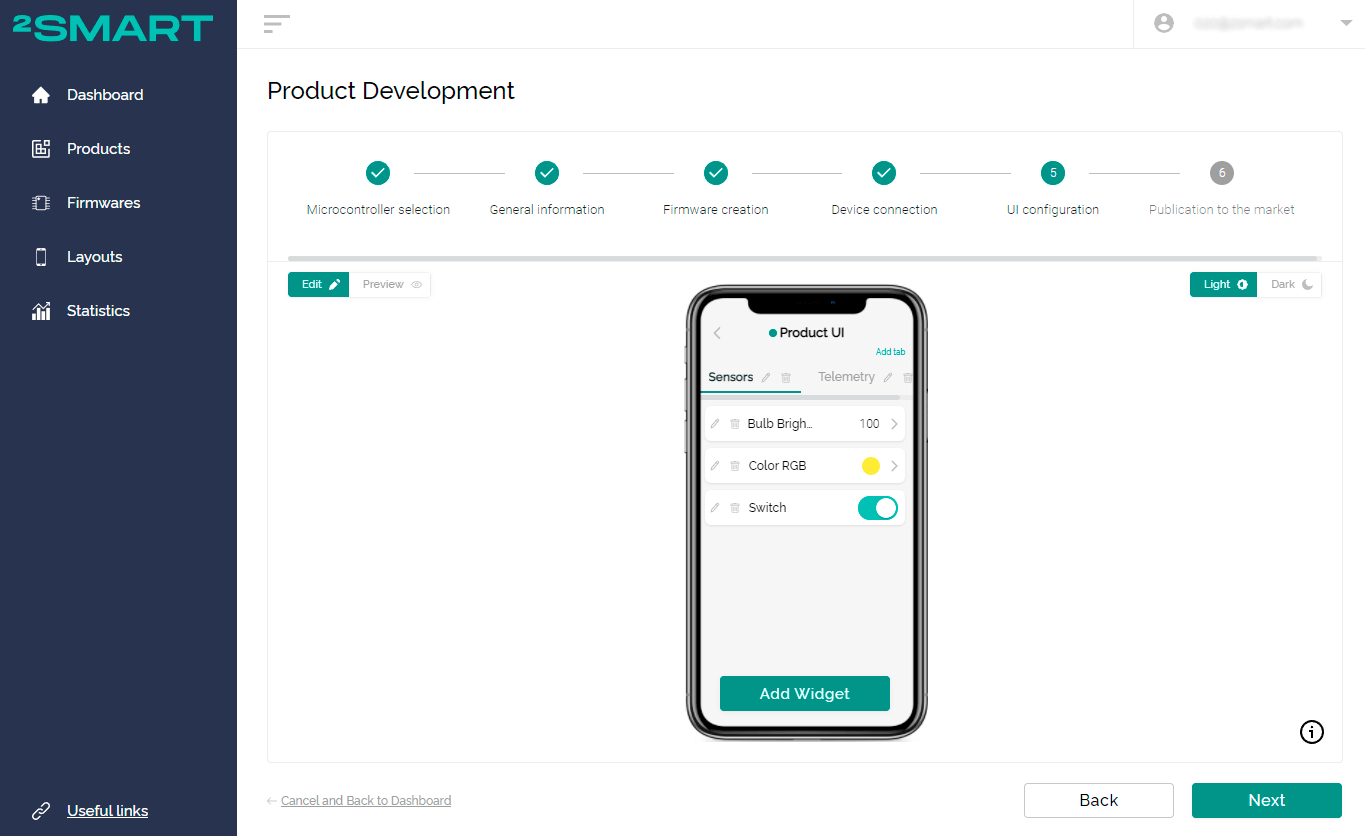
When using the wizard, configuring the application is the following fifth stage:
When using the product page, click on the “Add Layout” button:
Having received information about all sensors, the platform will automatically create an application interface. A control widget will be offered for each of the sensors.
Since different widgets can be used for the same device sensor, we recommend that you configure the interface manually. Use the 2Smart Cloud widget library and set the most convenient widget for each sensor. A detailed description of each of the widgets can be found in the help.
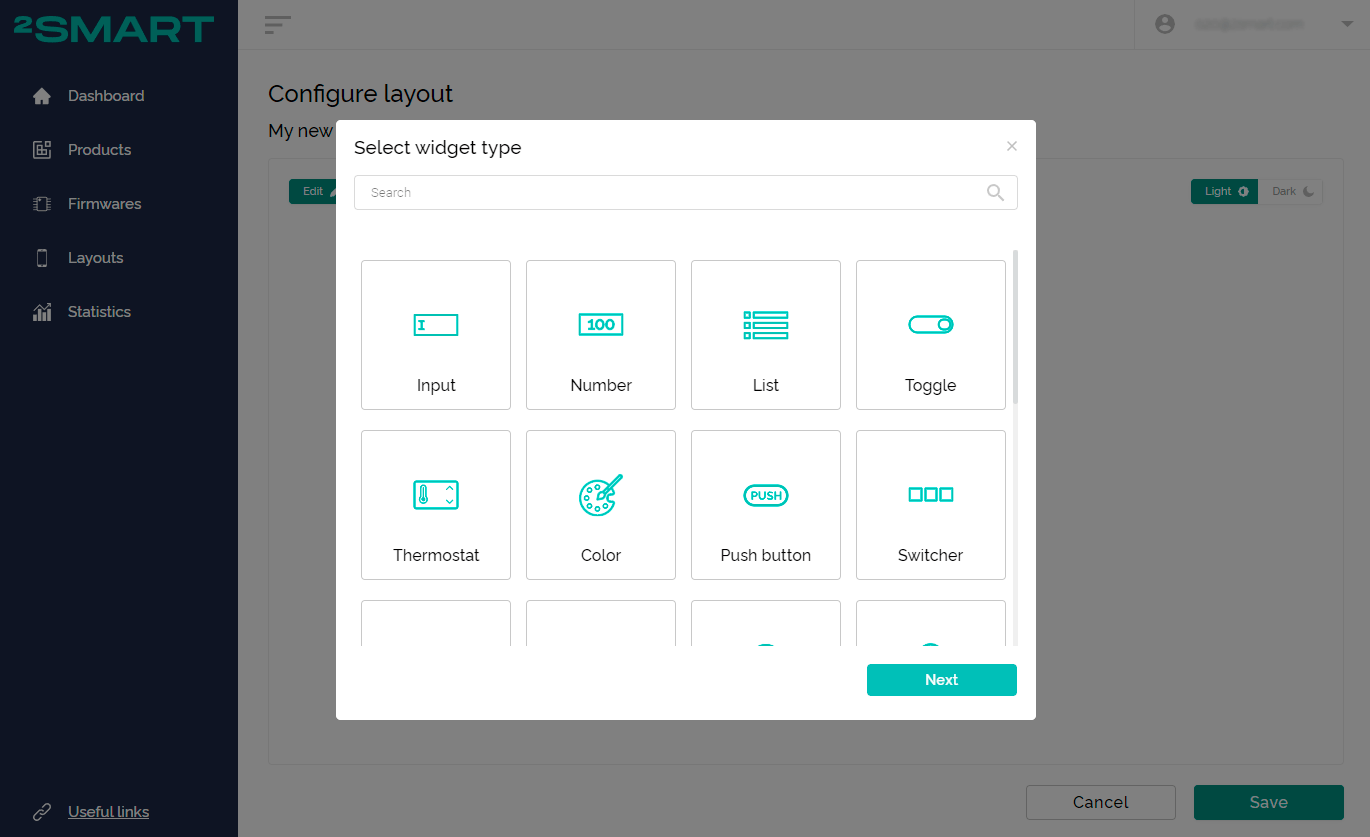
Click “Add Widget" in the mobile app emulator to access the widget library.
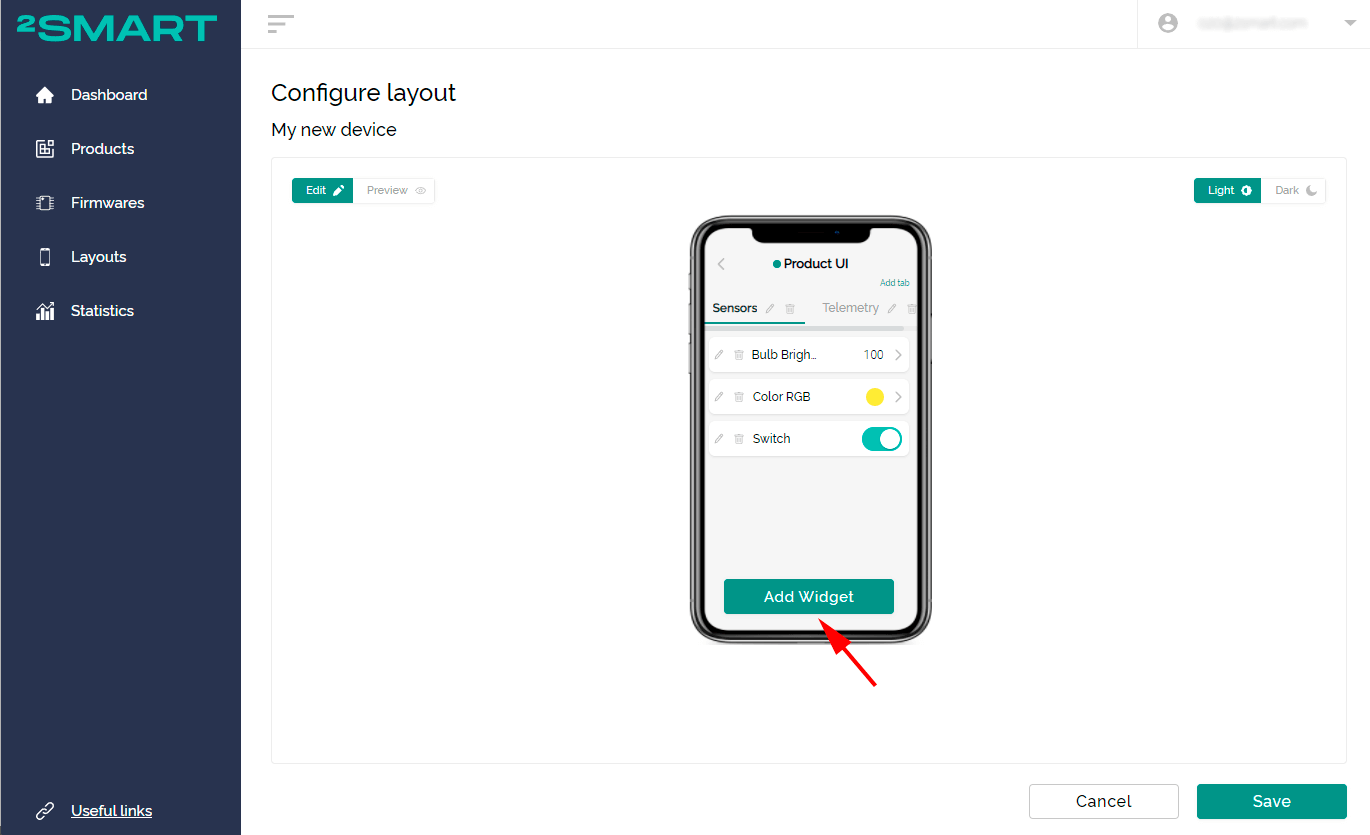
You can also:
- delete existing widgets;
- rename existing widgets;
- change the order of widgets using the drag-and-drop function;
- group widgets using tabs.
Ability to set up conditions for displaying or hiding tabs and widgets
The user can set up conditions for display or hide tabs, widgets, or “Grid” components on the layout.
The new “Condition” section is used in the tabs and widgets settings to make it possible.
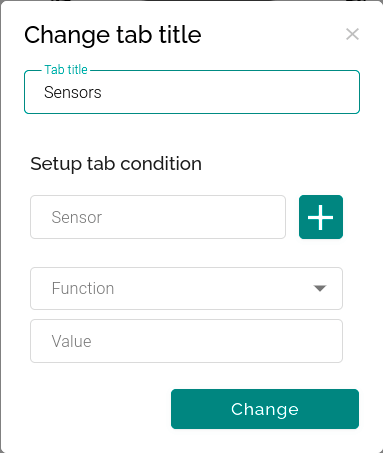
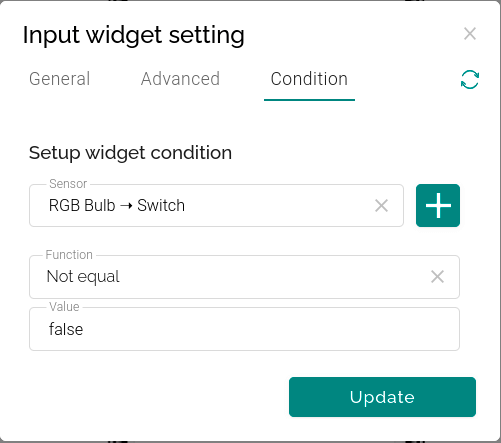
To add the condition, you should:
- Choose the sensor that will influence the tab or widget.
- Choose the function. There are two functions - "is equal" and "not equal":
- is equal - the component is shown if the sensor value matches the specified one,
- not equal - the component is displayed if the sensor value doesn't match the specified one.
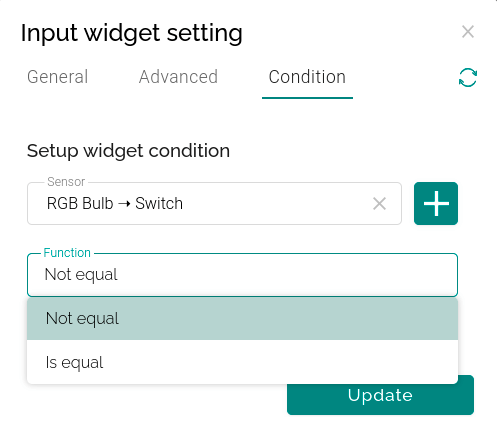
- Specify the value for the comparison. It can be a string, number, boolean, etc.
Save settings by clicking the “Update” or “Add” button, and they will be applied to the layout.