“Companies” page
Administrators with the appropriate permissions can manage Companies in the system using the "Companies" page.
- If the User has a Role that excludes permissions "View Companies" and "Manage Companies", the "Companies" page will not be available to them.
- If the User has a Role that includes only the "View Companies" permission, they will be able to access the "Companies" page but will not be able to create a new Company or edit the existing one.
Description of the entity on the platform in the section: "Companies”.
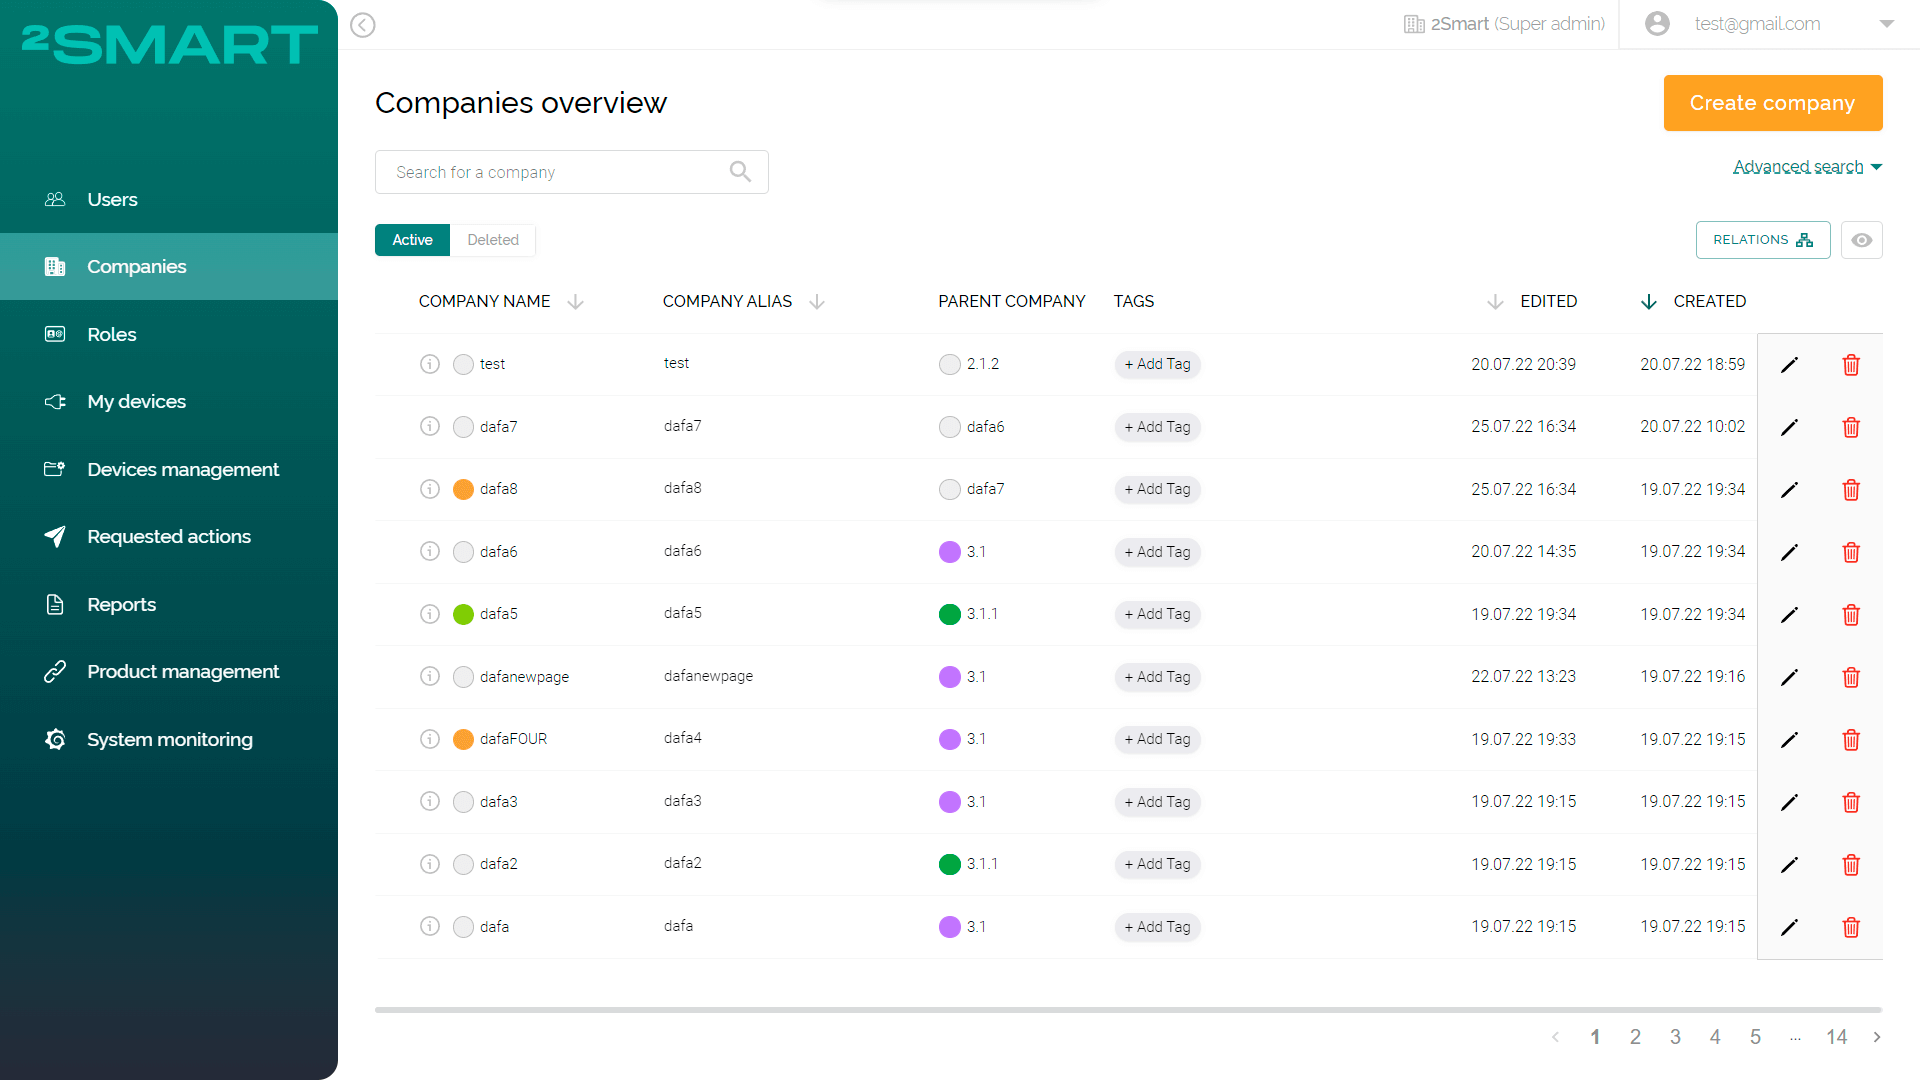
The table with existing Companies is available in the workspace on the "Companies" page. The table displays only the administrator's Company and its subsidiaries.
Detailed description and example in the section: "Manage Companies and Users in a nested structure".
The table displays basic information about the Companies:
- “Company name”;
- “Company alias”, which the User specifies when registering to become a participant of this Company;
- “Parent Company” - the Company whose administrators can manage the current Company;
- “Tags” assigned to the Company;
- Date and time of “editing” and “creation”.
The Company table headers allow sorting the list of Companies quickly. The User can use the "View" button to select which table columns will be shown.
Creating Companies
The administrator with the appropriate permissions can independently add new Companies to the system. To do this, click the "Create Company" button on the "Companies" page.
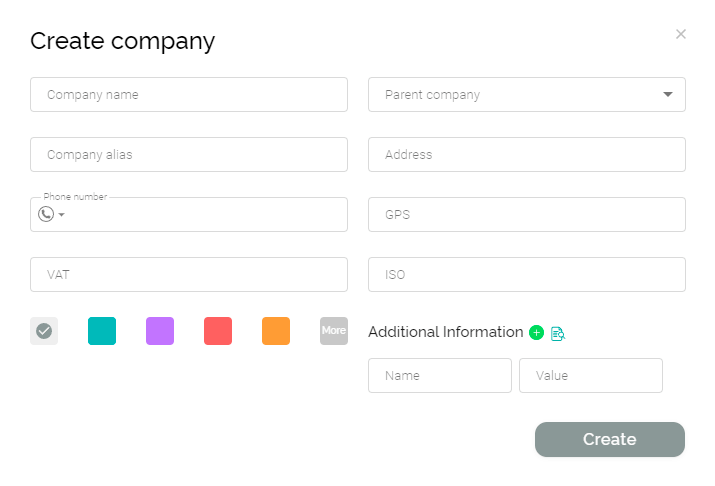
In the appeared modal window “Create Company”, the administrator must fill in the required fields:
- “Company name”*;
- “Parent Company”* - the top-level Company that will be the parent of the new Company;
Parent Company administrators will be able to manage the new Company.
- “Company alias”*, which the User specifies when registering;
- “Address”, “Phone number”, and “GPS” coordinates of the Company;
- “VAT” and “ISO” of the Company;
- Color selection (Additional description in the section “Entity color selection”);
- “Additional information” (Additional description in the section “Entering additional information”).
Fields marked with "*" ("Company name", "Parent Company", and "Company alias") are mandatory.
After filling in all fields, the administrator must click the "Create" button. Created Company will be displayed in the general table of Companies.
Editing Companies
The administrator with the appropriate permissions can edit the existing Companies in the system using the table on the "Companies" page. To do this, select the required Company in the table on the "Companies" page and click the pencil icon "Edit".

In the appeared modal window "Edit Company", the administrator can make changes in the required fields. After editing the Company, the administrator must click the "Update" button.
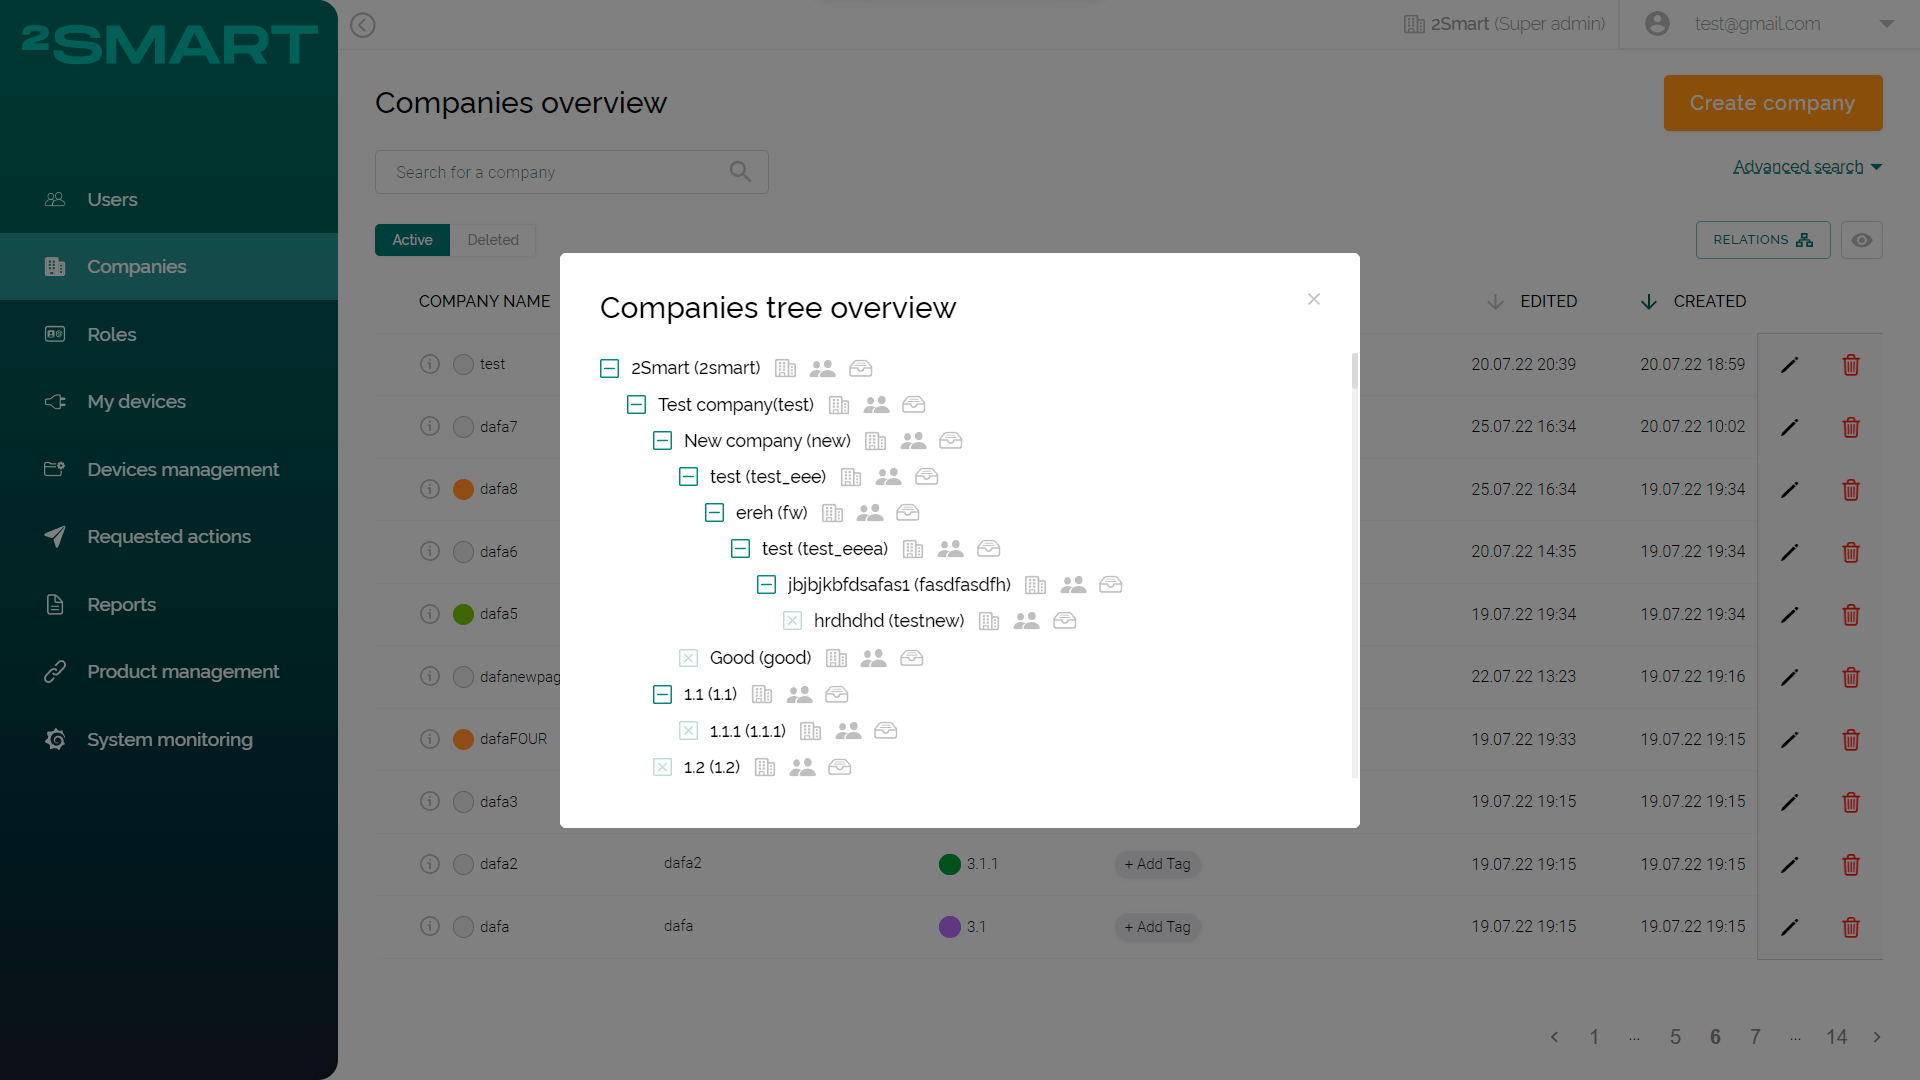
Companies tree overview
The system allows administrators to create nested Companies. To display parent and child Companies in a tree structure, use the "Relations" button on the "Companies" page.

In the appeared modal window "Companies tree overview", the administrator can see a structured list of Companies and perform the following actions:
- "Open Companies page" - for quick filtering by the parent Company on the "Companies" page;
- "Open Users page" - for quick filtering of the Company's Users on the "Users" page;
- "Open devices management page" - for quick filtering of Device ID connected by the Company on the "Devices management" page.