“Devices management” page
Administrators with the appropriate permissions can manage and/or delete Device IDs on the system and then manage connected devices using the "Devices management" page.
- If the User has a Role that excludes permissions "Manage devices", “Service devices”, or “View devices”, the "Devices management" page will not be available to them.
- If the User has a Role that excludes permissions "Manage Device IDs" and "Delete Device IDs", the Device ID management functionality will not be available to them.

The device management table displays the following basic information:
- "Device ID" - device identifier.
- "Title" - the name of the device.
- "Companies" - the Companies the device is associated with.
- "Product" - the name of the product in the vendor panel.
- “Pair device” – generating or viewing credentials for device pairing.
- “Admins” – viewing a list of admins with access to the device management.
- "Status" - the current platform connection status of the device with this Device ID.
- "State" - the current device state (init, ready, disconnected, lost, not connected).
- “Firmware version” – the version of the firmware installed on this device.
- “Type” - the product type that helps to distinguish products with the same name. There are three possible options: testing, development, and release.
- “Abbreviation” - the product abbreviation that helps to distinguish products with the same name and type
- "QR code" - viewing and downloading a QR code with Device ID for connecting the device.
- “Owner” - the email address of the User who owns the device.
- "Pairing mode" - how the device is connected to the network.
- "License" - license number of the device.
- “Machine ID” – the 15-character value that helps to better identify the device.
- "Batch name" - the name of the batch to which the device belongs.
- "Tags" assigned to the device.
- Date and time of "editing" and "creation".
The devices management table headers allow sorting the list of devices quickly.
The User can use the "View" button to select which table columns will be shown.
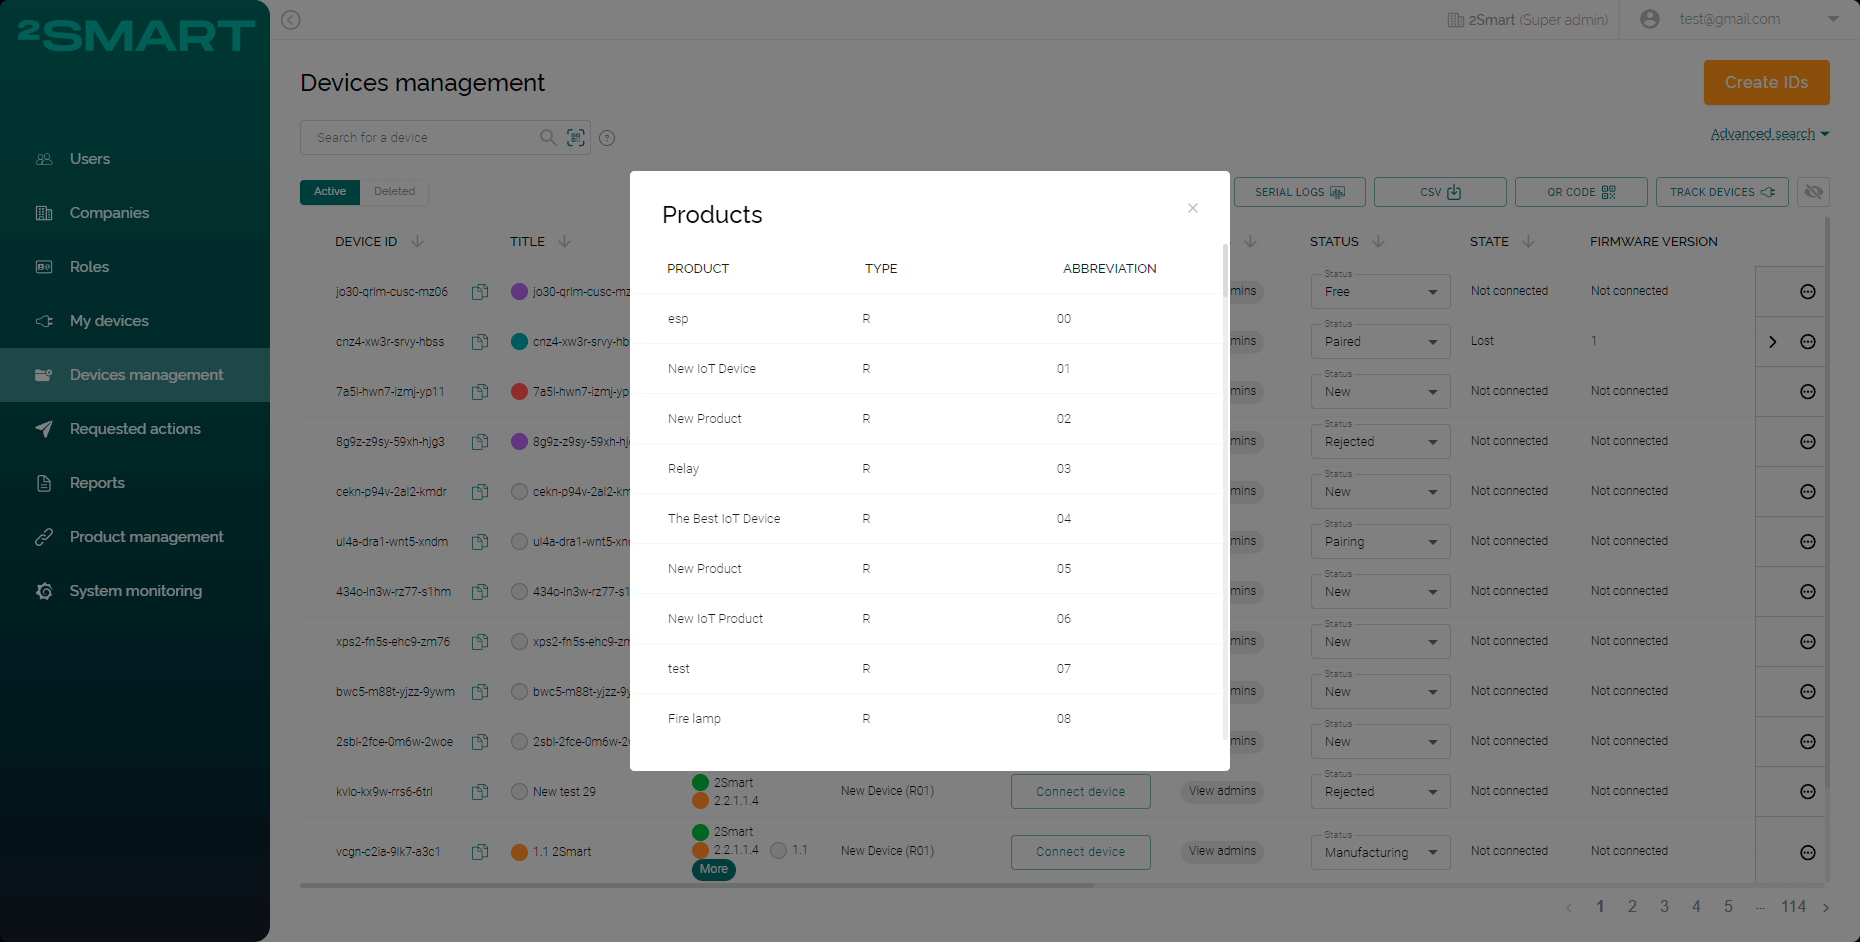
The "Products" button is designed to open a modal window with a list of products and their abbreviations. The product abbreviation is a required Device ID attribute.

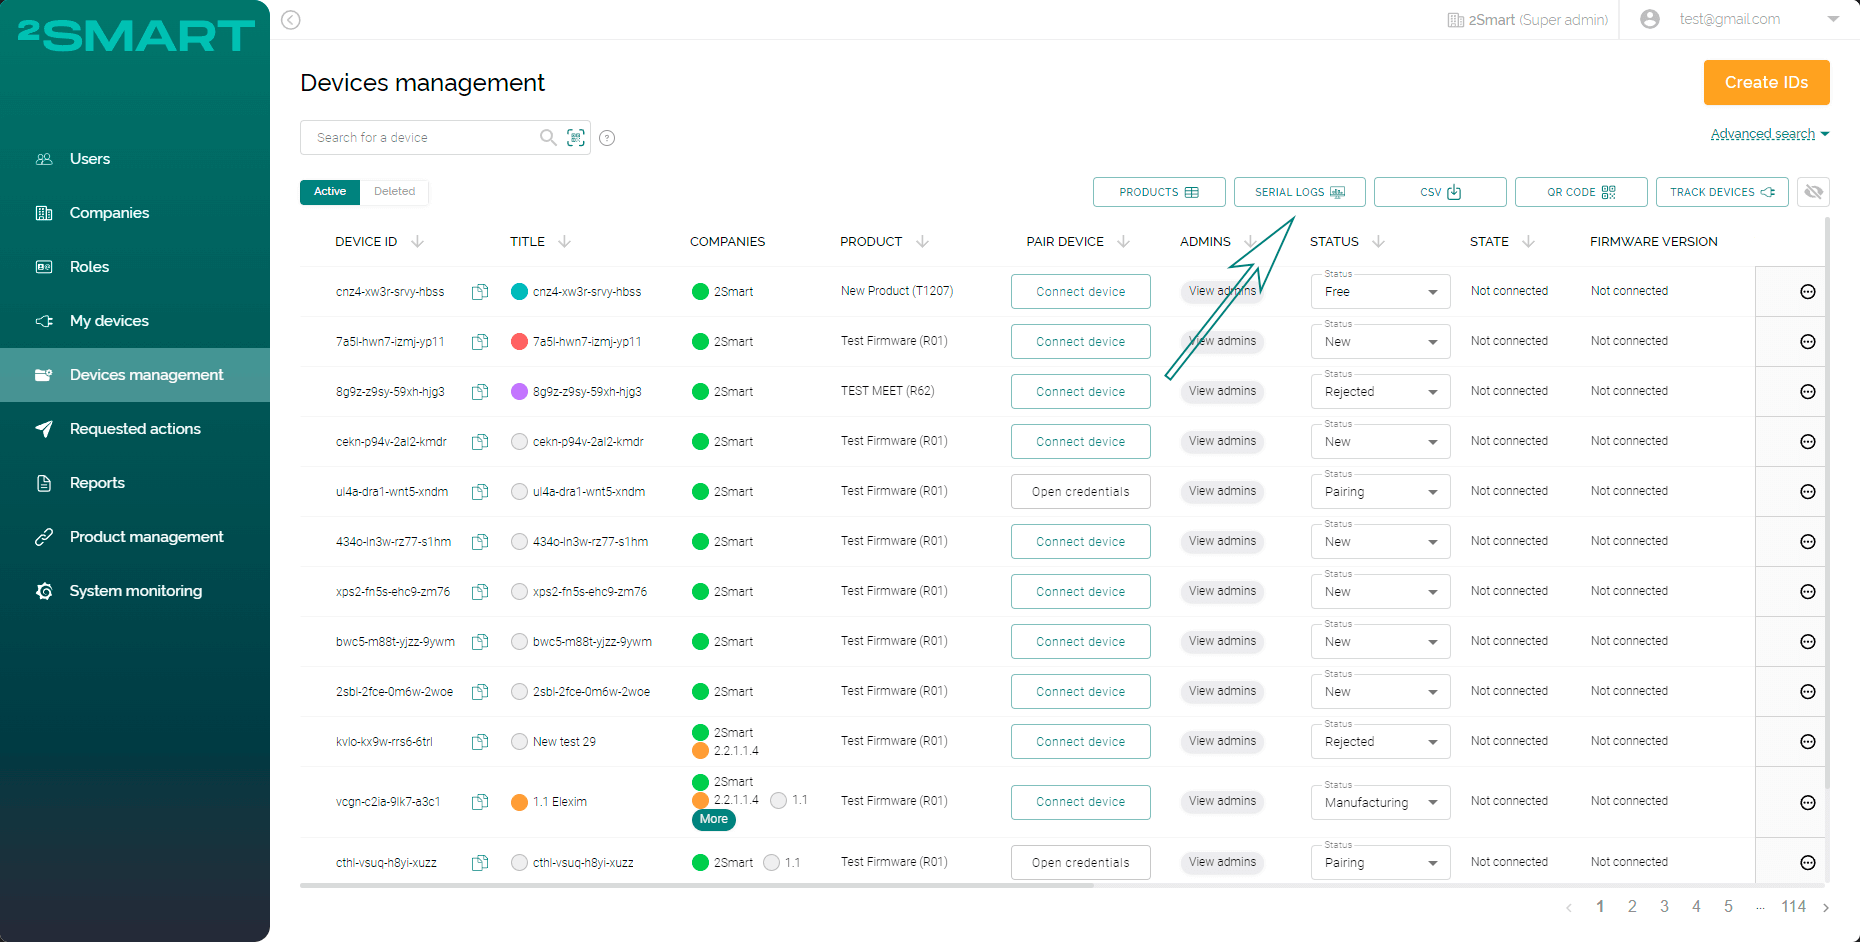
The "Serial logs" button is intended for viewing the microprocessor log of ESP32-based devices. It allows you to work with the log of the device connected to the computer running the web application using a USB cable. See the "Viewing the device logs" section below for more details.
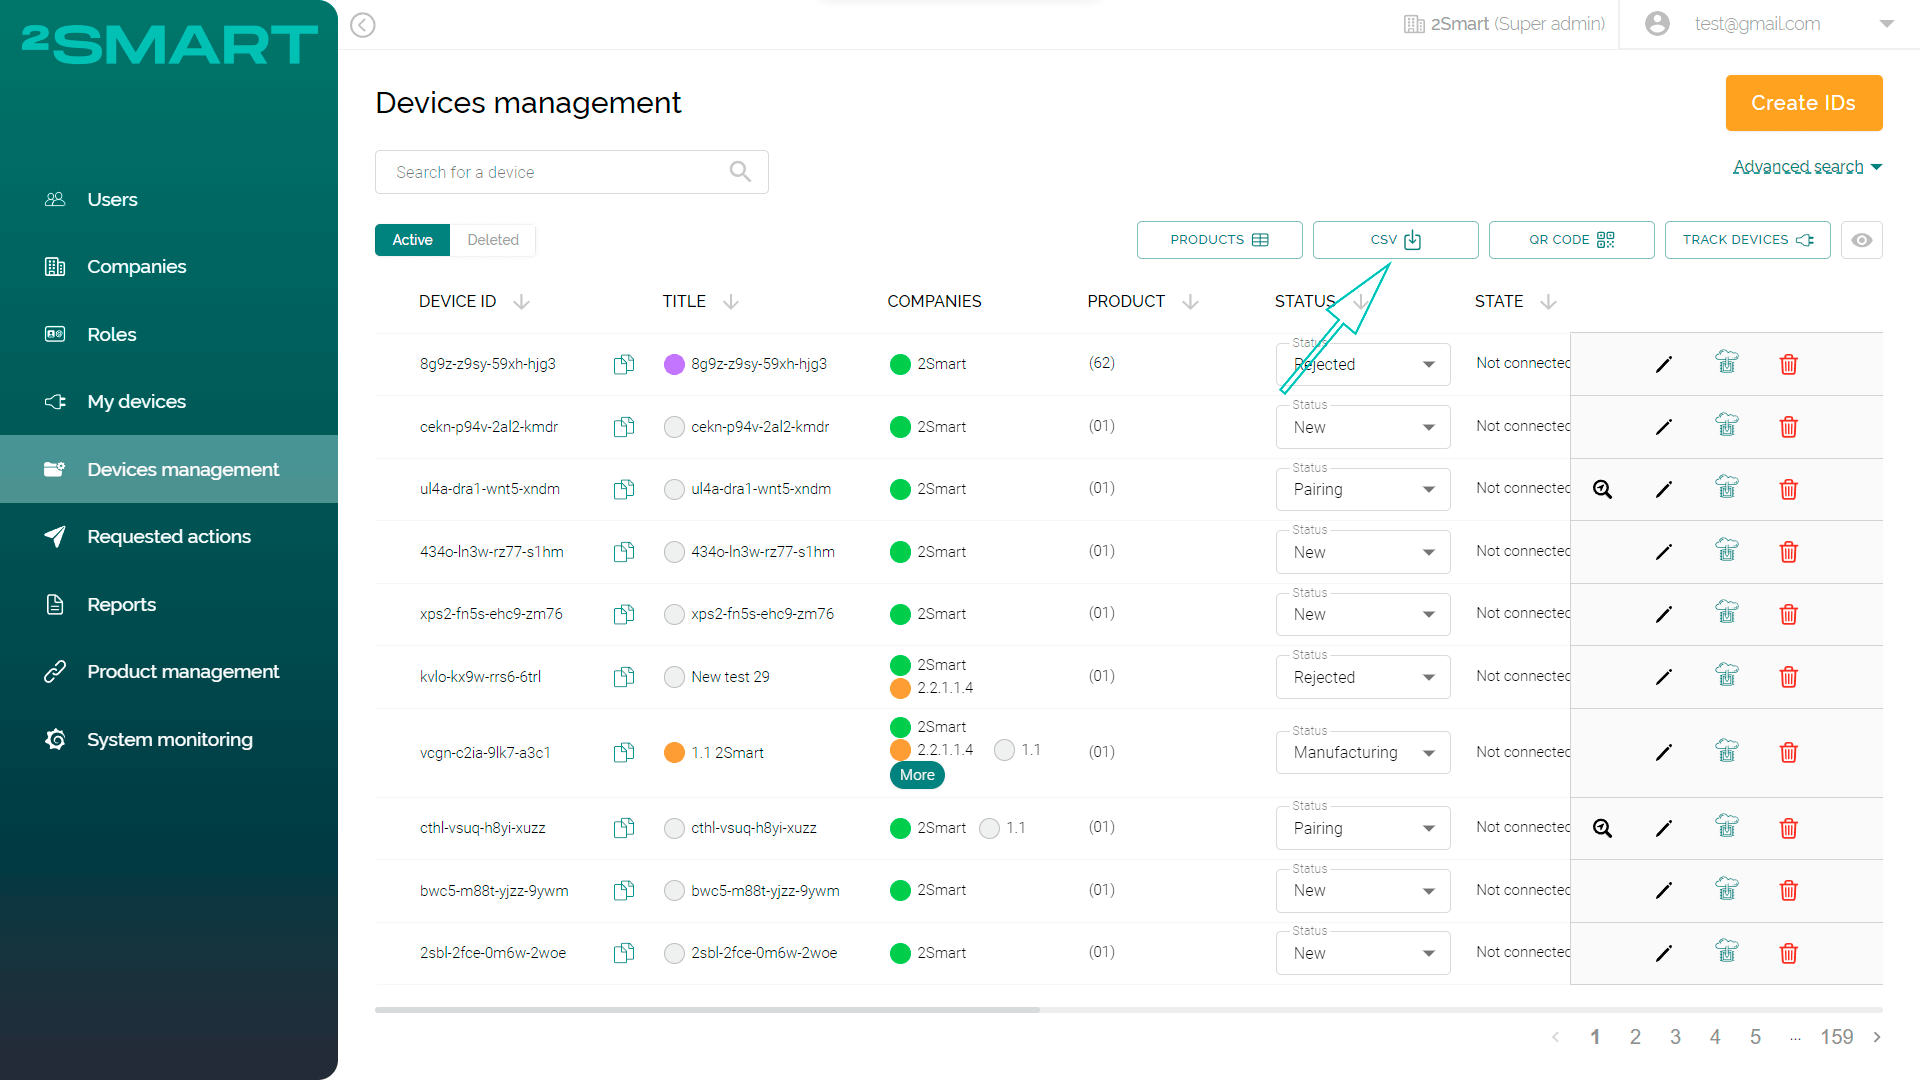
The "CSV" button is intended for generating and downloading a Device IDs array spreadsheet as a .csv file.
Please note that the system generates an array of Device IDs currently displayed in the table. You can use the "Advanced search" link to filter the IDs you need. When you click the "CSV" button, a spreadsheet with the corresponding lines will be generated for you.
The "QR code" button is intended for generating and downloading an array of image files with QR codes that contain Device IDs.
Please note that the system generates an array of QR codes for Device IDs currently displayed in the table. You can use the "Advanced search" link to filter the IDs you need. When you click on the "QR code" button, the corresponding array of images will be generated for you.

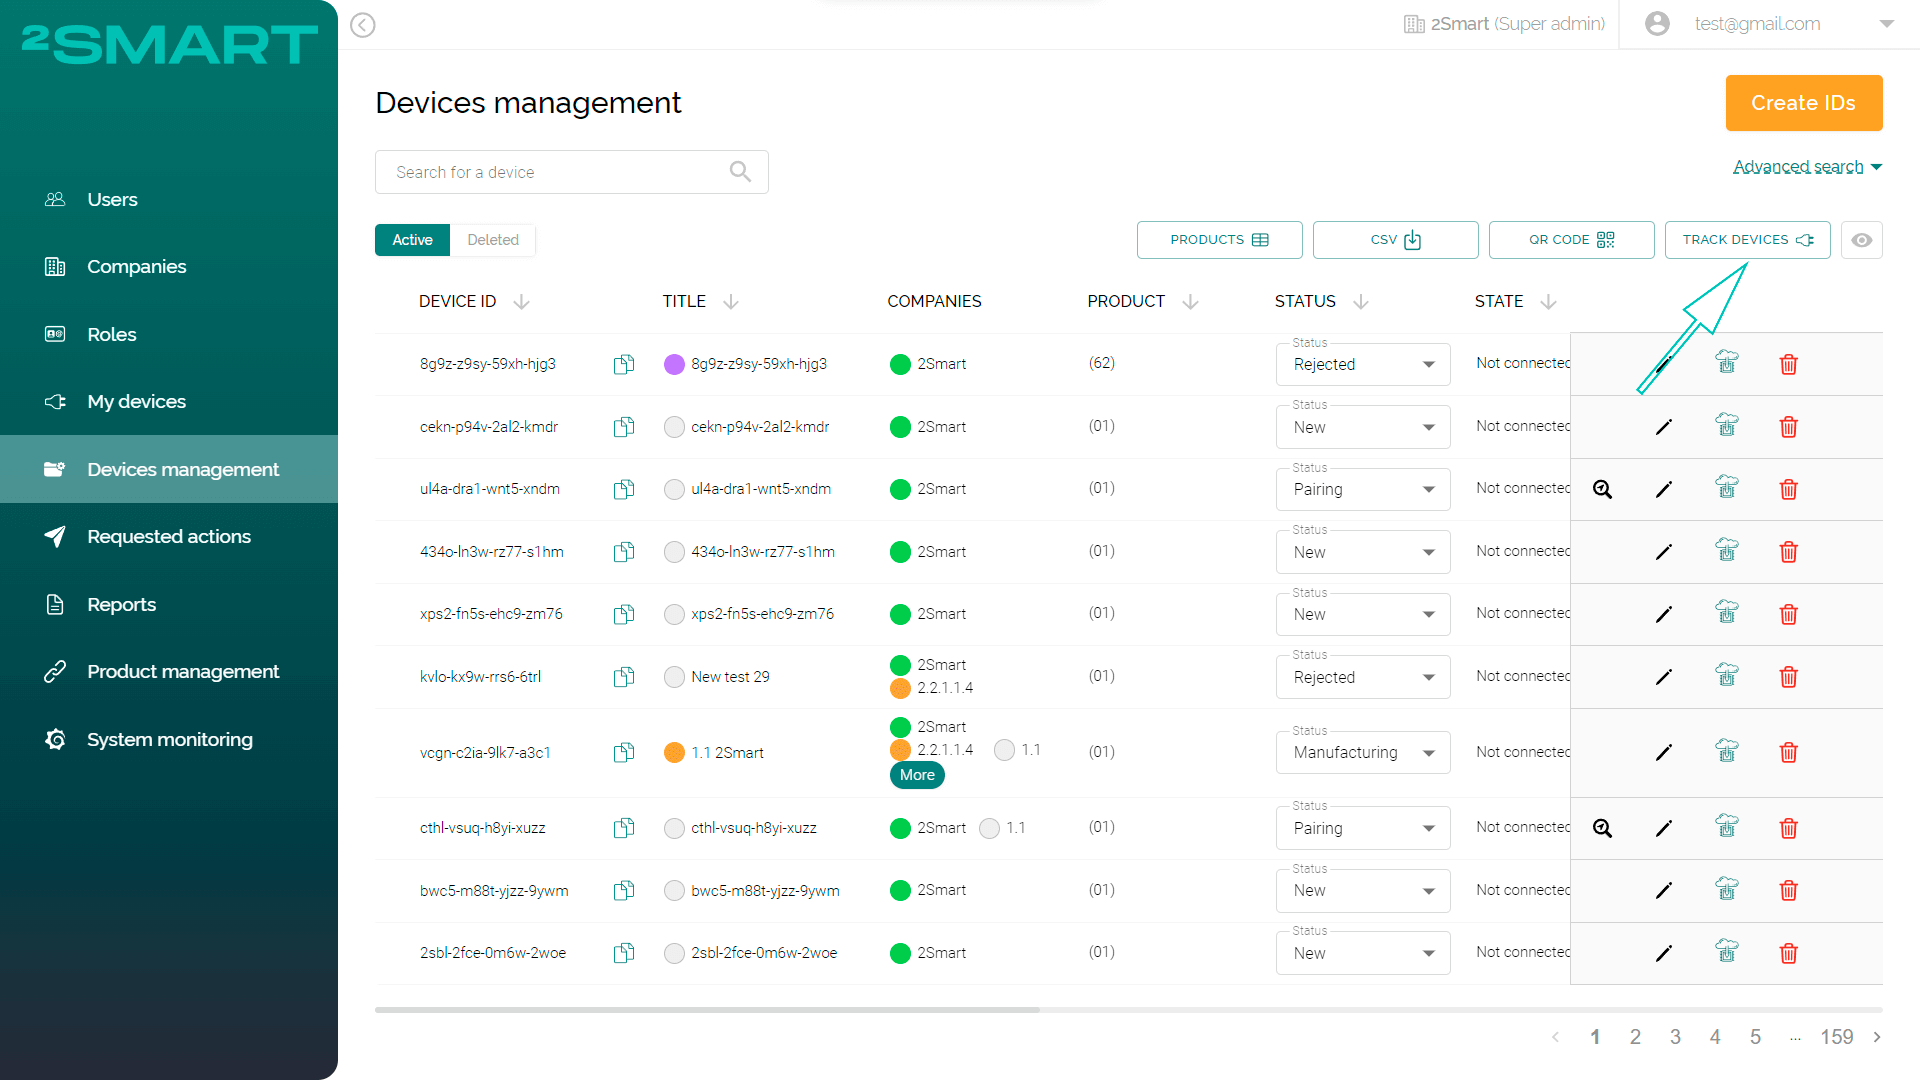
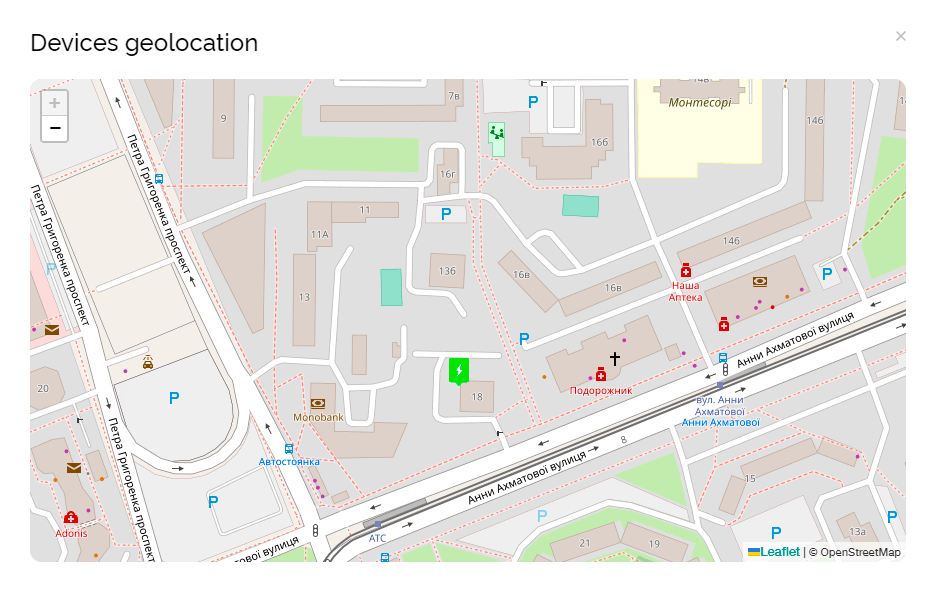
The "Track devices" button is intended for tracking the location of devices on the map if they have a GPS module.
By clicking on the "Open devices page" icon in the required line, the User gets access to the page that contains a complete list of the device's sensors with their current values and the ability to get historical sensor value data (if available).

Creating Device IDs
The administrator with the appropriate permissions can independently add new Device IDs to the system. To do this, click the "Create IDs" button on the "Devices management" page.

In the appeared modal window “Create IDs”, the administrator must fill in the required fields:
- “Batch name” - the name of the batch of devices for which the required number of identifiers will be generated.
- “Number” - the number of identifiers to be generated.
- "Company" - a drop-down list of companies available to the administrator to select the one for which the ID is being created.
- “License” - license number of the device that consists of 10 characters (Latin characters in upper and lower case and numbers).
- “Product” - a drop-down list with a choice of a specific manufacturer's product for which identifiers to be generated.
- “Color selection” - highlighting the ID on the platform with a specific color for the convenience of the administrator.
- “Additional information” - additional fields for adding any information about the identifier (see the "Entering additional information" section for details).
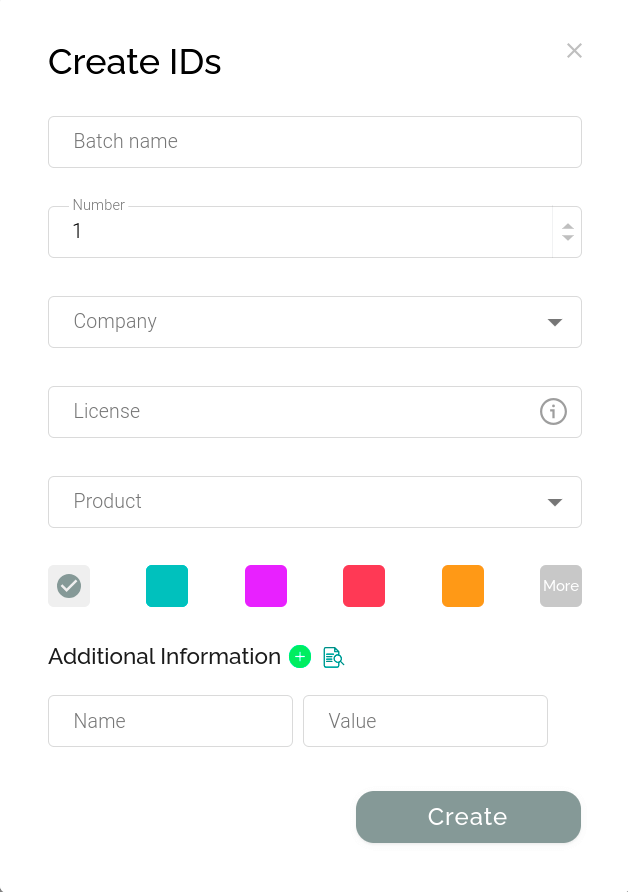
After filling in all fields, the administrator must click the "Create" button. The created Device ID will be displayed in the table.
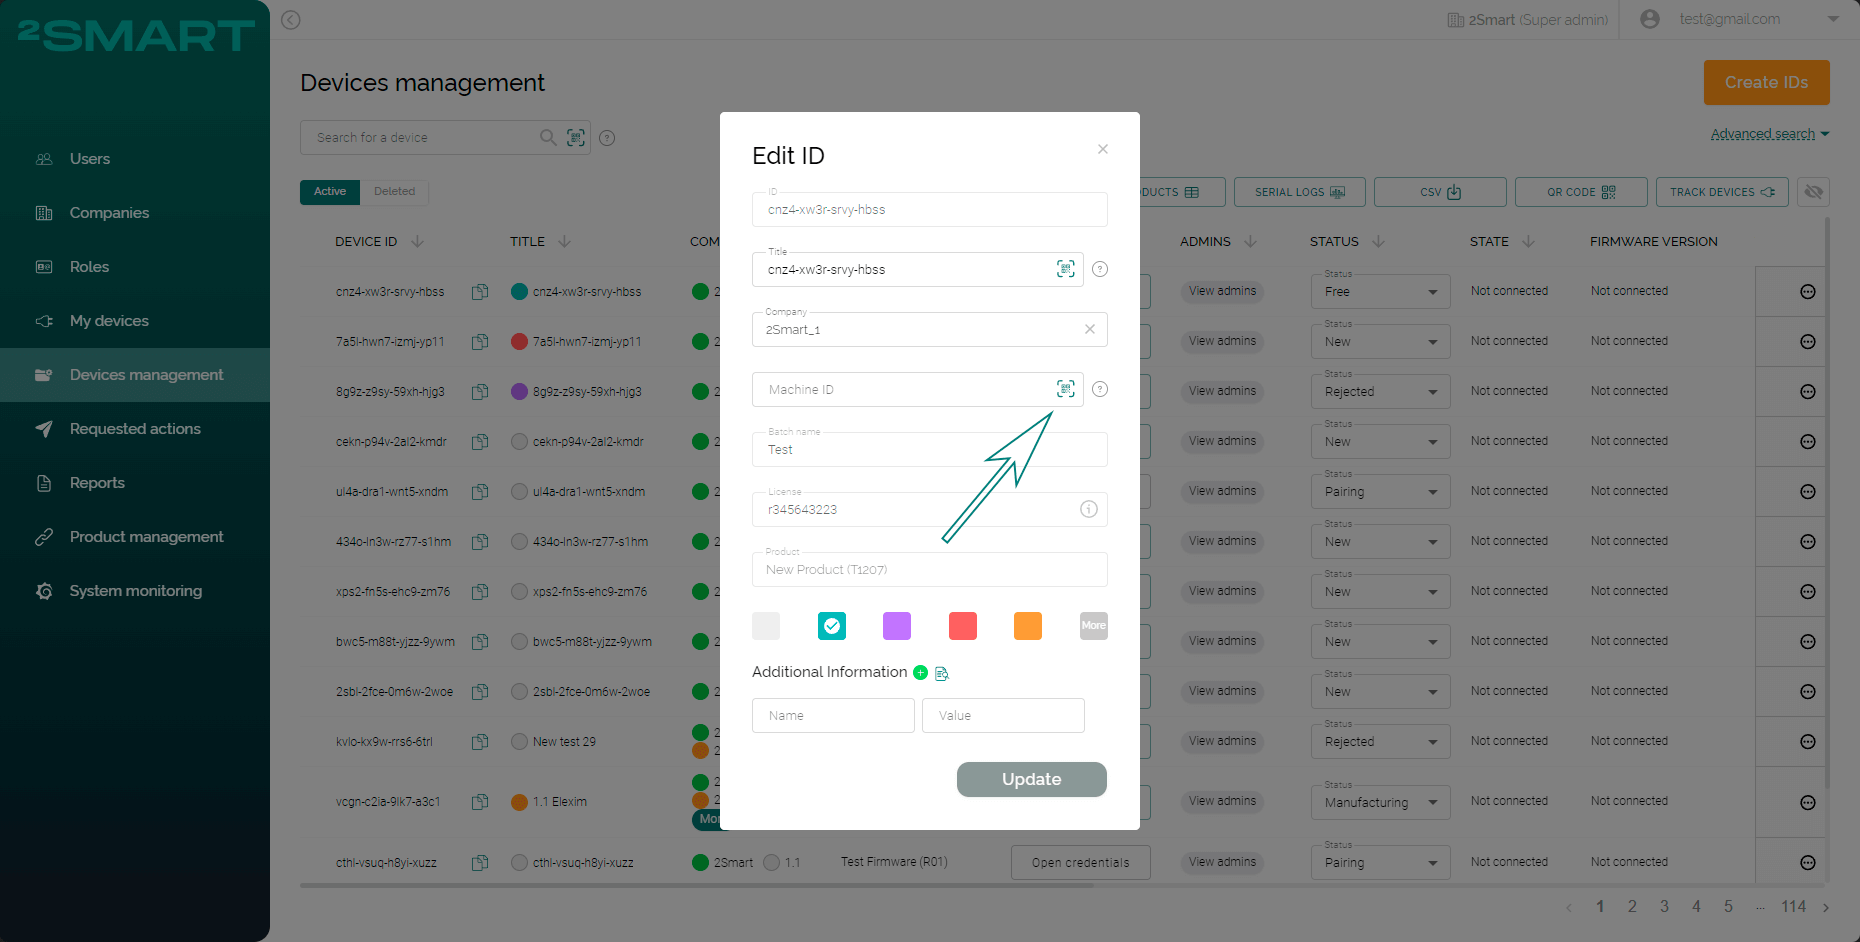
Editing Device IDs
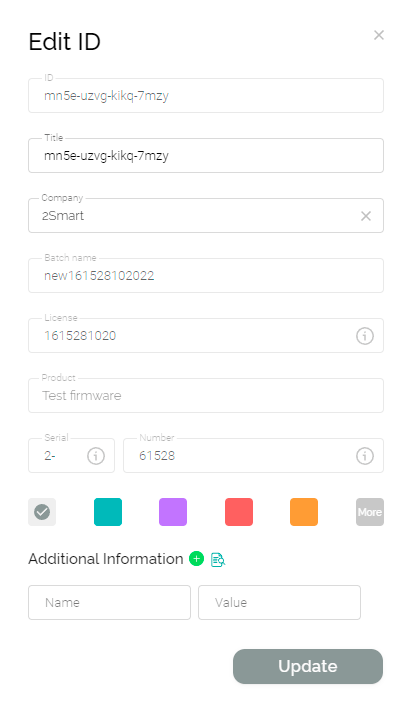
The administrator with the appropriate permissions can edit the existing Device IDs in the system using the table on the "Devices management" page. To do this, select the required Device ID in the table and click the pencil icon "Edit".

In the modal window "Edit ID" that appears, the administrator can edit the required fields. After editing the Device ID, the administrator must click the "Update" button.
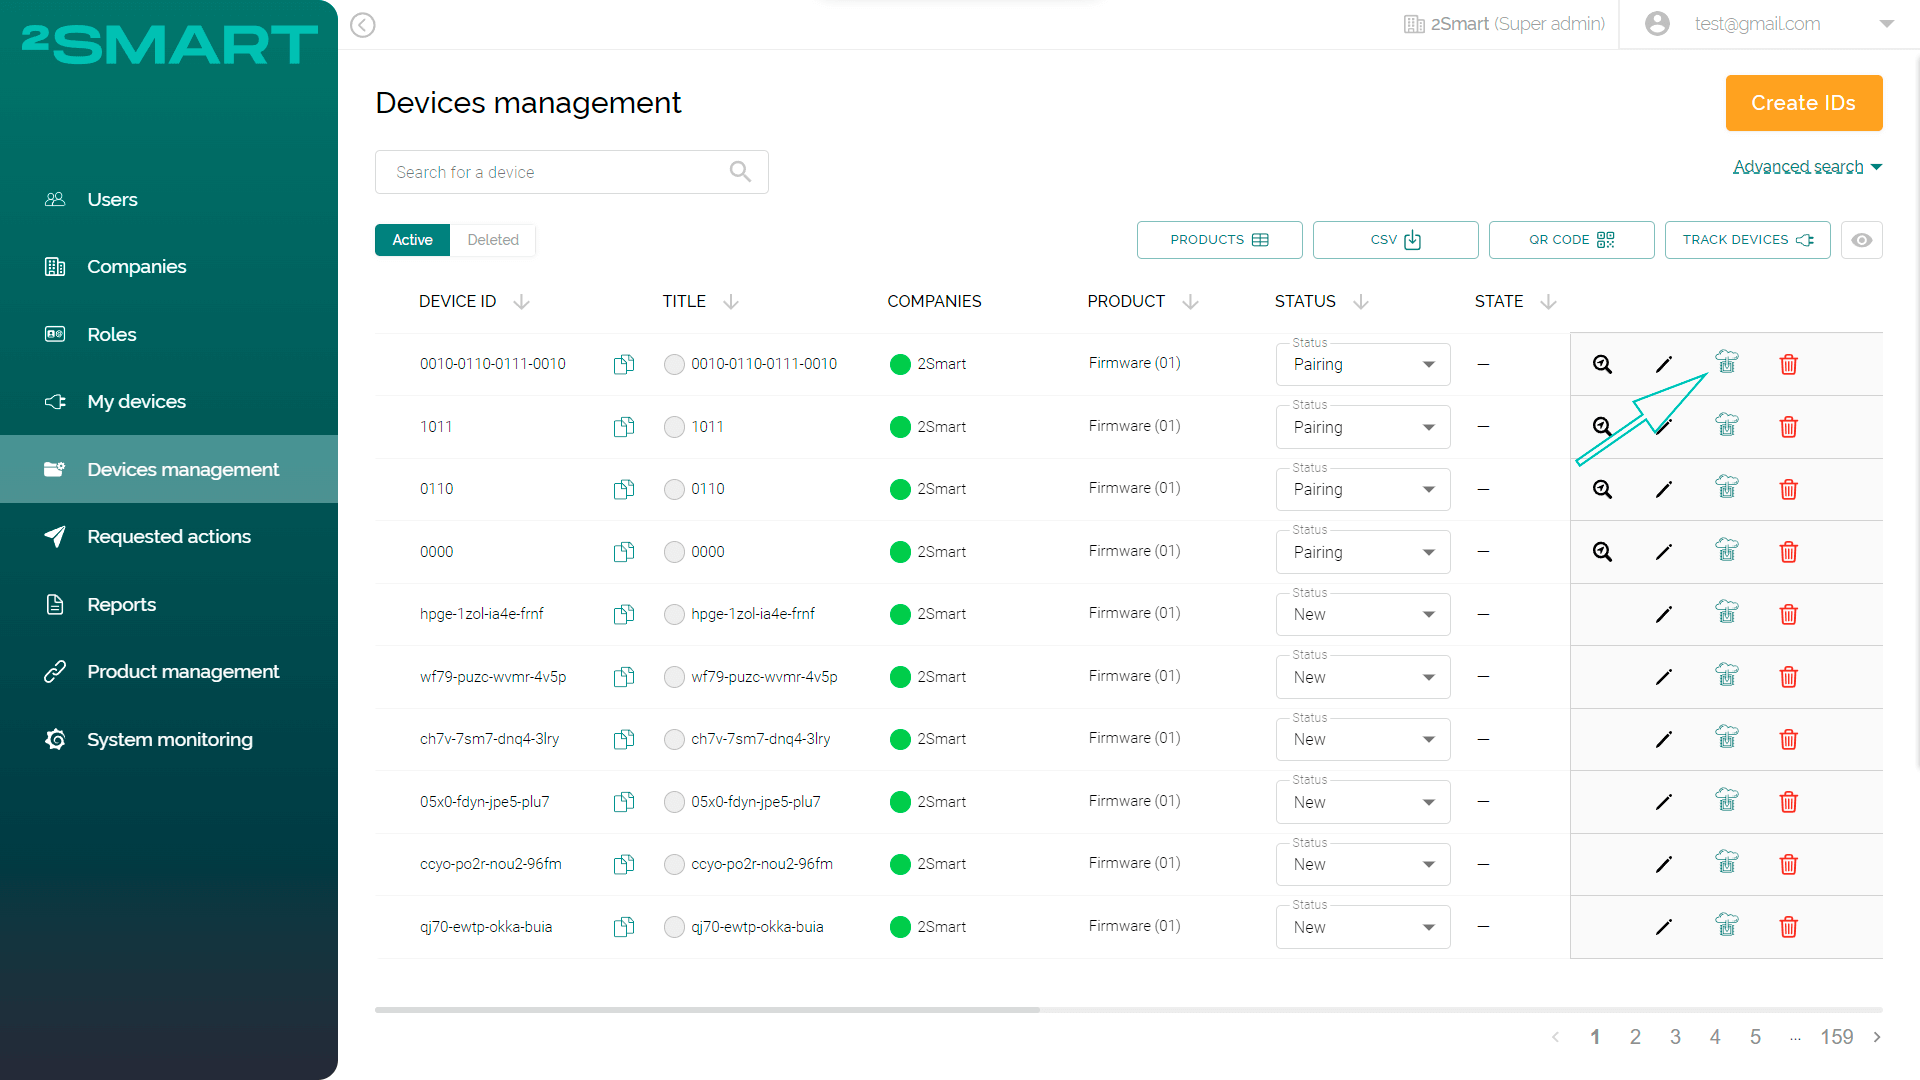
Flashing the device
To install the firmware on the device via a browser, use the "Flash" icon in the corresponding line of the table. Please note that the Device ID is hardcoded into the firmware.
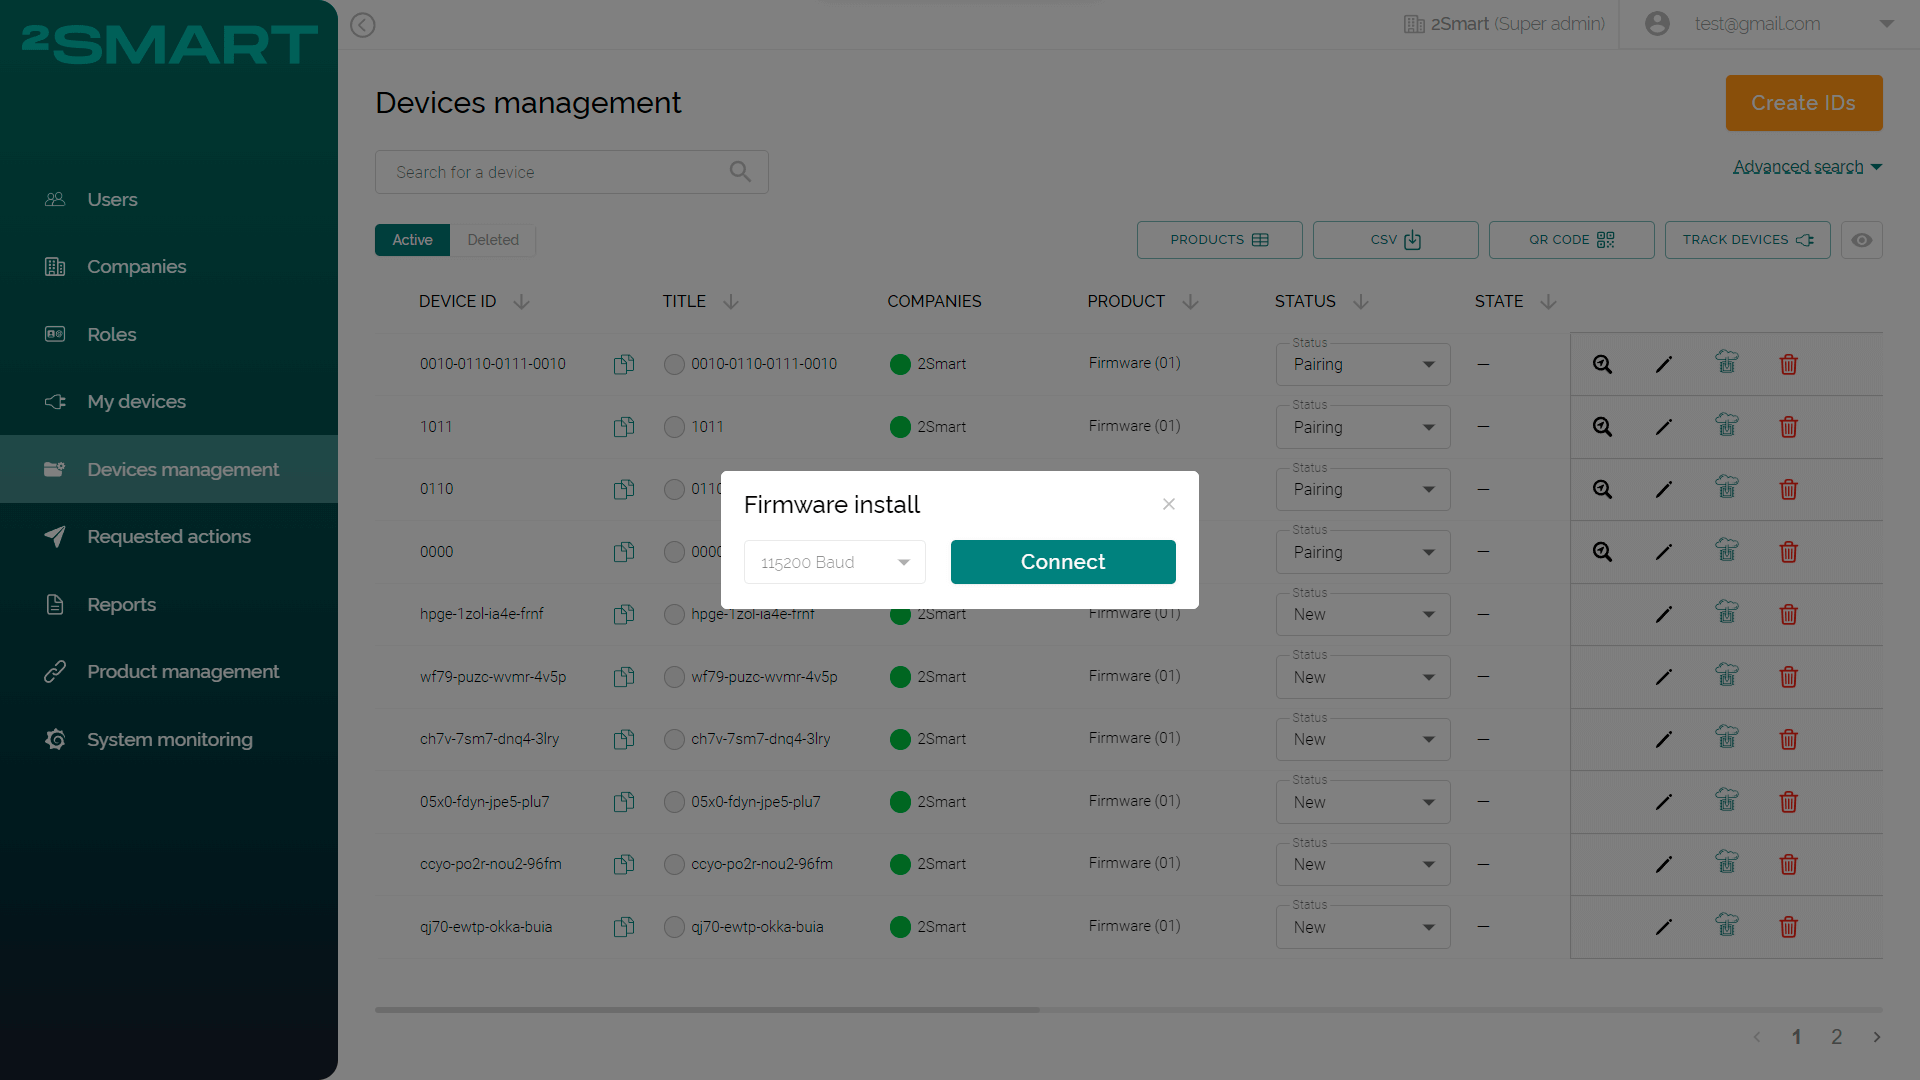
Connect the device to your computer using the USB cable (use an appropriate adapter if necessary). In the modal window, click the “Connect” button.
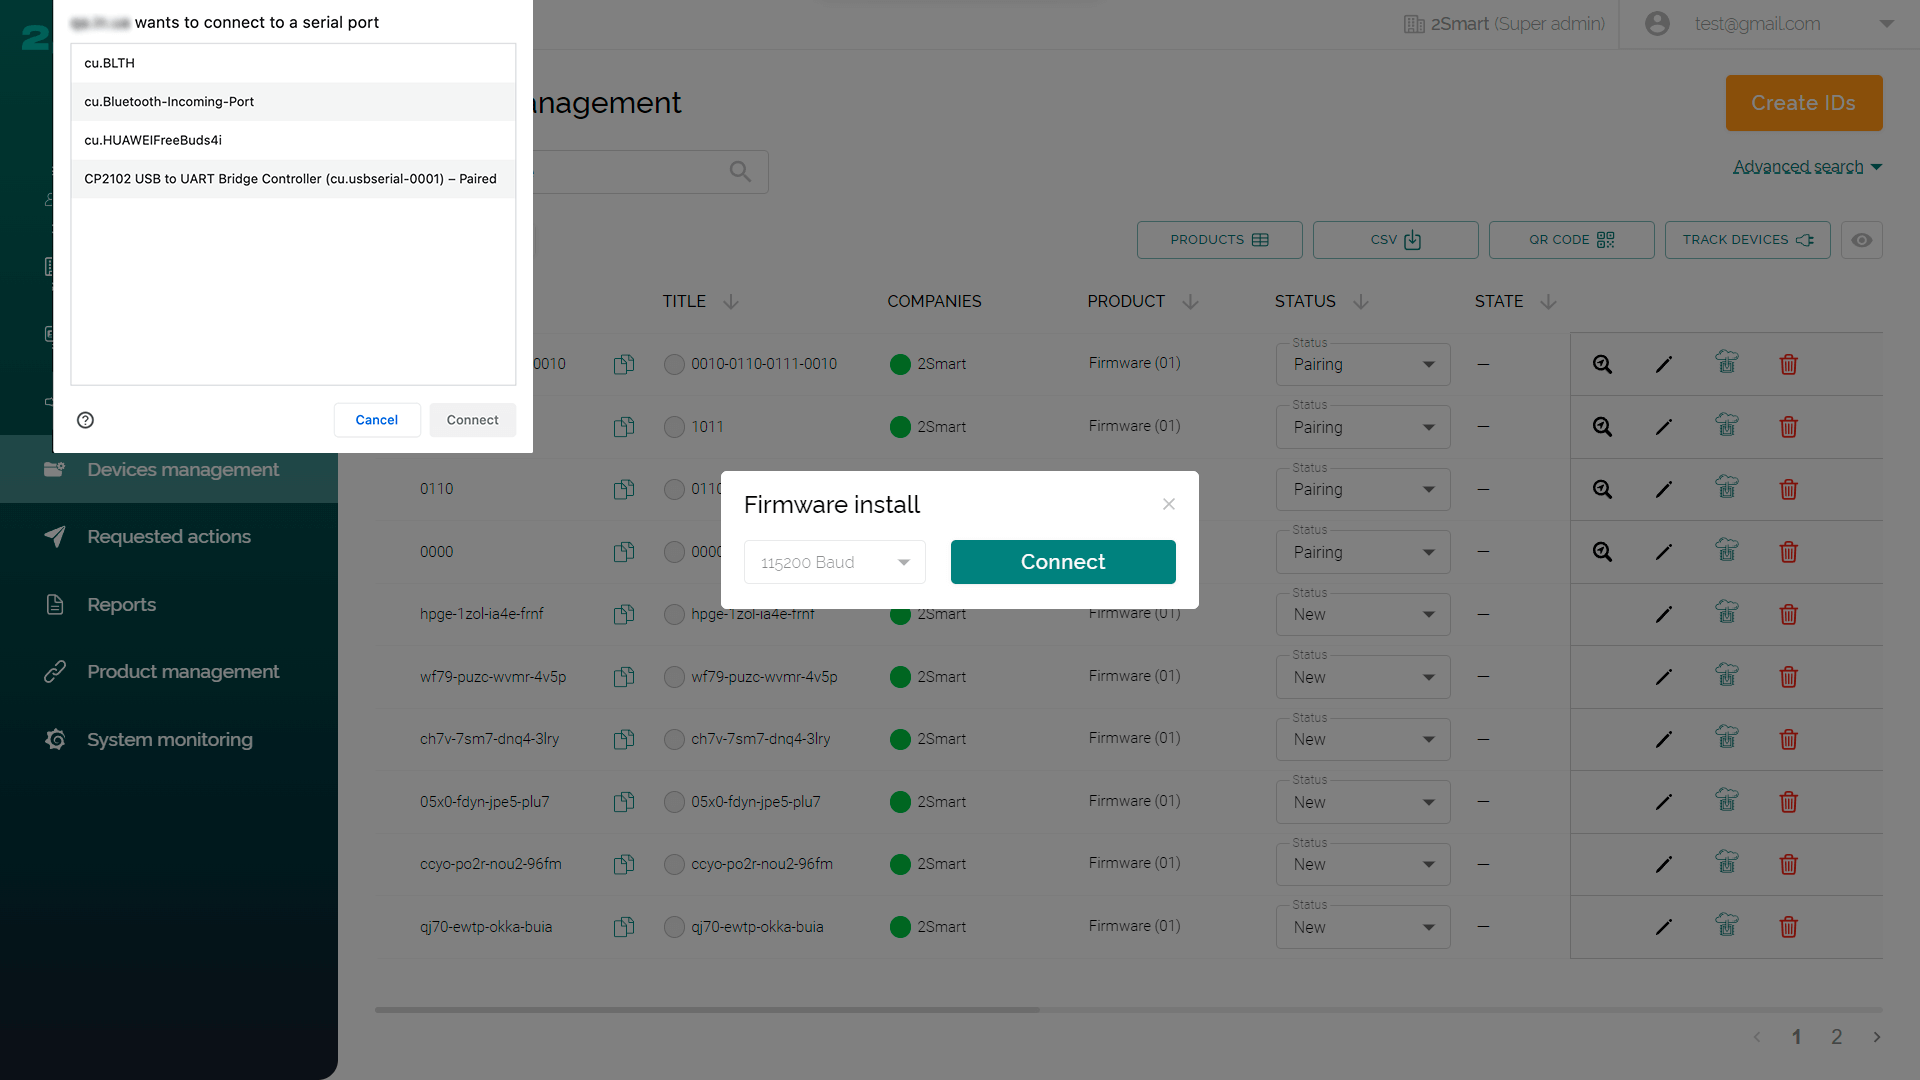
Select the computer’s serial port to which your device is connected. Click the “Connect” button.
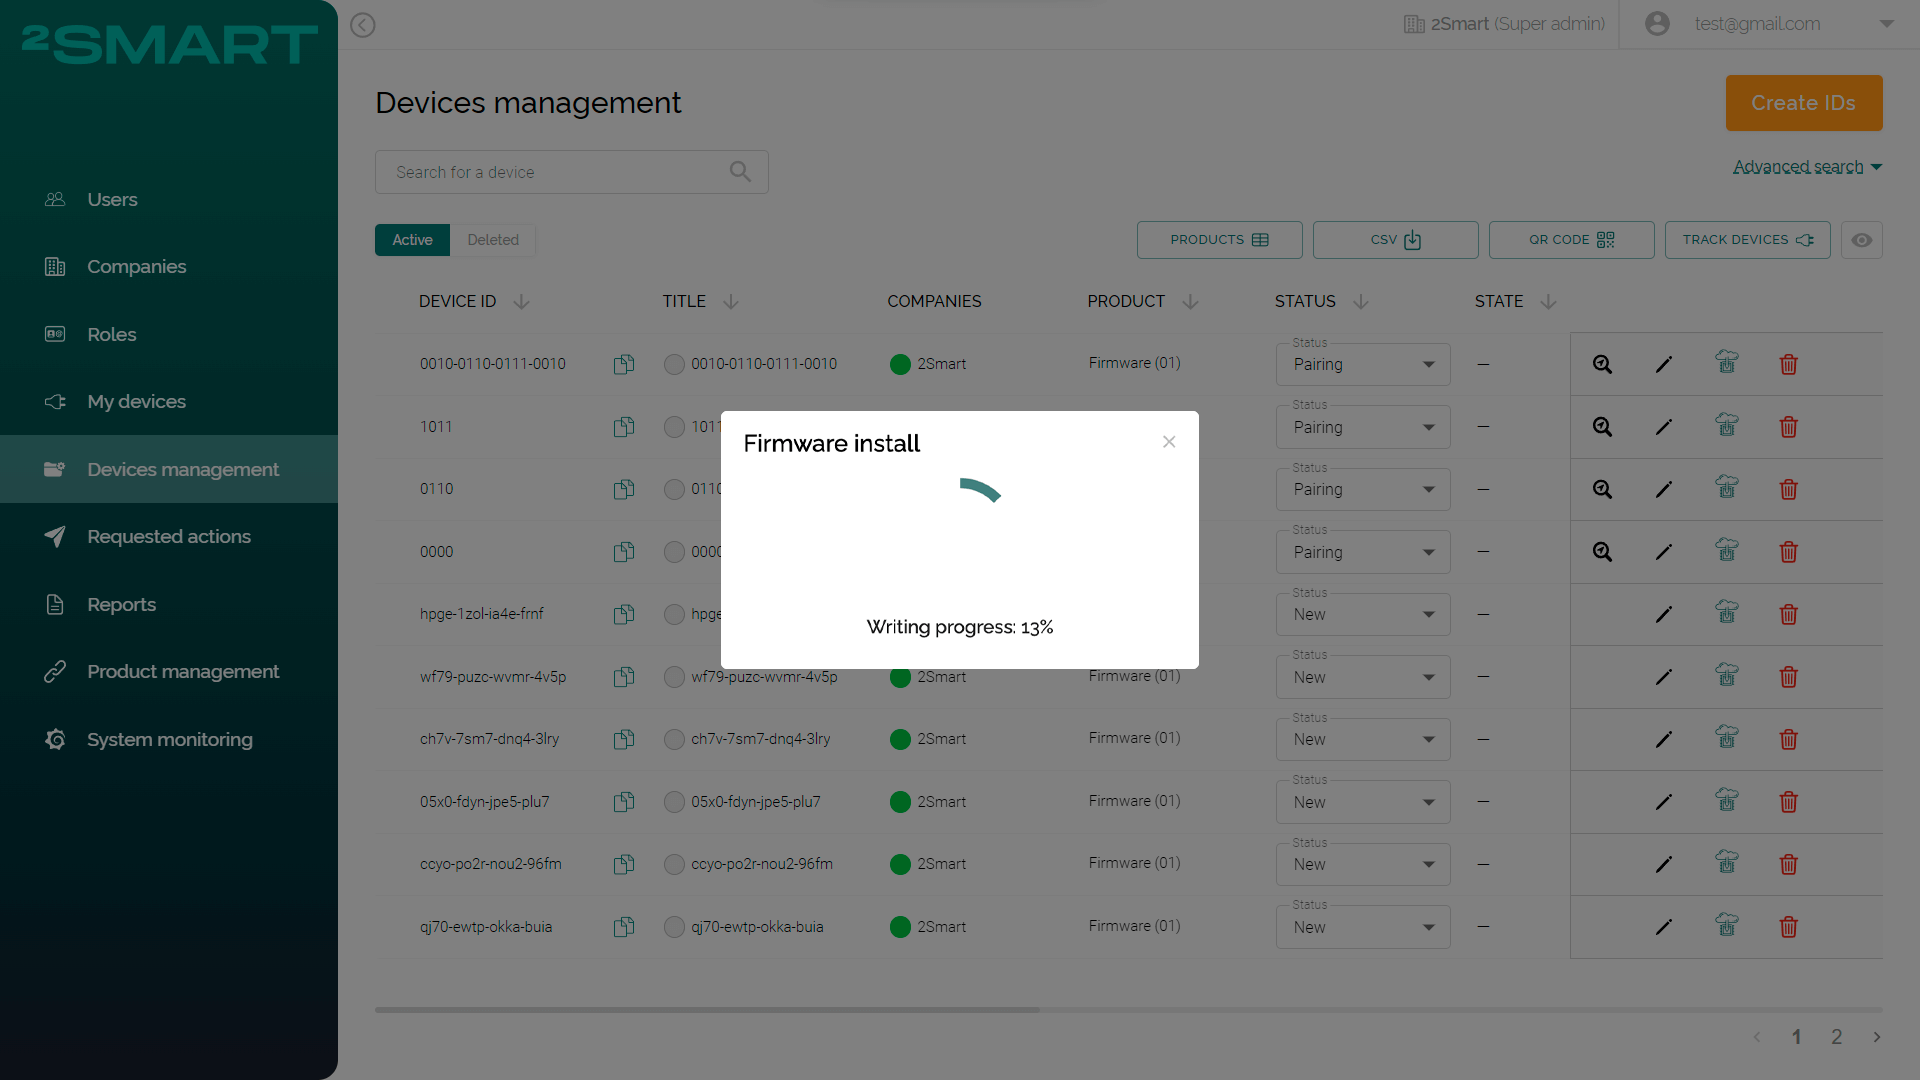
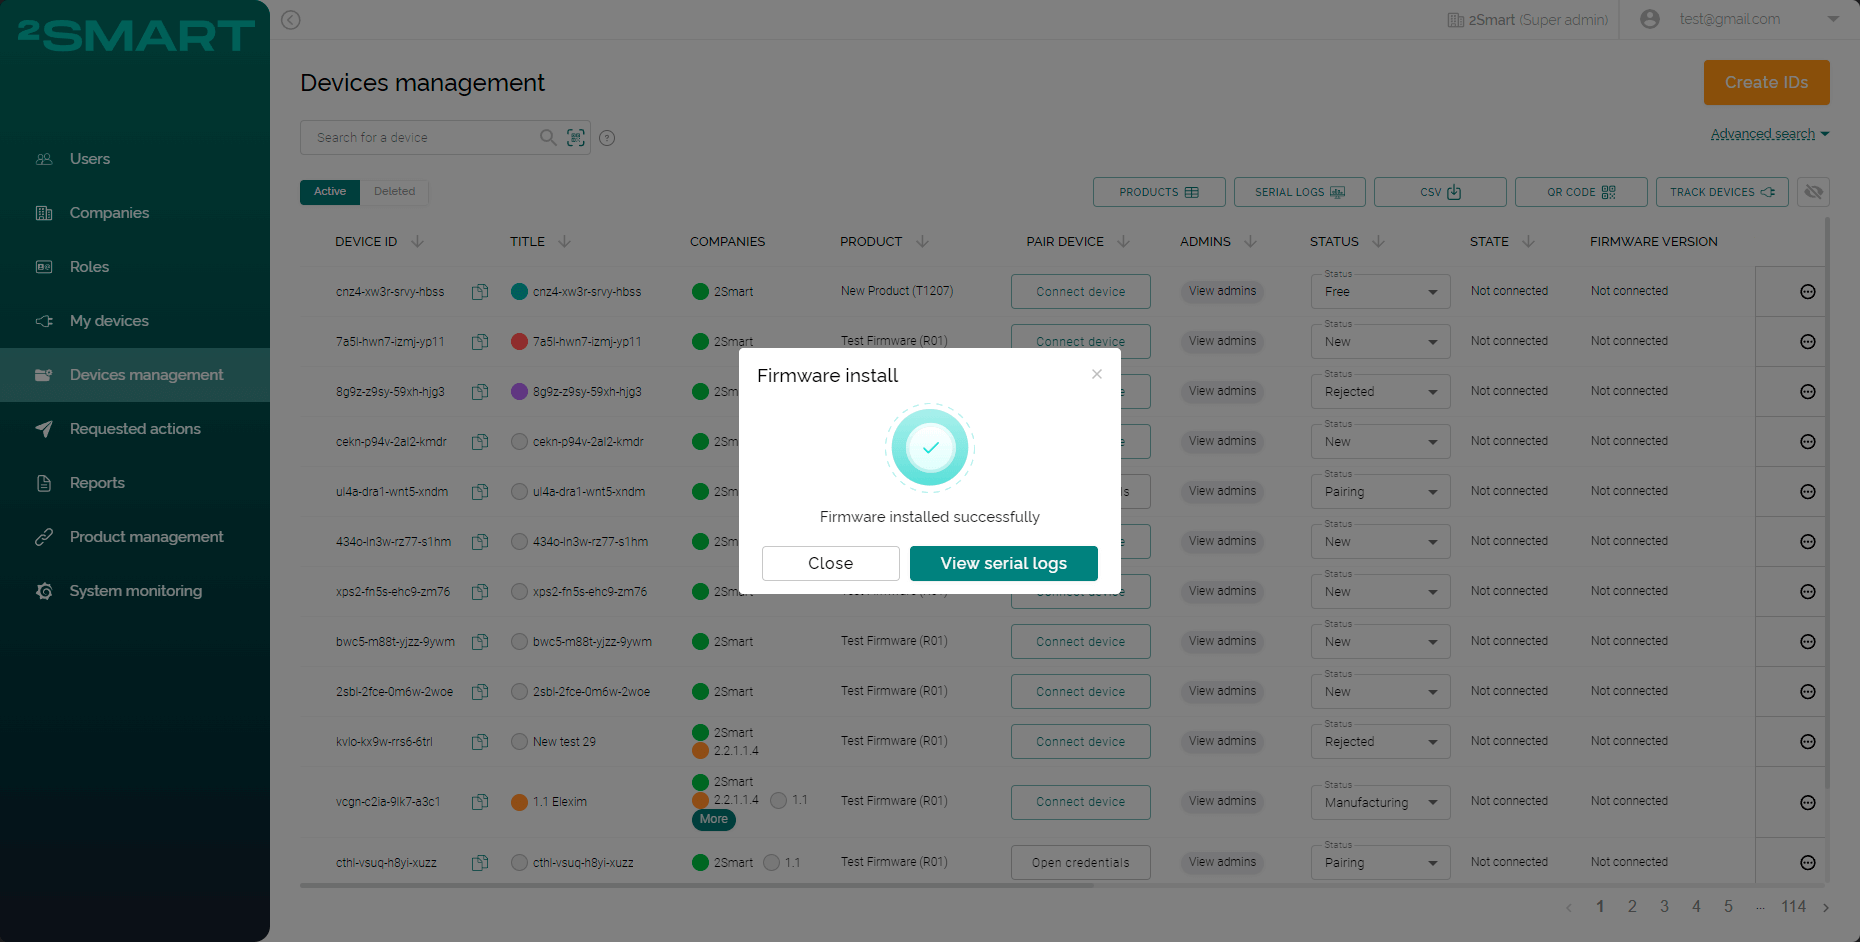
Wait until the firmware is installed on the device.
Viewing the device logs
To view logs after the successful device’s flashing, click the “View serial logs” button on the appeared modal window.
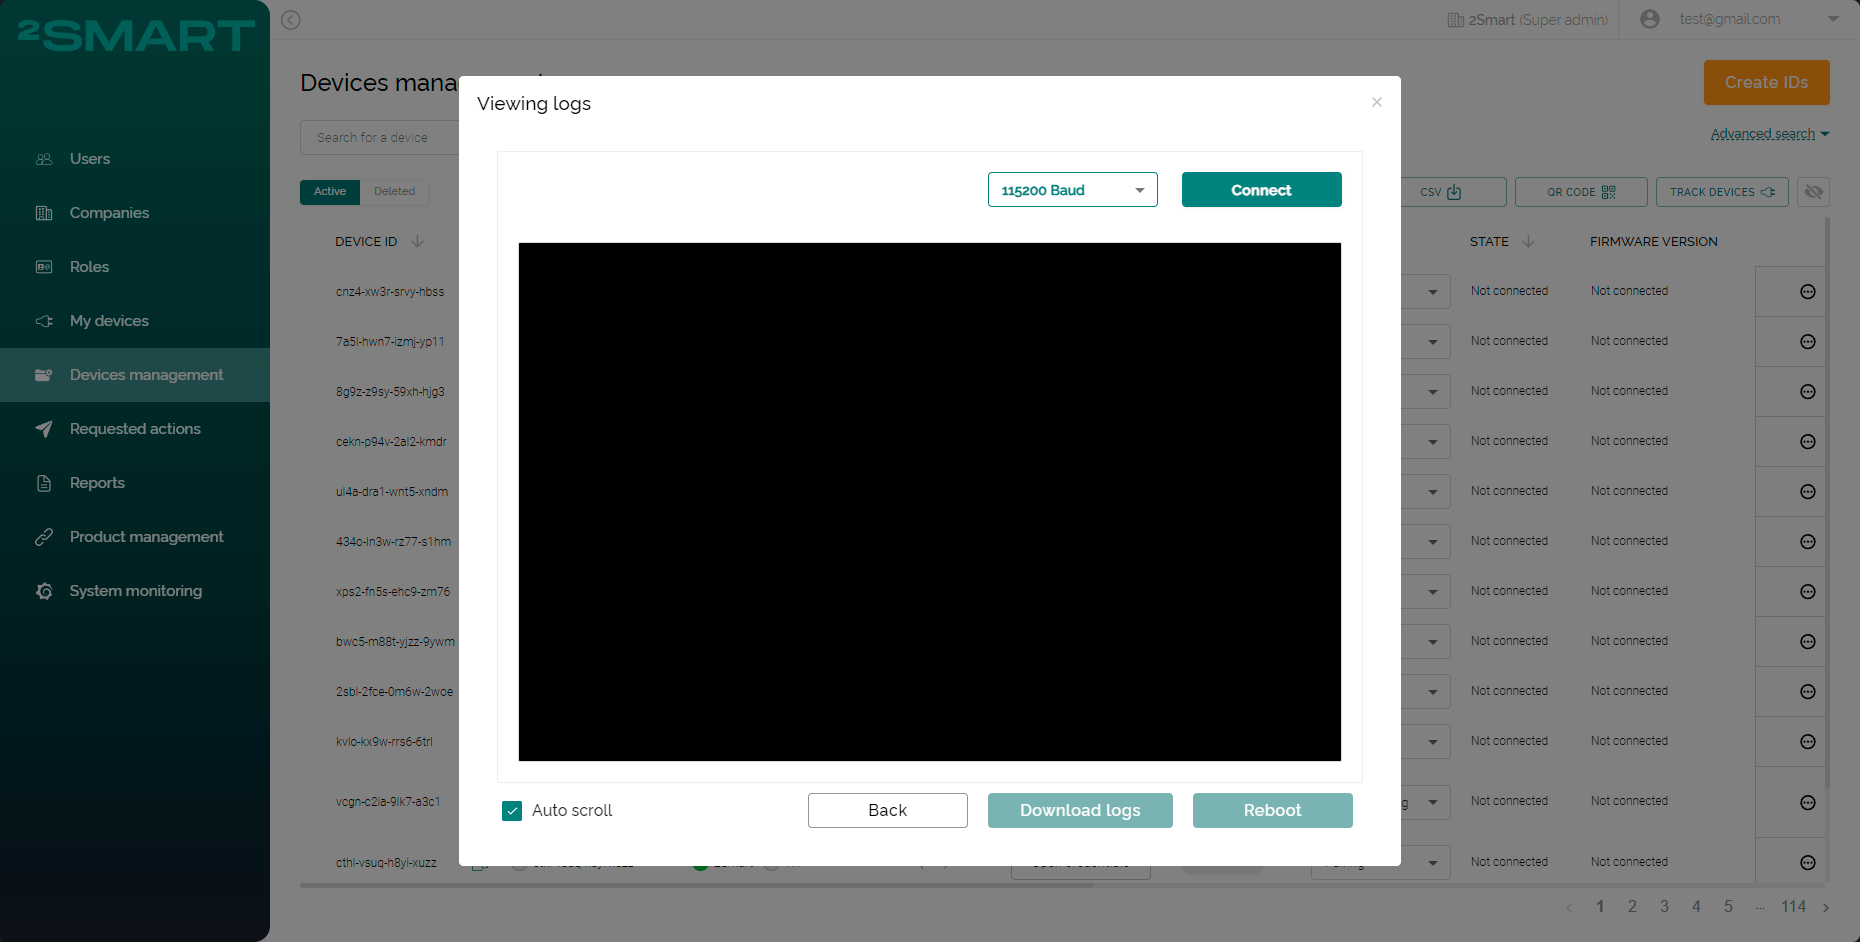
Or open the logs by clicking the “Serial logs” button on the admin panel.
Click the “Connect” button in the appeared modal window. Connect to the device’s serial port: click the serial port that was used on the flashing stage and click the “Connect” button in the modal window on the left side of the screen.
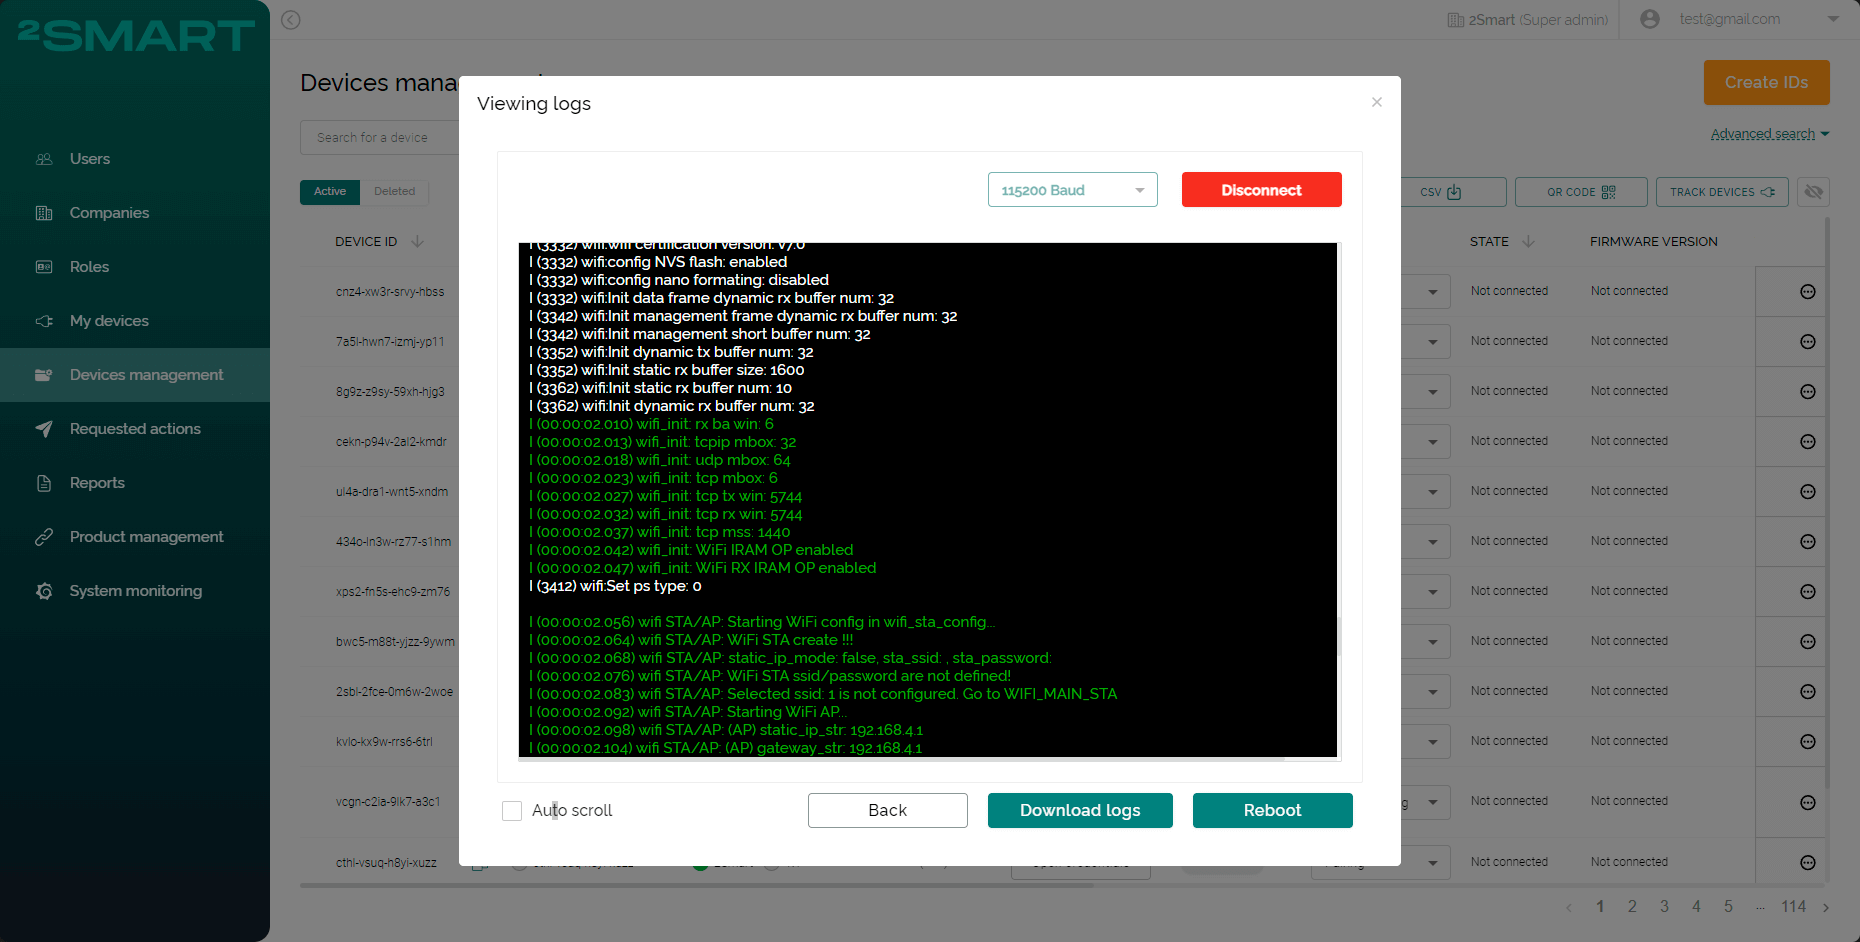
Wait for some seconds, and view logs. From the opened modal window, you can also:
- disconnect from the device;
- activate/deactivate the log’s auto scroll;
- download logs;
- reboot the device.
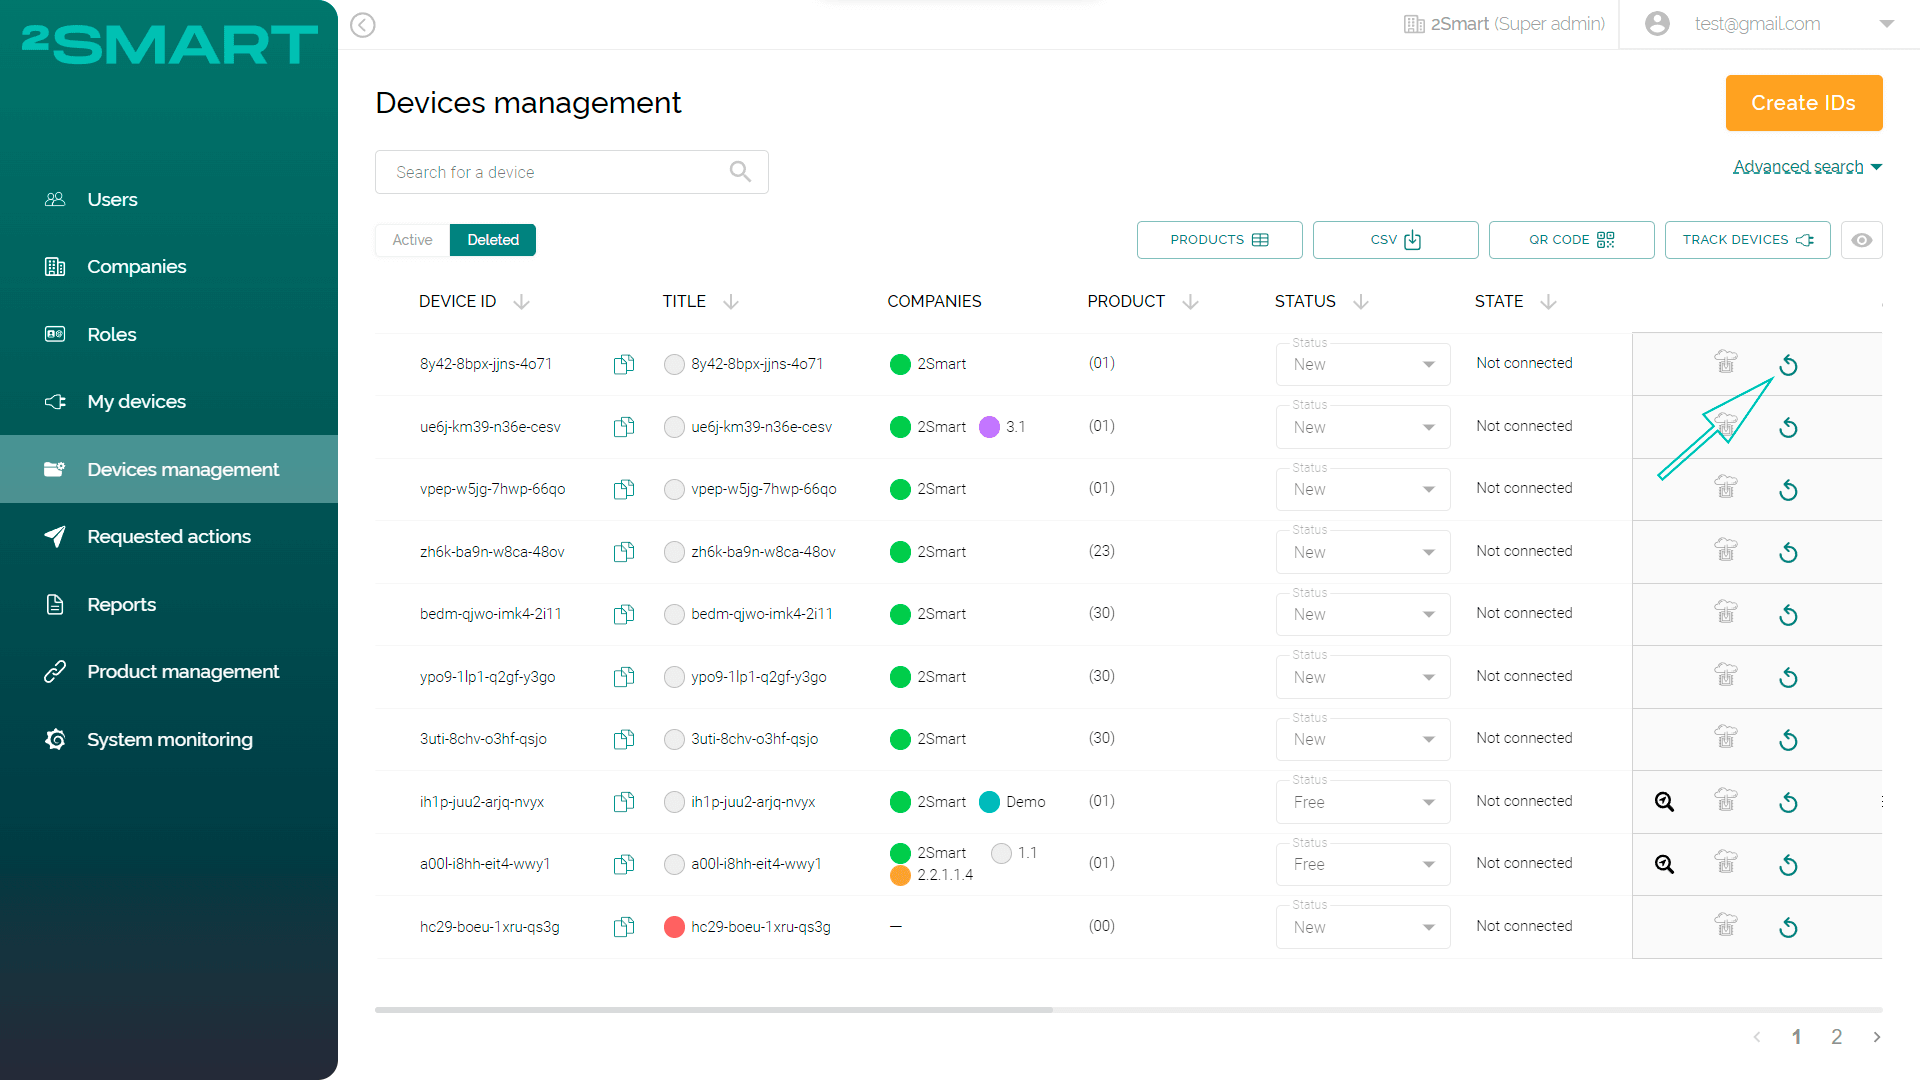
Deleting the Device ID
To remove the Device ID, use the "Delete" icon in the corresponding line of the table.

To restore the Device ID, go to the Deleted tab and click the Restore button in the corresponding line of the table.

Viewing the device location
To view the location of a device with this Device ID, use the "Open location" icon in the corresponding line of the table.


Viewing sensors of each node
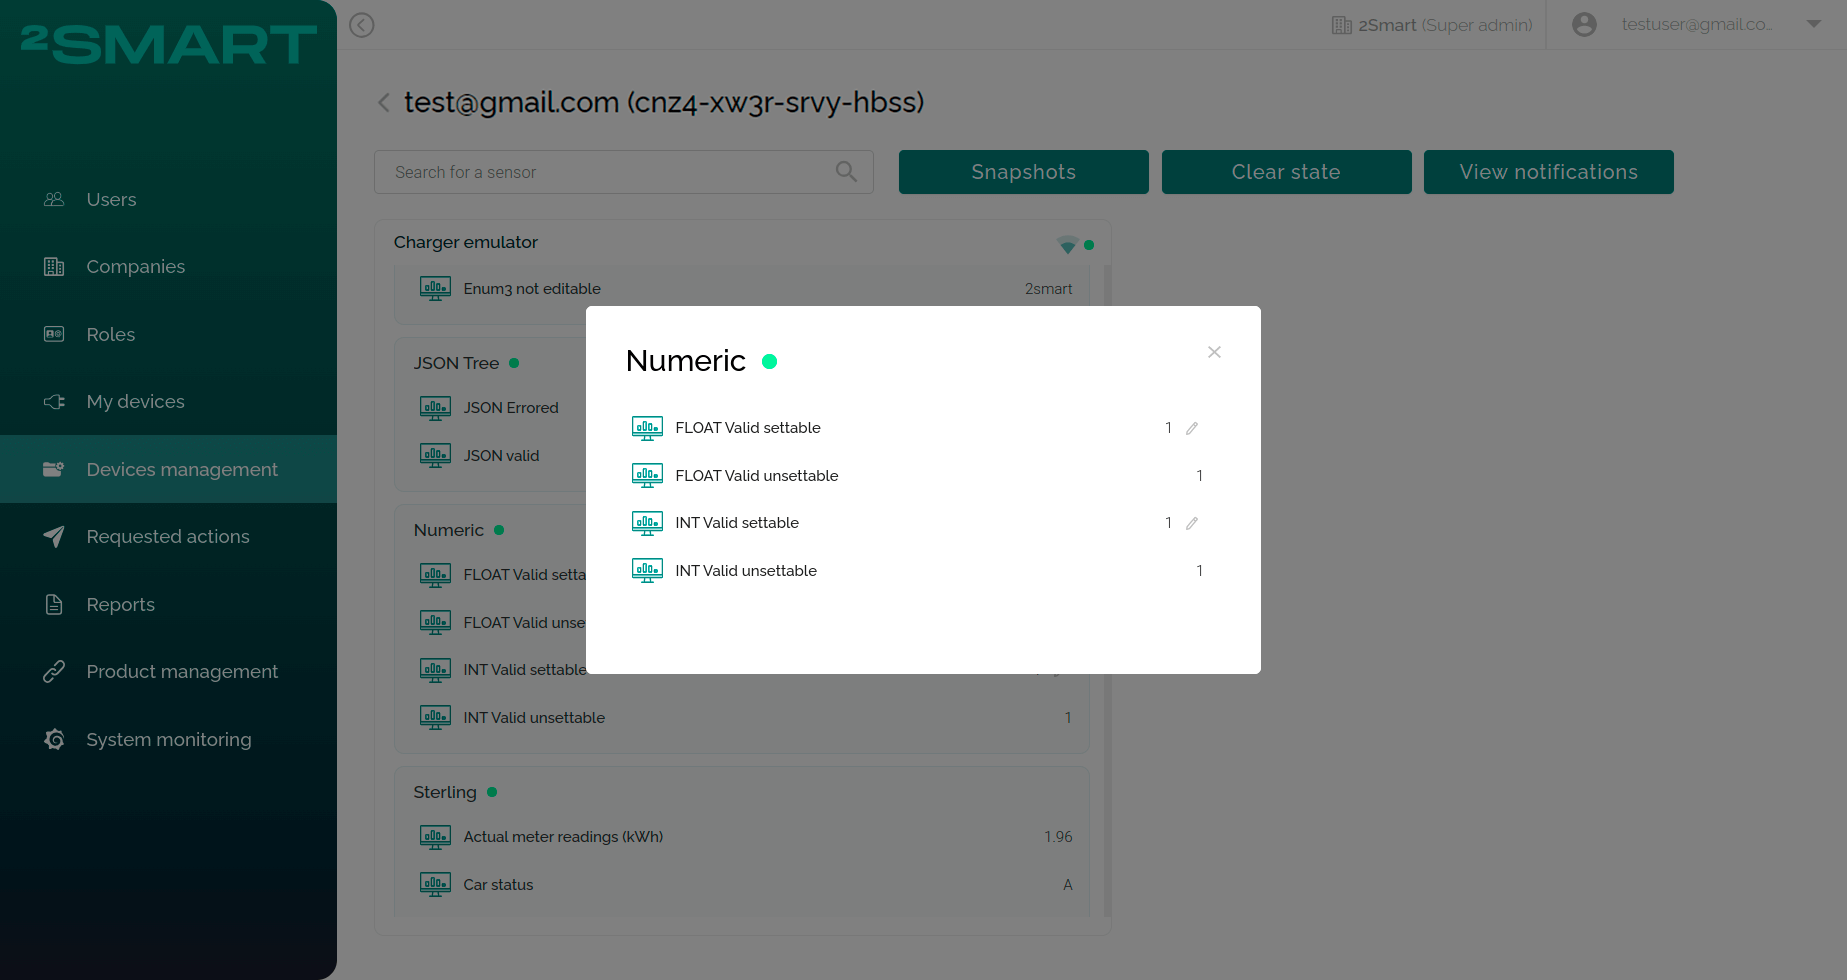
To avoid the long scrolling, you can open the modal window with sensors of each node. Click the node name on the device’s page to open the modal window that contains all sensors of this node.
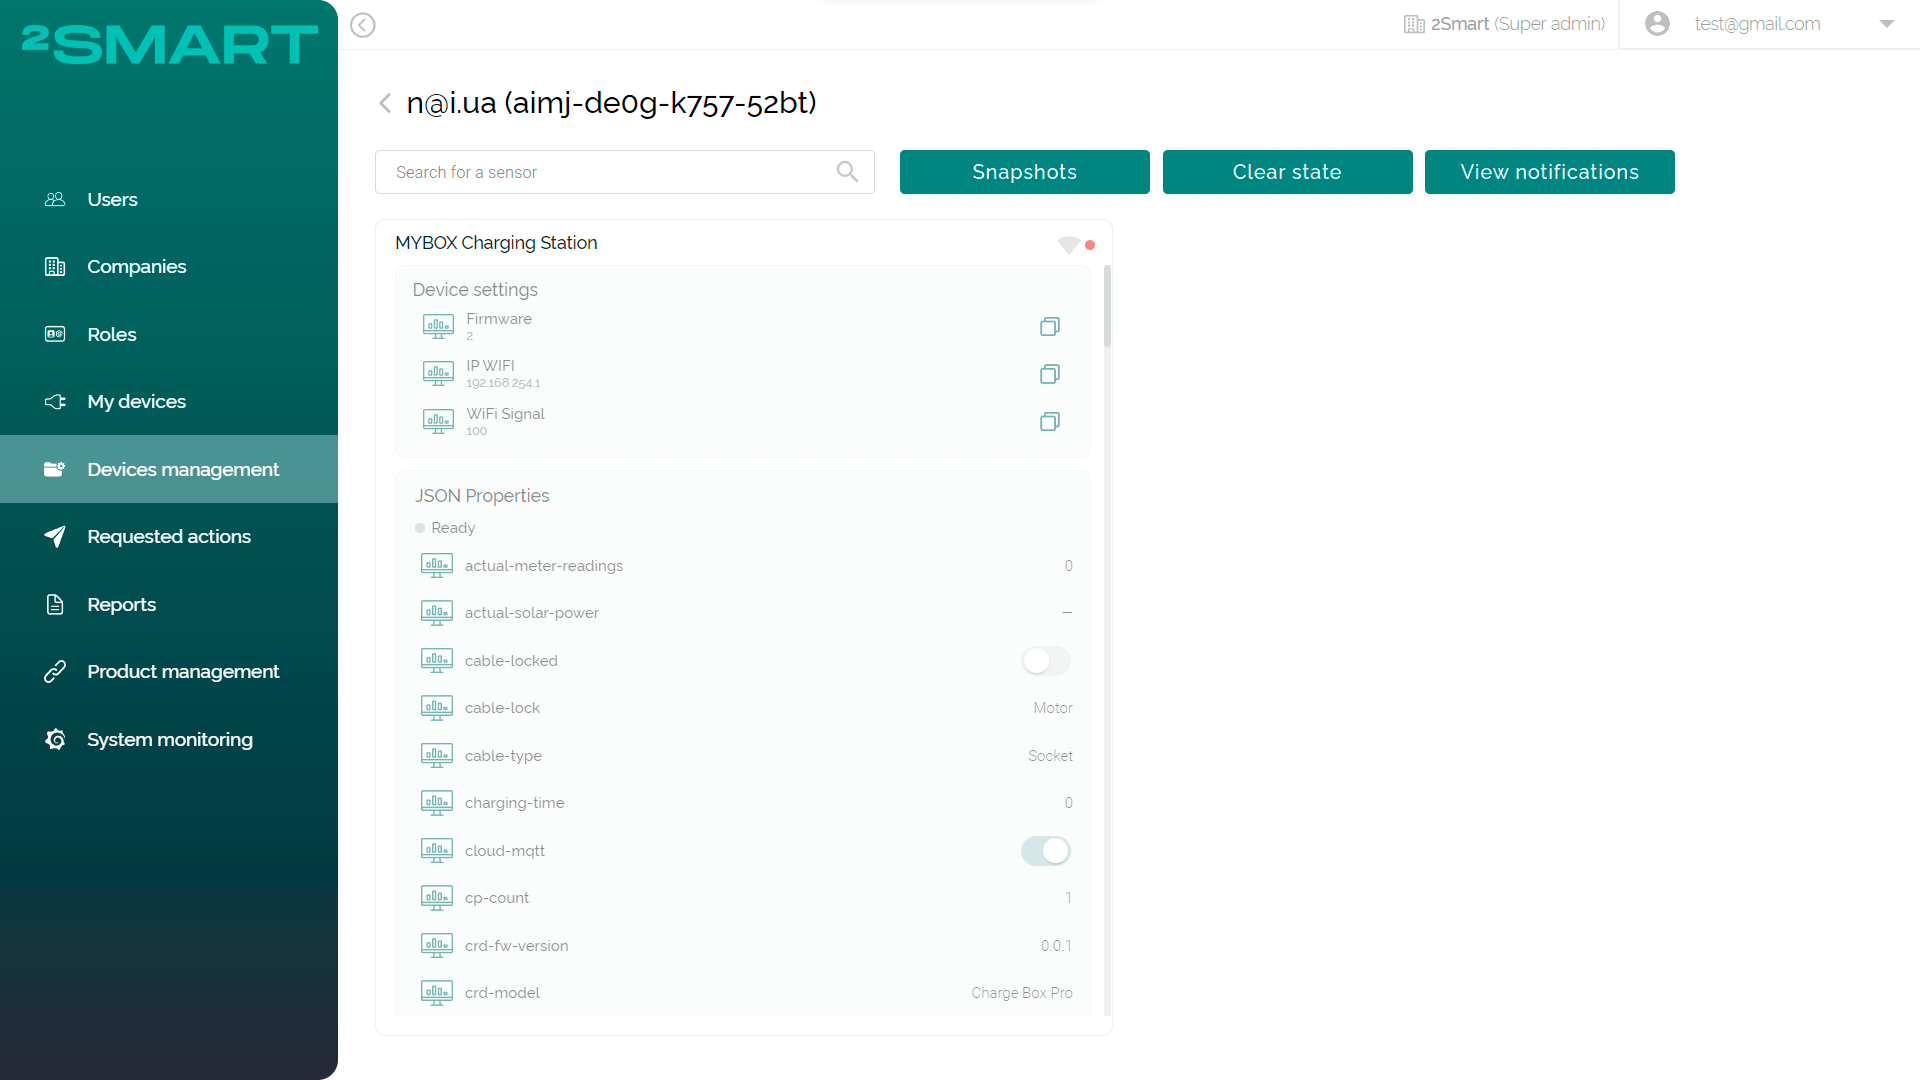
Snapshots
Snaphots are used to save the device sensors values and copy the device’s properties to another devices in one click. The admin can create a template with the device sensor values/configuration and apply it to any another devices with such senors in the future. It allows to make the devices configuration more quicker.
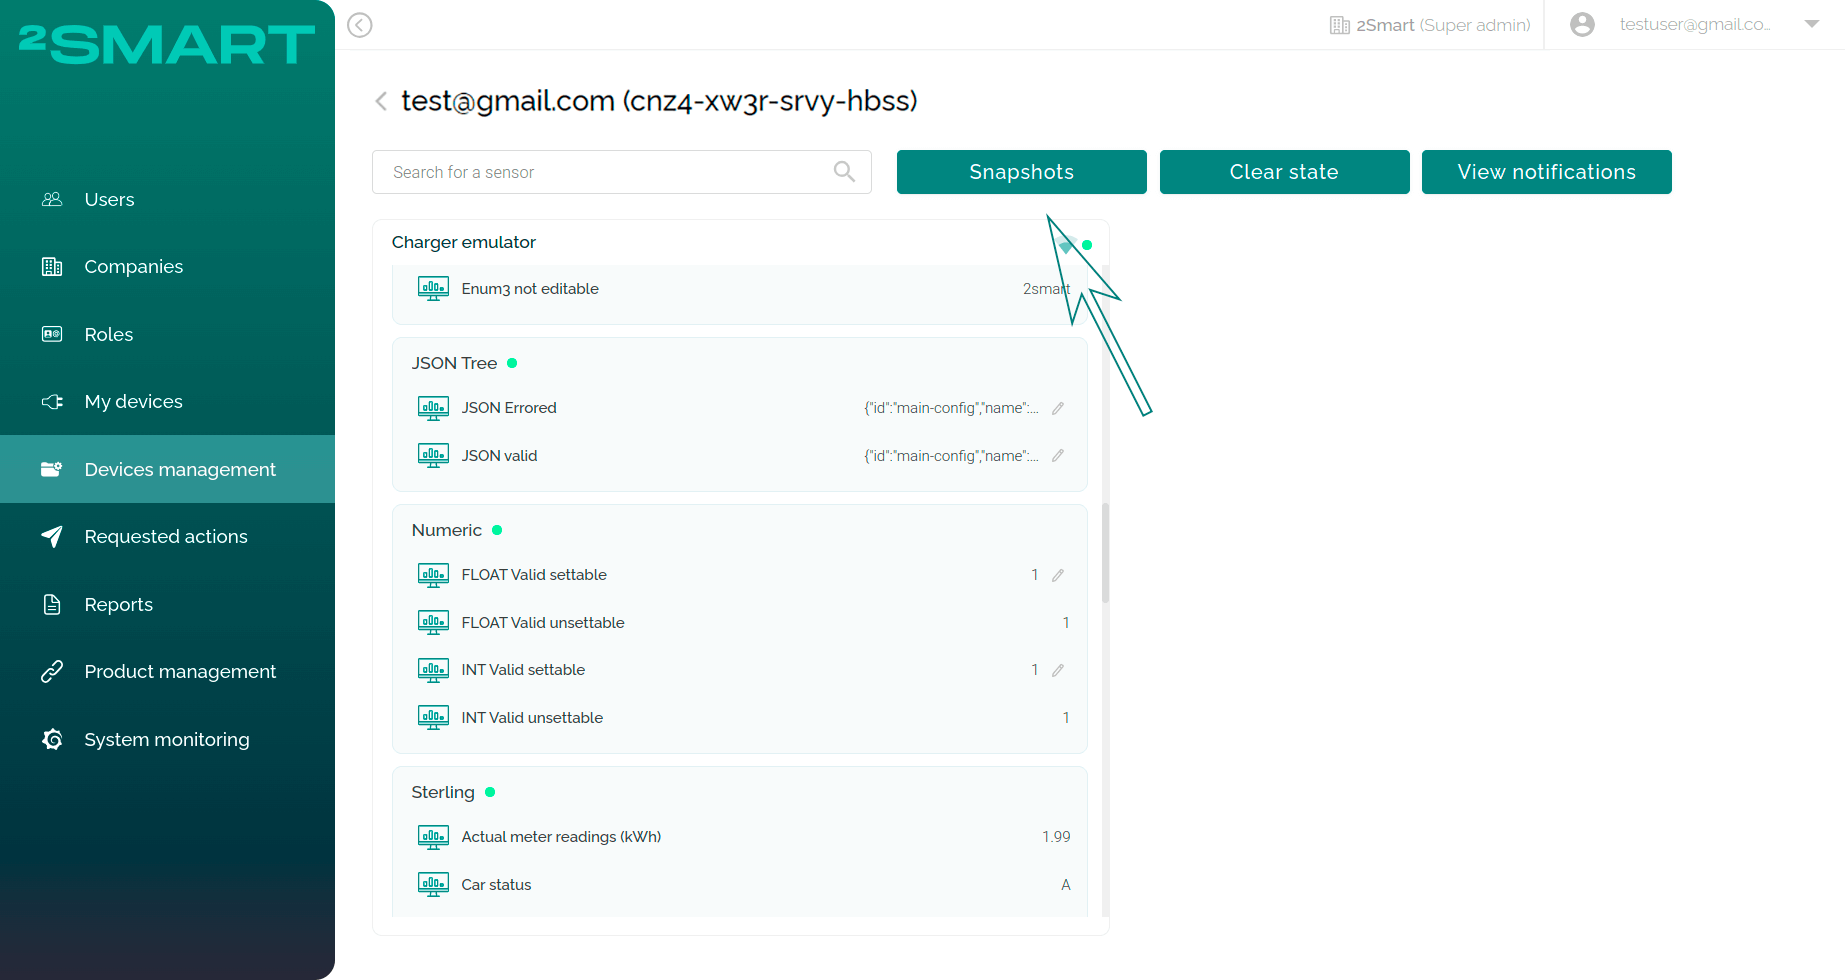
To create the snapshot, click the “Snapshots” button on the device’s page.
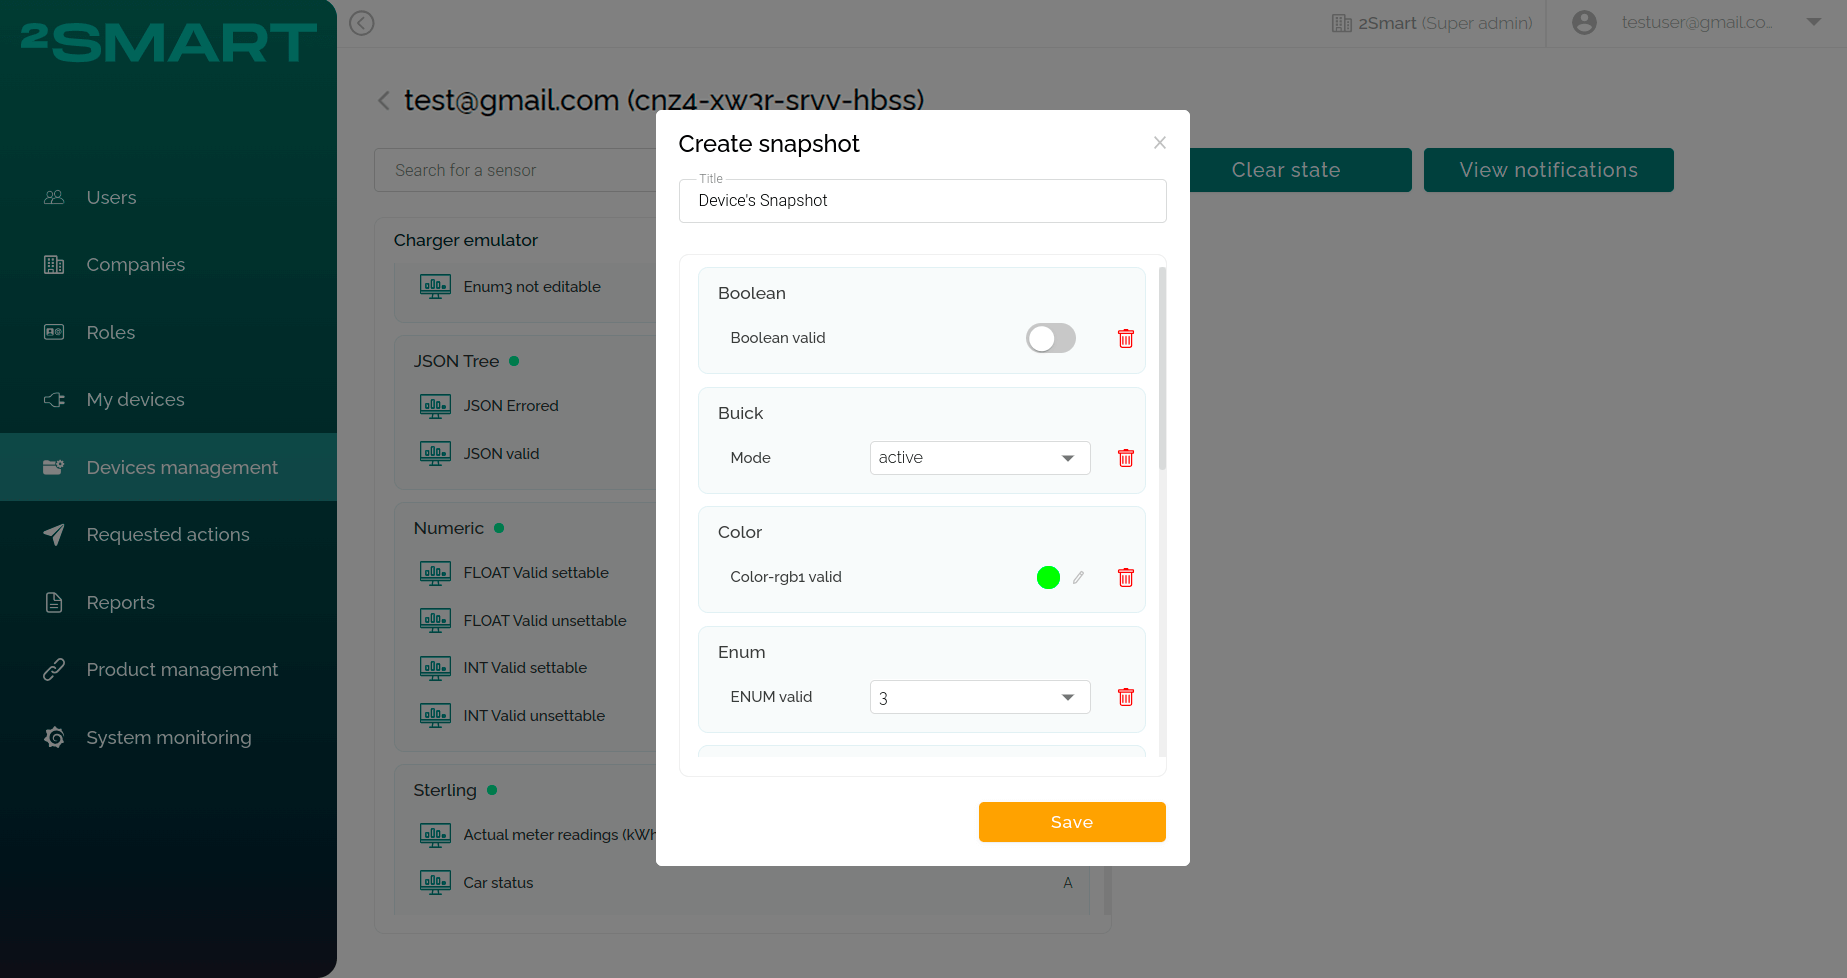
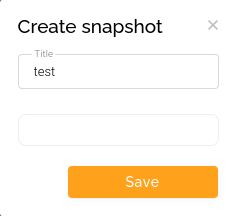
Click the “Create” button in the modal window that appears.
Enter the snapshot title, delete sensors that you don’t need from the snapshot, change the values and click the “Save” button.
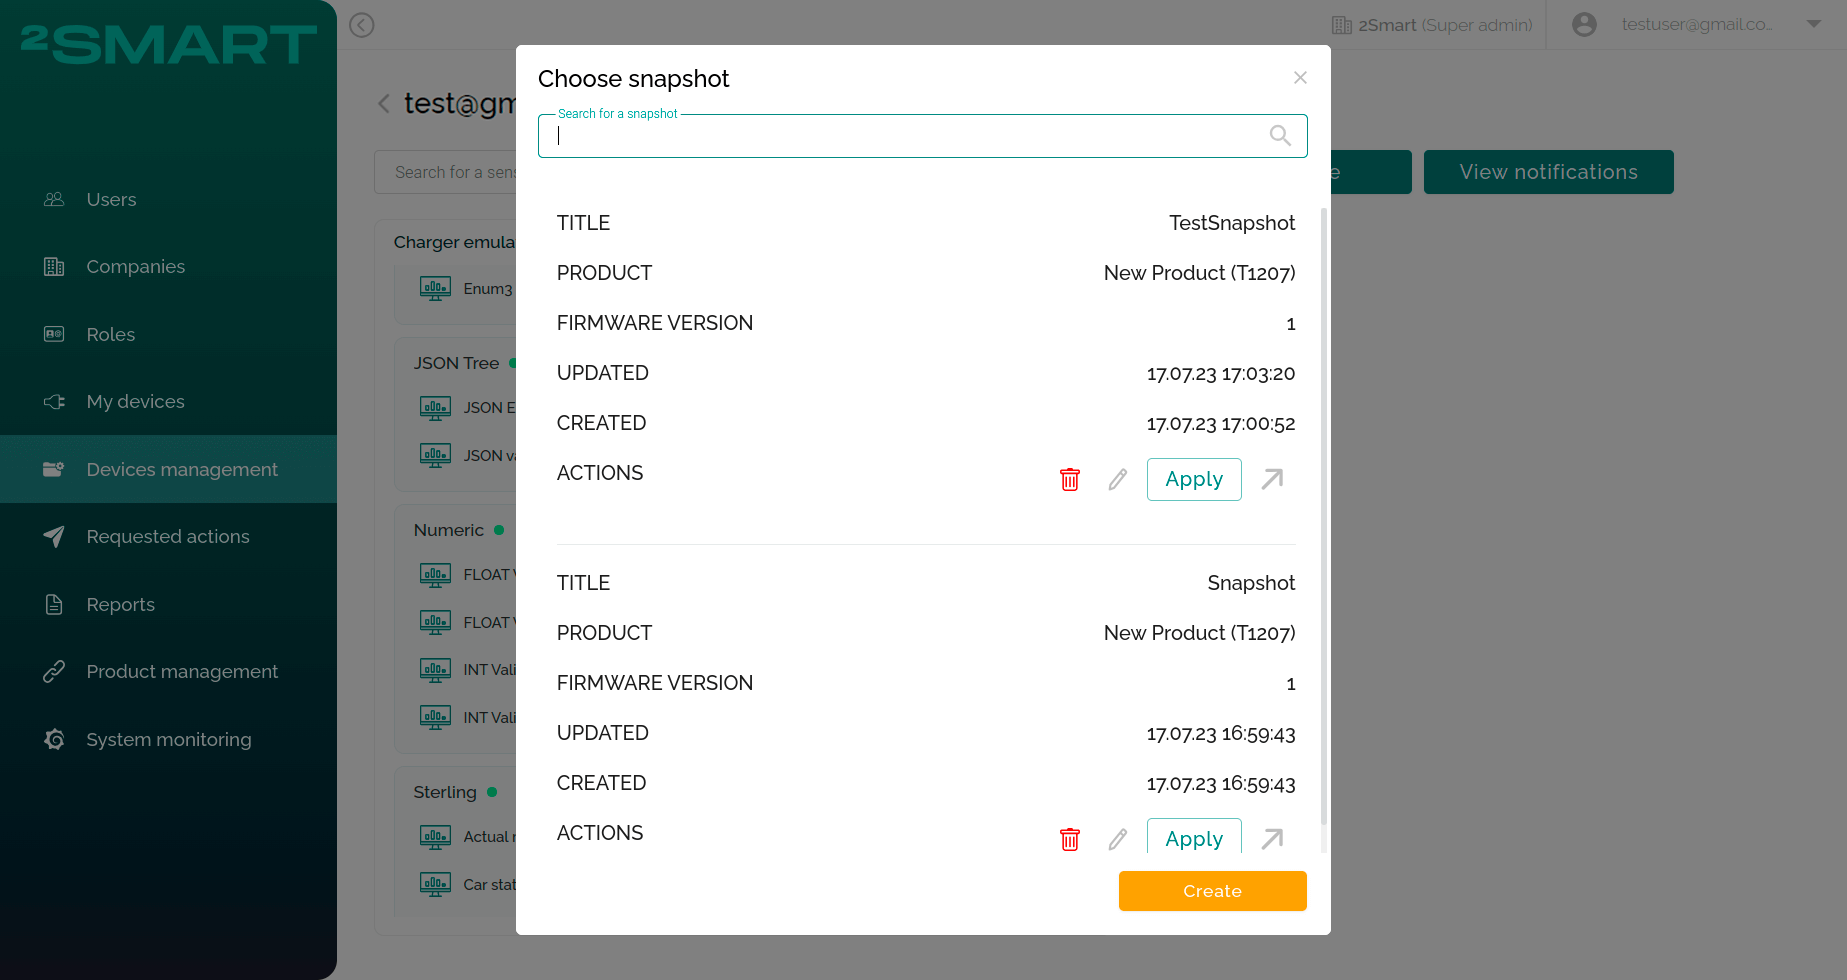
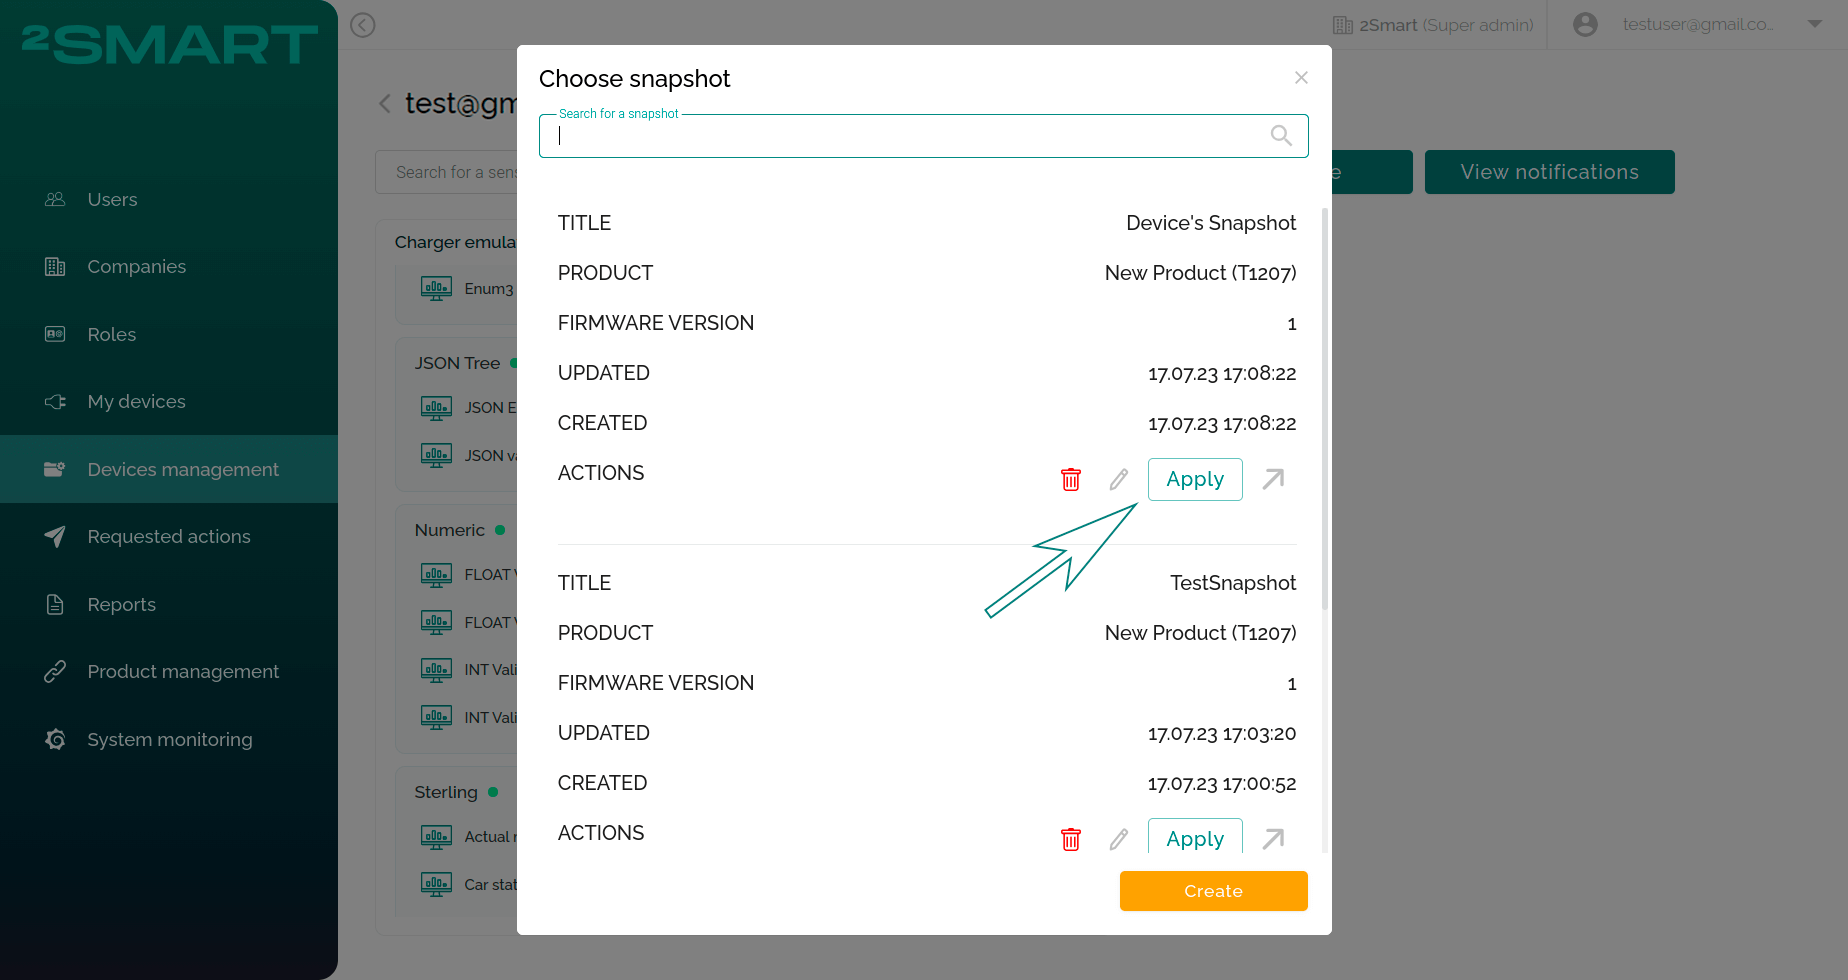
You will see the created and other existing snapshots in the “Choose snapshot” modal window. Click the “Edit” button to edit the snapshot or arrow icon to view the snapshot’s preview.
To apply a snapshot to your device, click the “Apply” button near the chosen one.
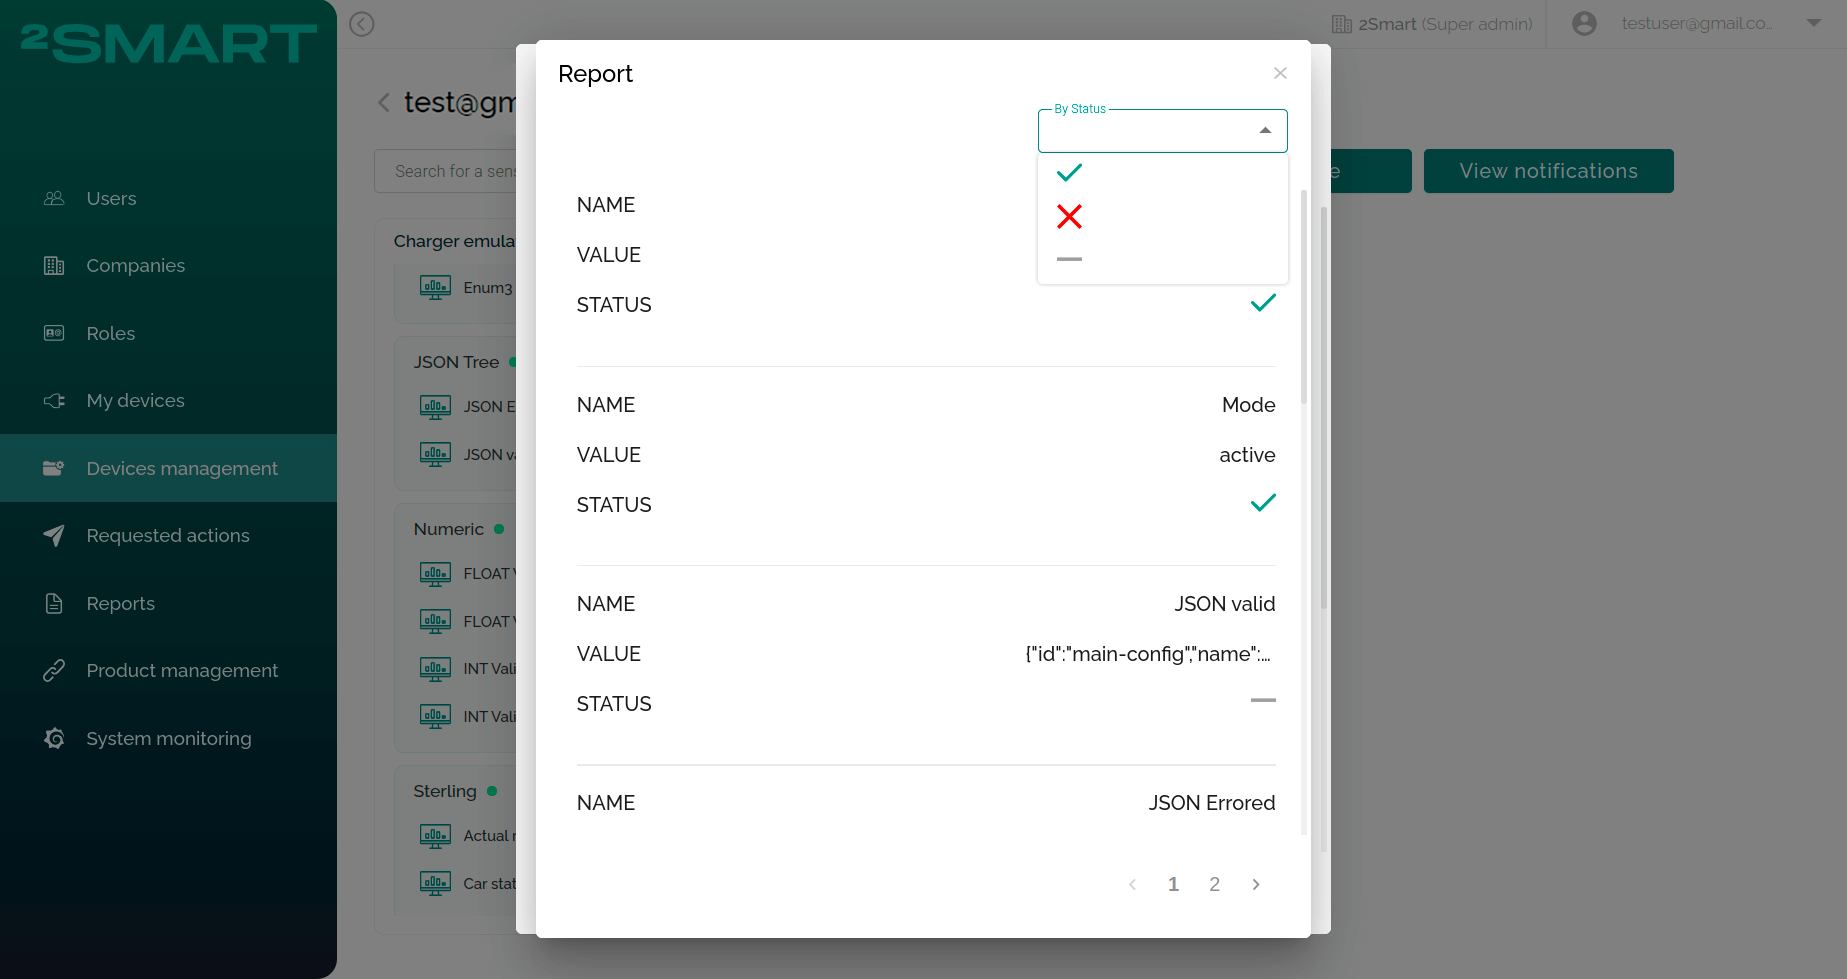
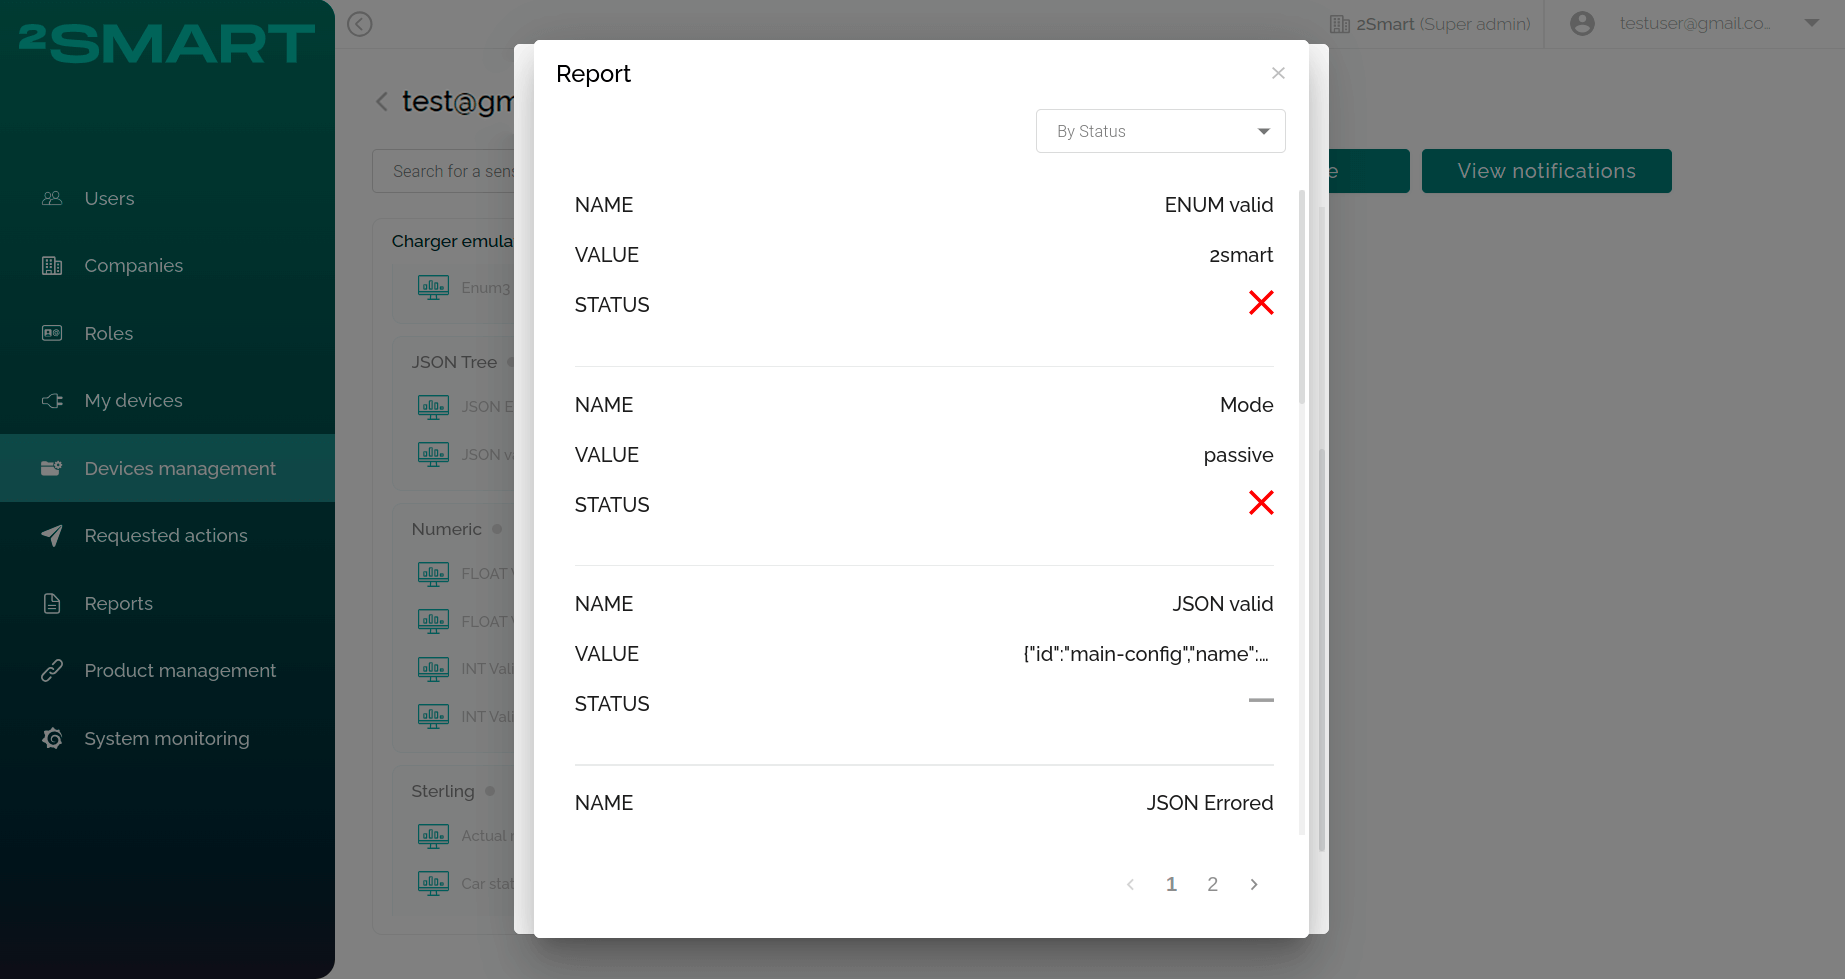
Wait for some seconds and see the implementing results in the “Report” modal window. There you can see which values were applied successfully or weren’t applied due to the error or the unchanged value. Also, you can filter results by status.
Please note that snapshots are successfully applied for the devices with the “Ready” status only. If the device is turned off, you’ll see the unsuccess statuses for sensor values in the report.
Snapshots aren’t available in the following cases:
- The device isn’t in the “Paired” status. For such case you can’t open the device’s page thus you can’t create or apply the snapshot for it.
- The device state is cleared. In this case you still see the list of snapshots and can click the “Apply” button, but there will be the unsuccessful statuses for all sensors. Also, there will not be any available sensors if you try to create the snapshot.
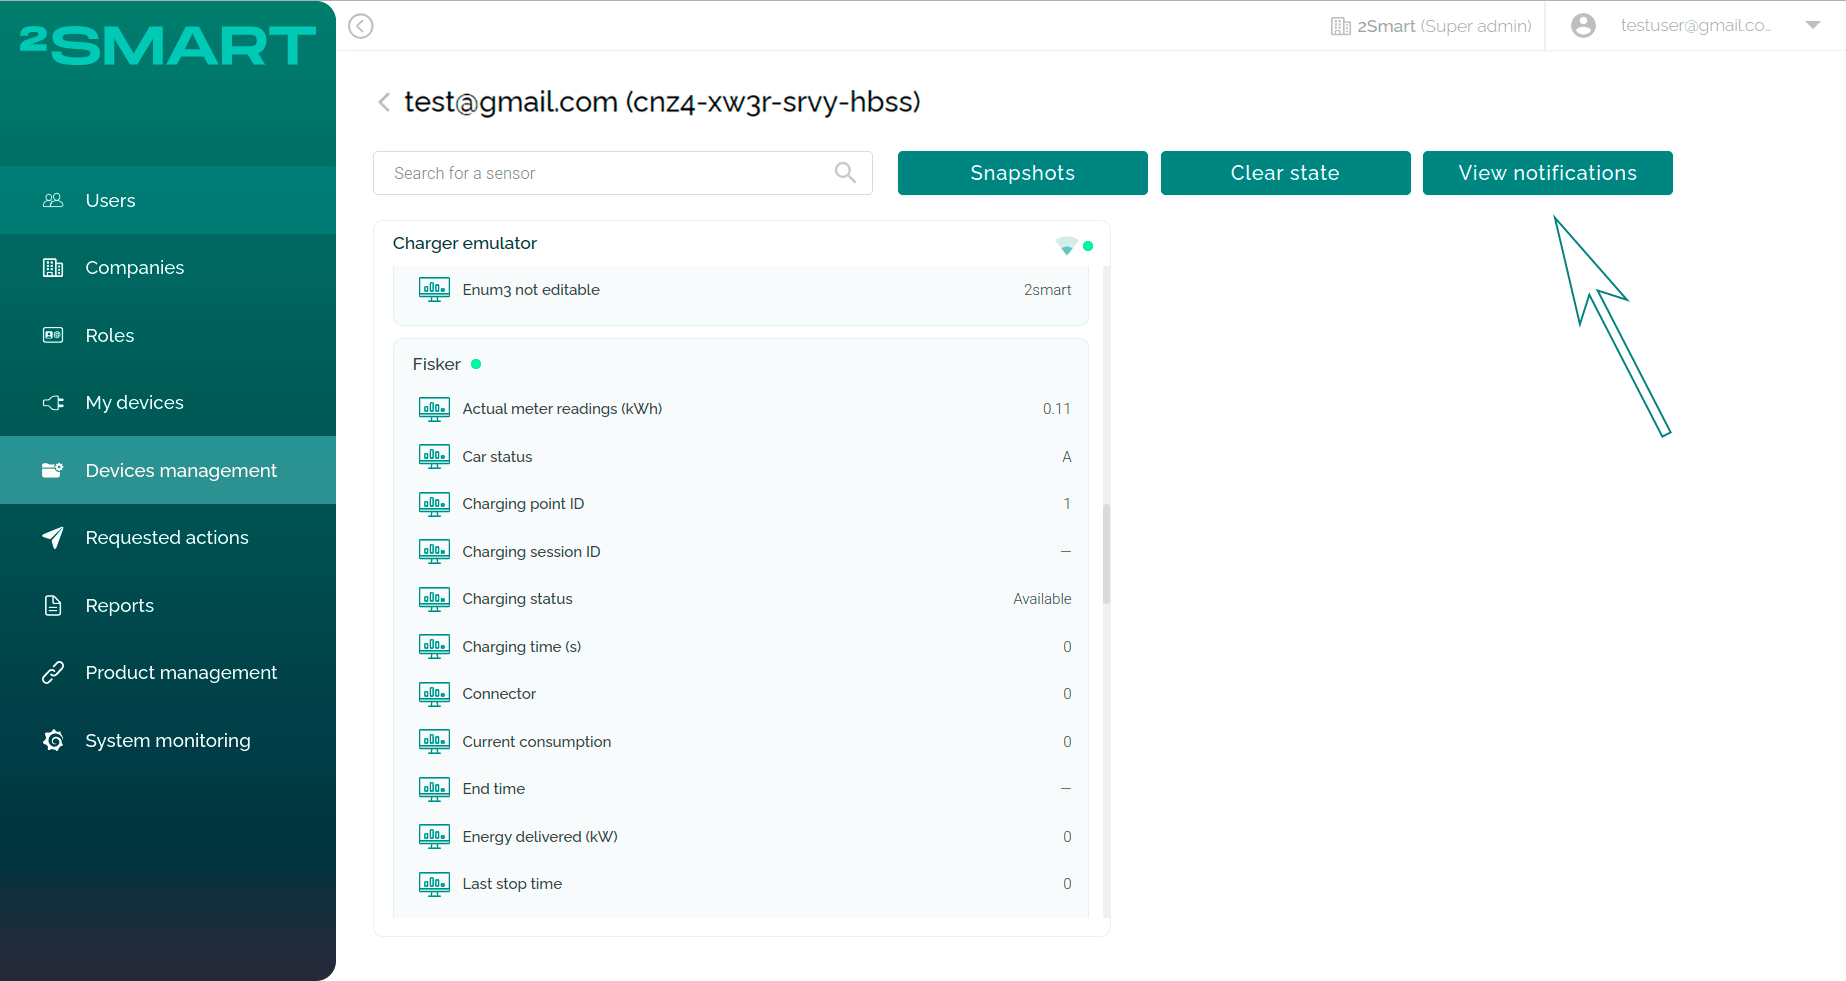
Monitor device activity from the admin panel
This feature allows Users with the “Service device” permission to view the device notification from the admin panel. To view it, open the device page and click the “View notifications” button.
In the modal window that appears, the Admin sees the device’s notifications. Please note that there aren’t shown notifications about connect/disconnect devices. It is used for the notifications about charging, errors etc. According to this, there are 3 levels of notifications:
- info,
- error,
- warning.
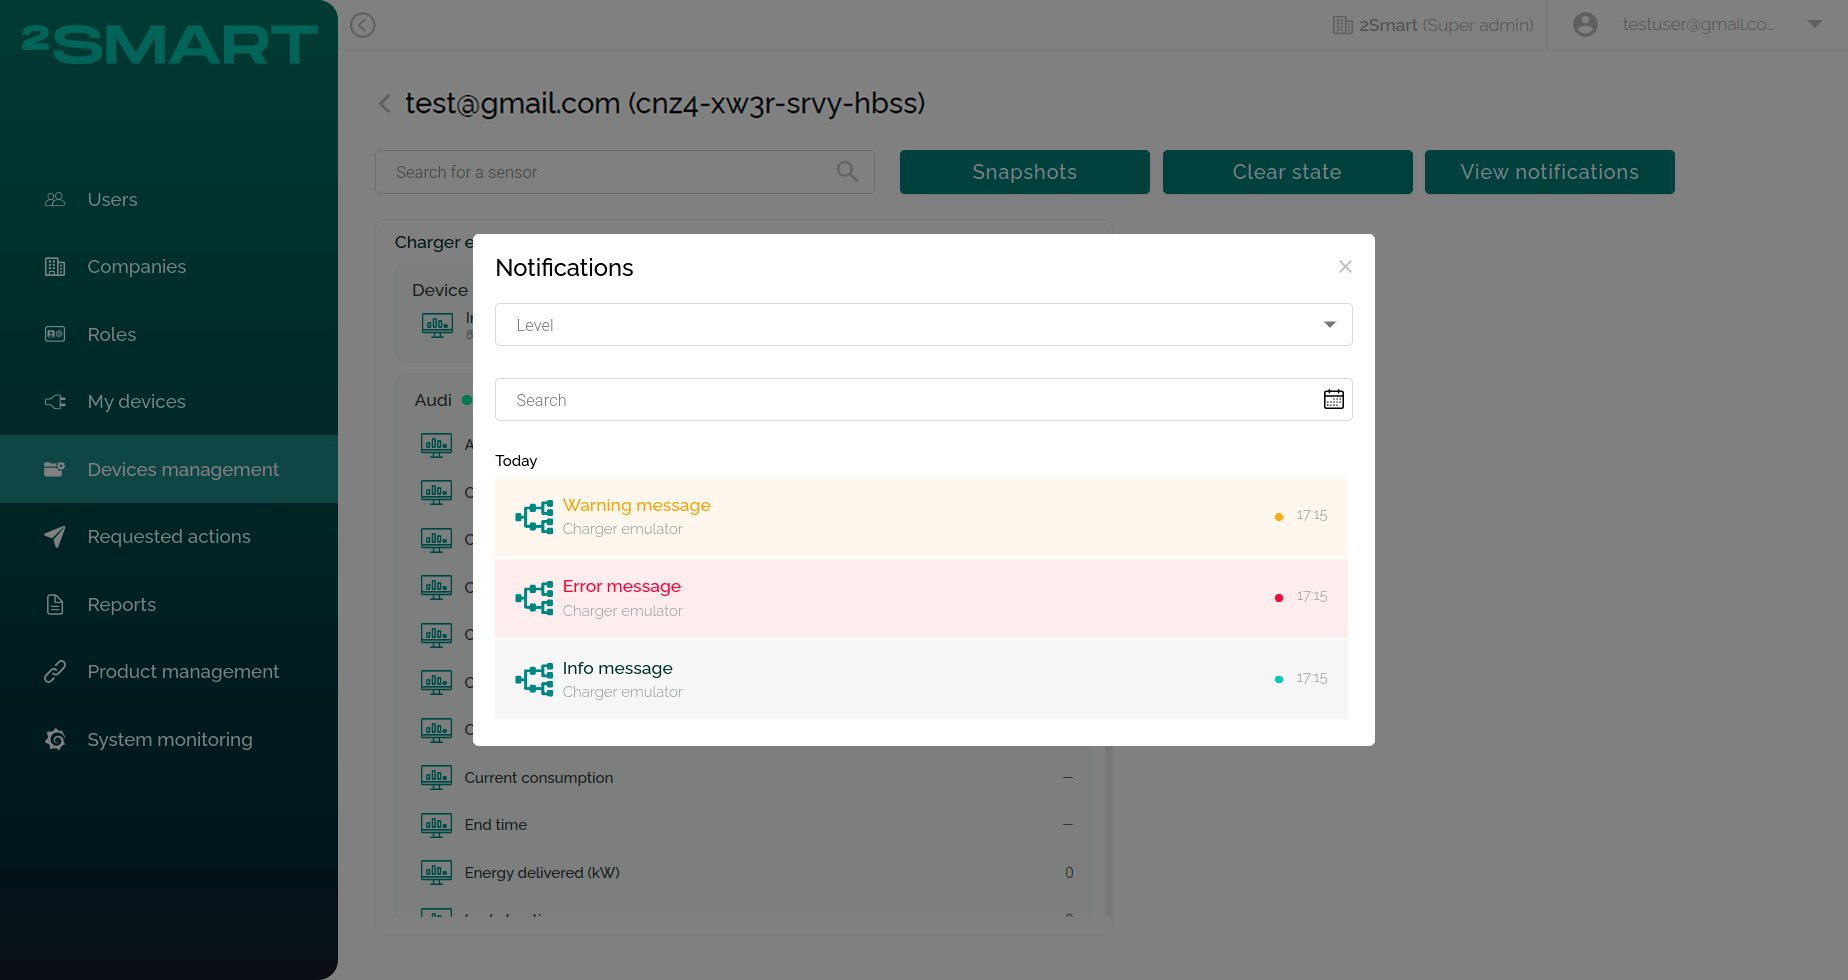
All messages are shown in the same way:
- data,
- message,
- device name,
- device icon.
The levels are differ with the 3 colors:
- green color - for the info messages,
- red color - for the error messages,
- yellow color - for the warning messages.
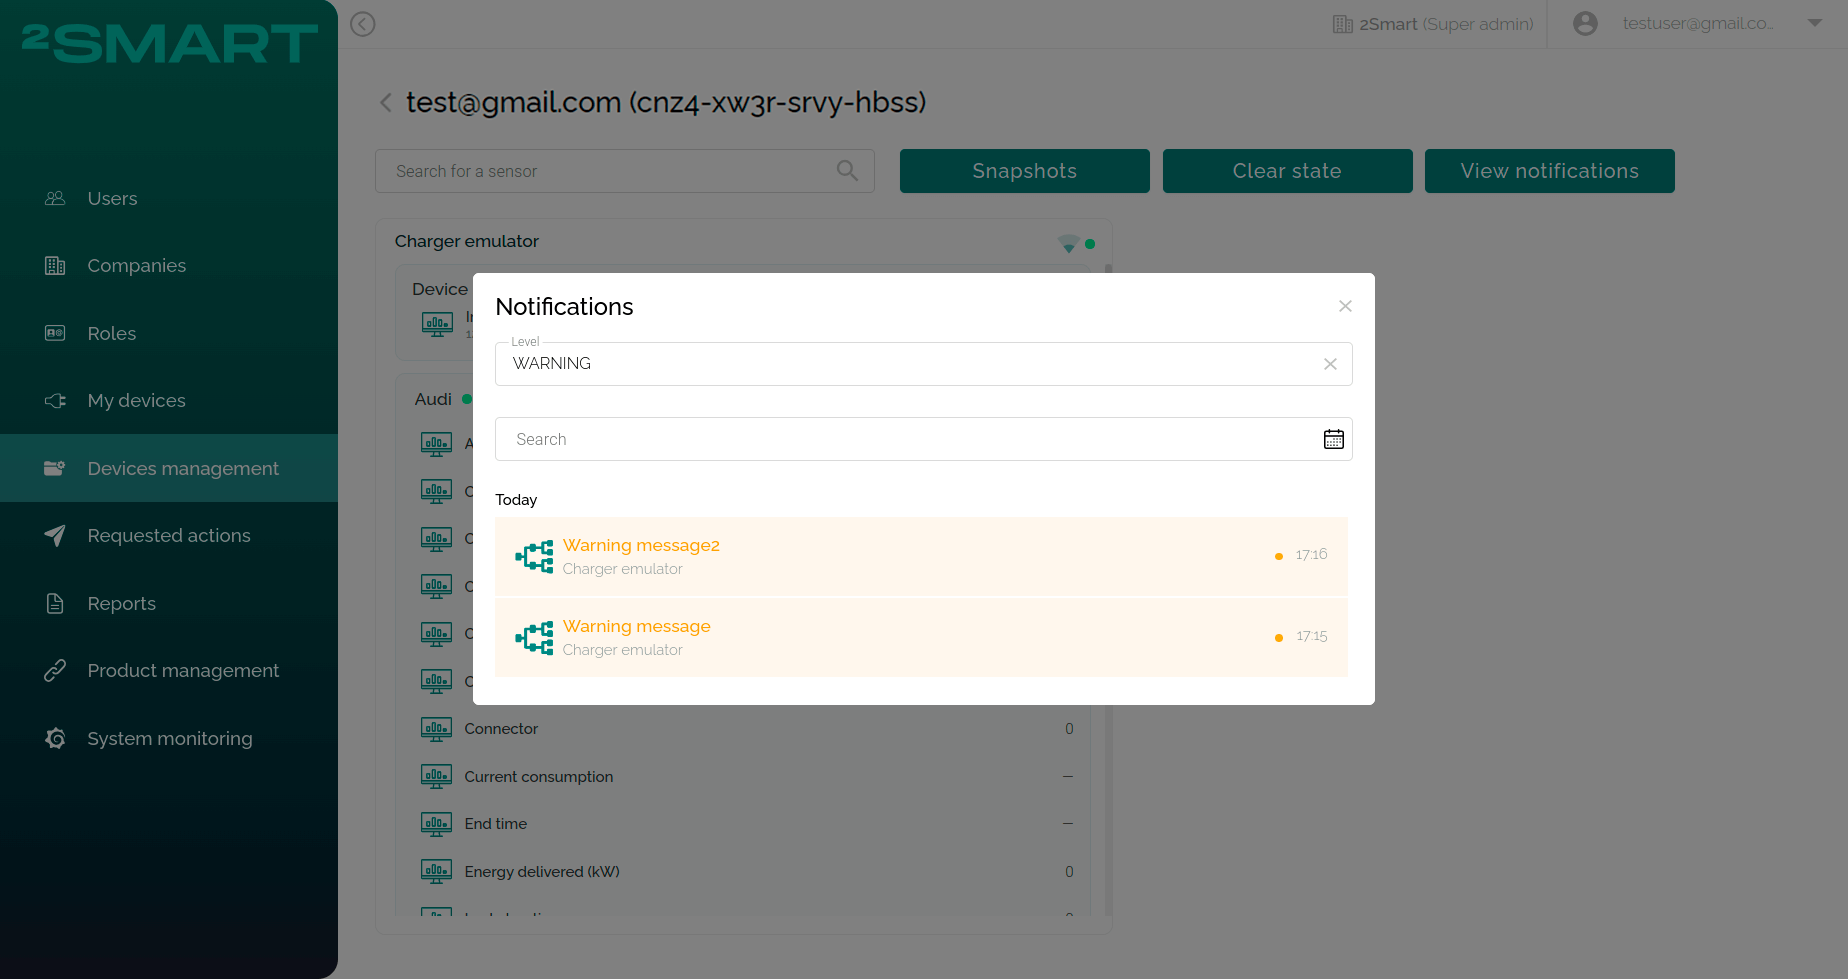
Notifications appear in real time, the newest on the top of the list. For the user's convenience, they can be searched by the message and filtered by date and level. Click the “Level” field to choose the level you want to see:

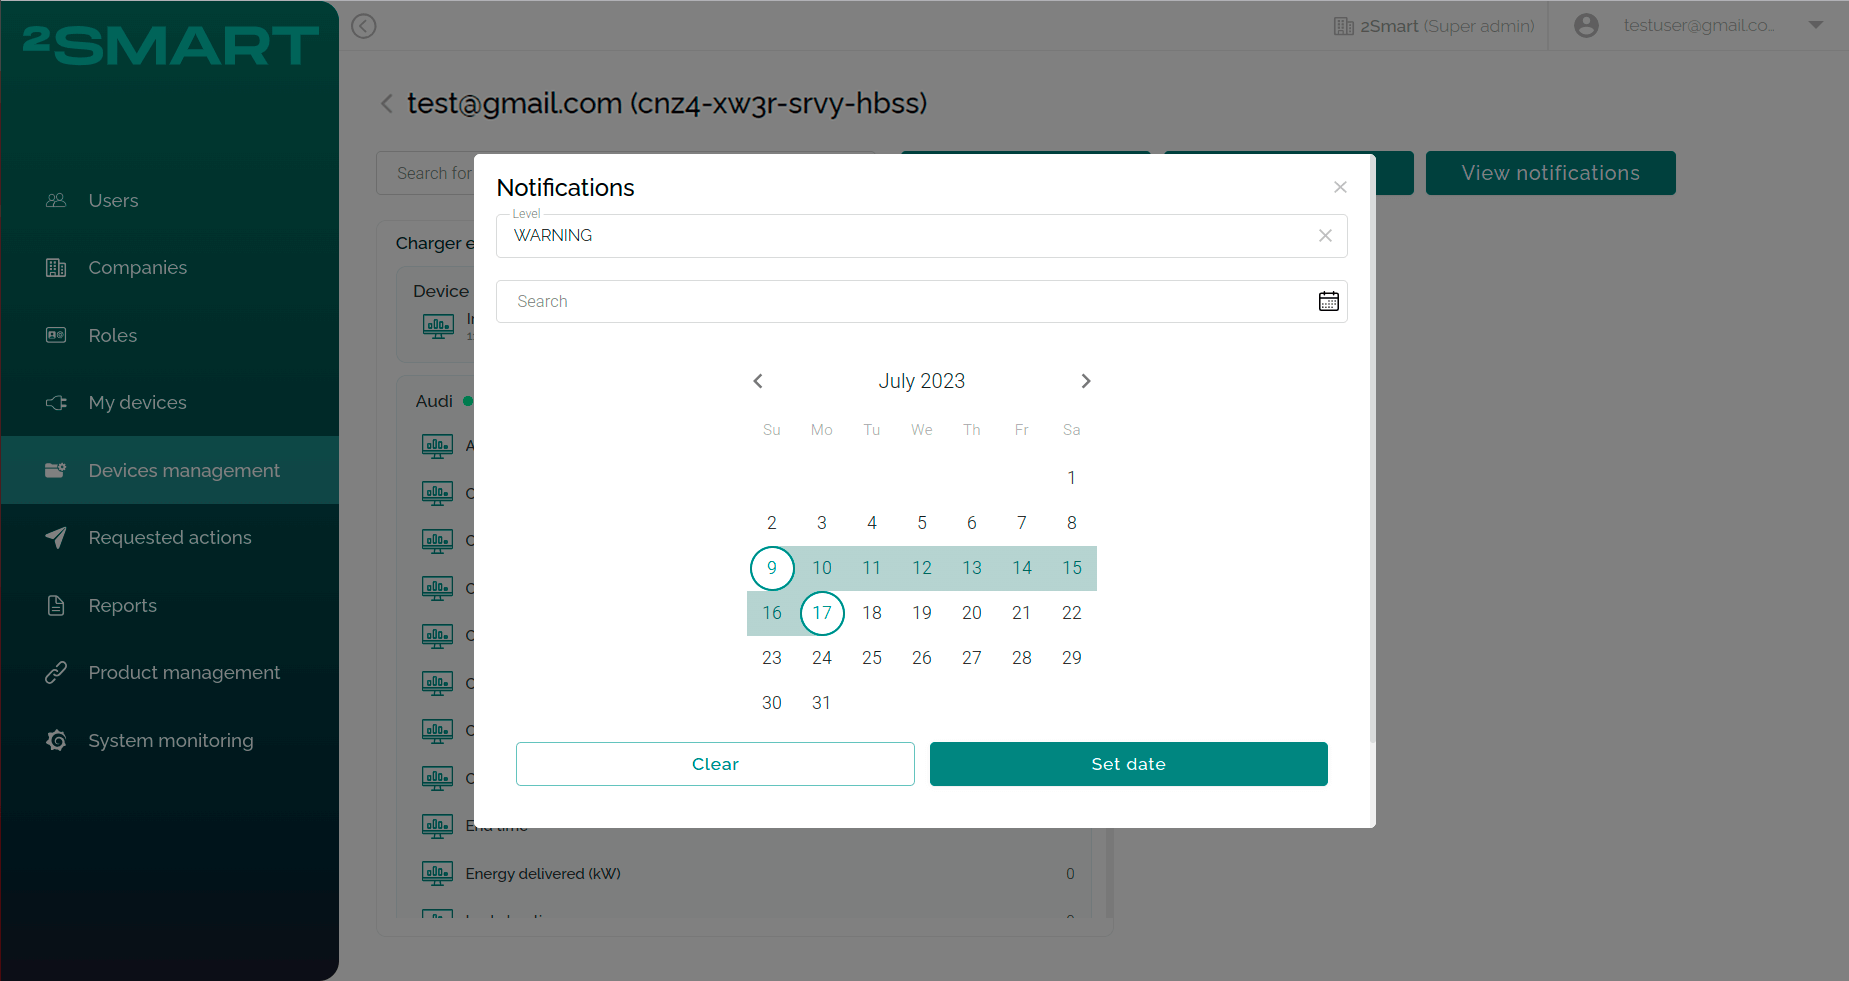
To filter by date, click the calendar icon, choose the date range and click the “Set date” button.
Historical reports
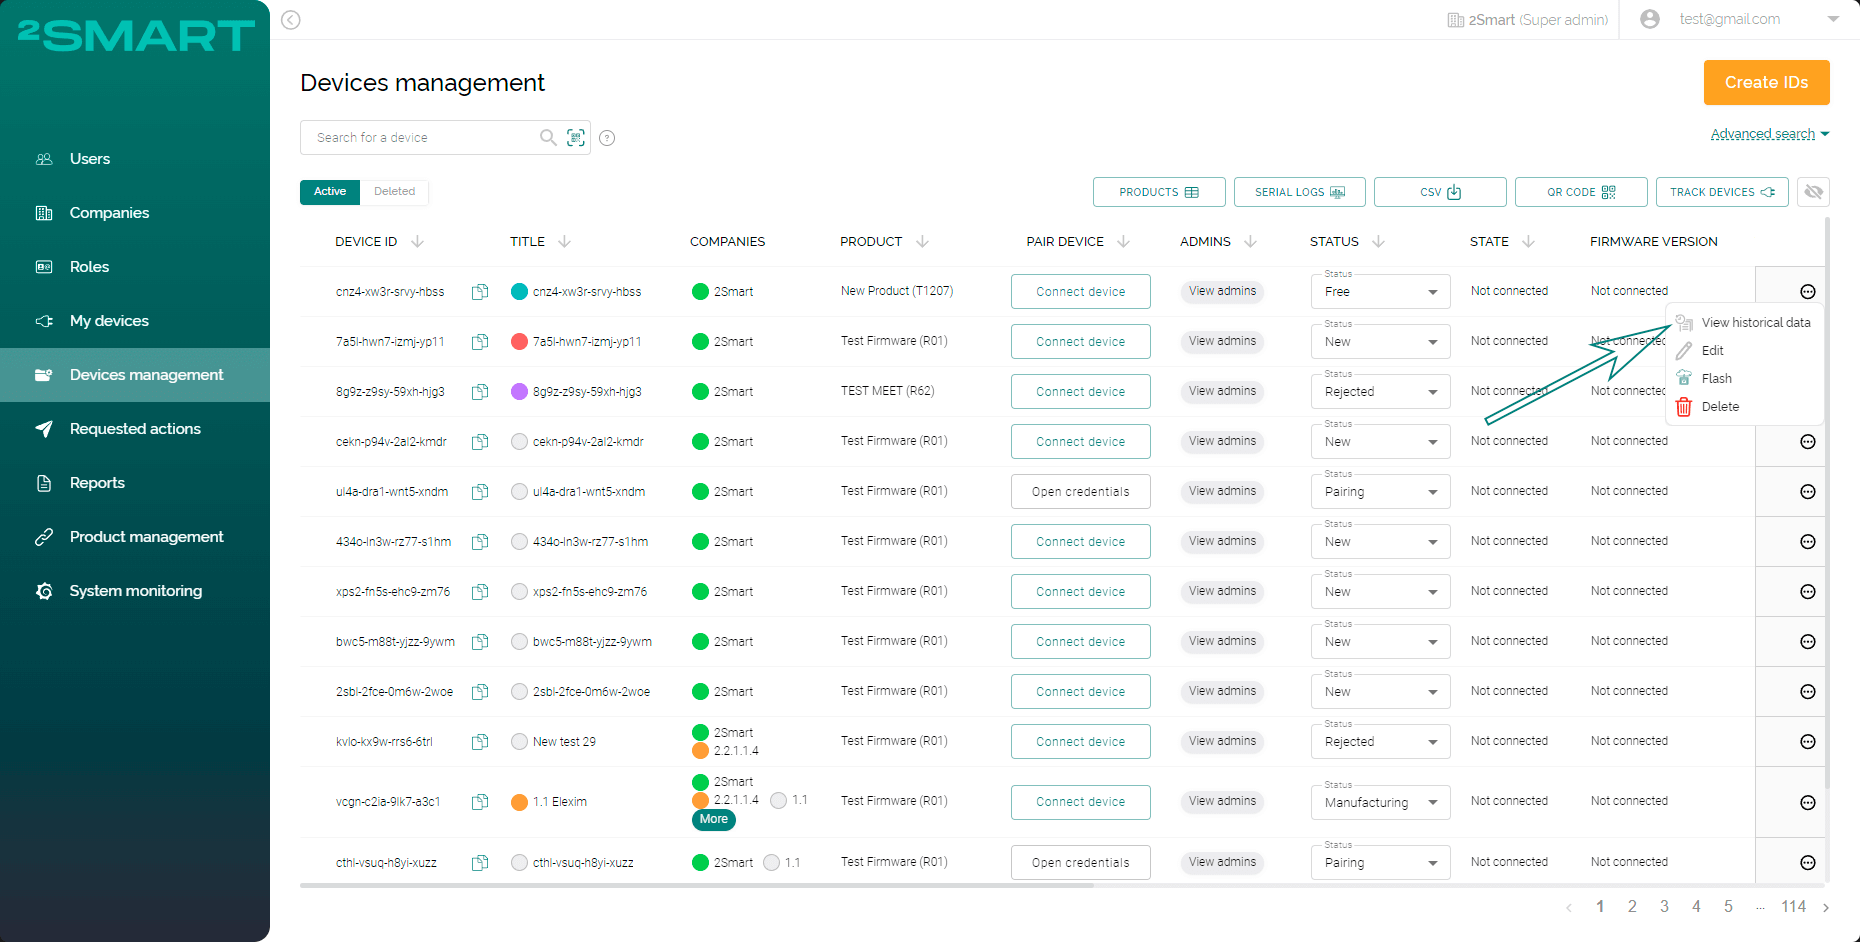
To create the report about device’s sensors value during the time, click the “View historical data” icon on the admin panel.
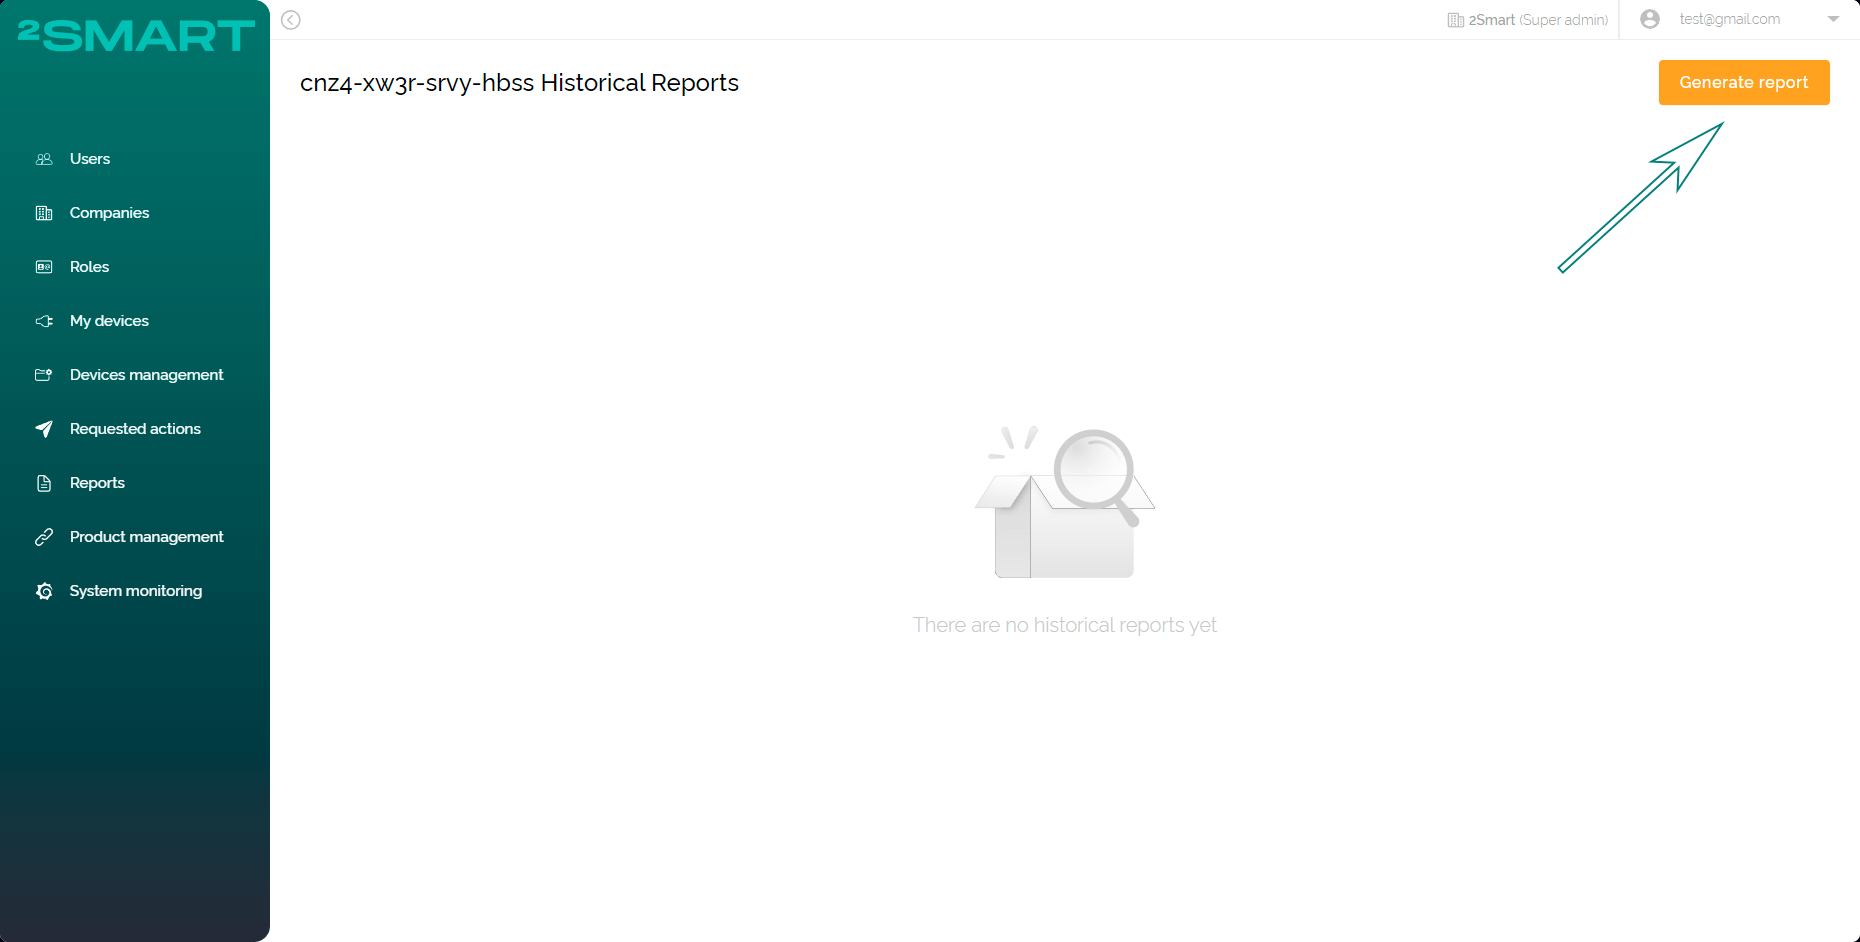
Click the “Generate report” button on the page that appears.
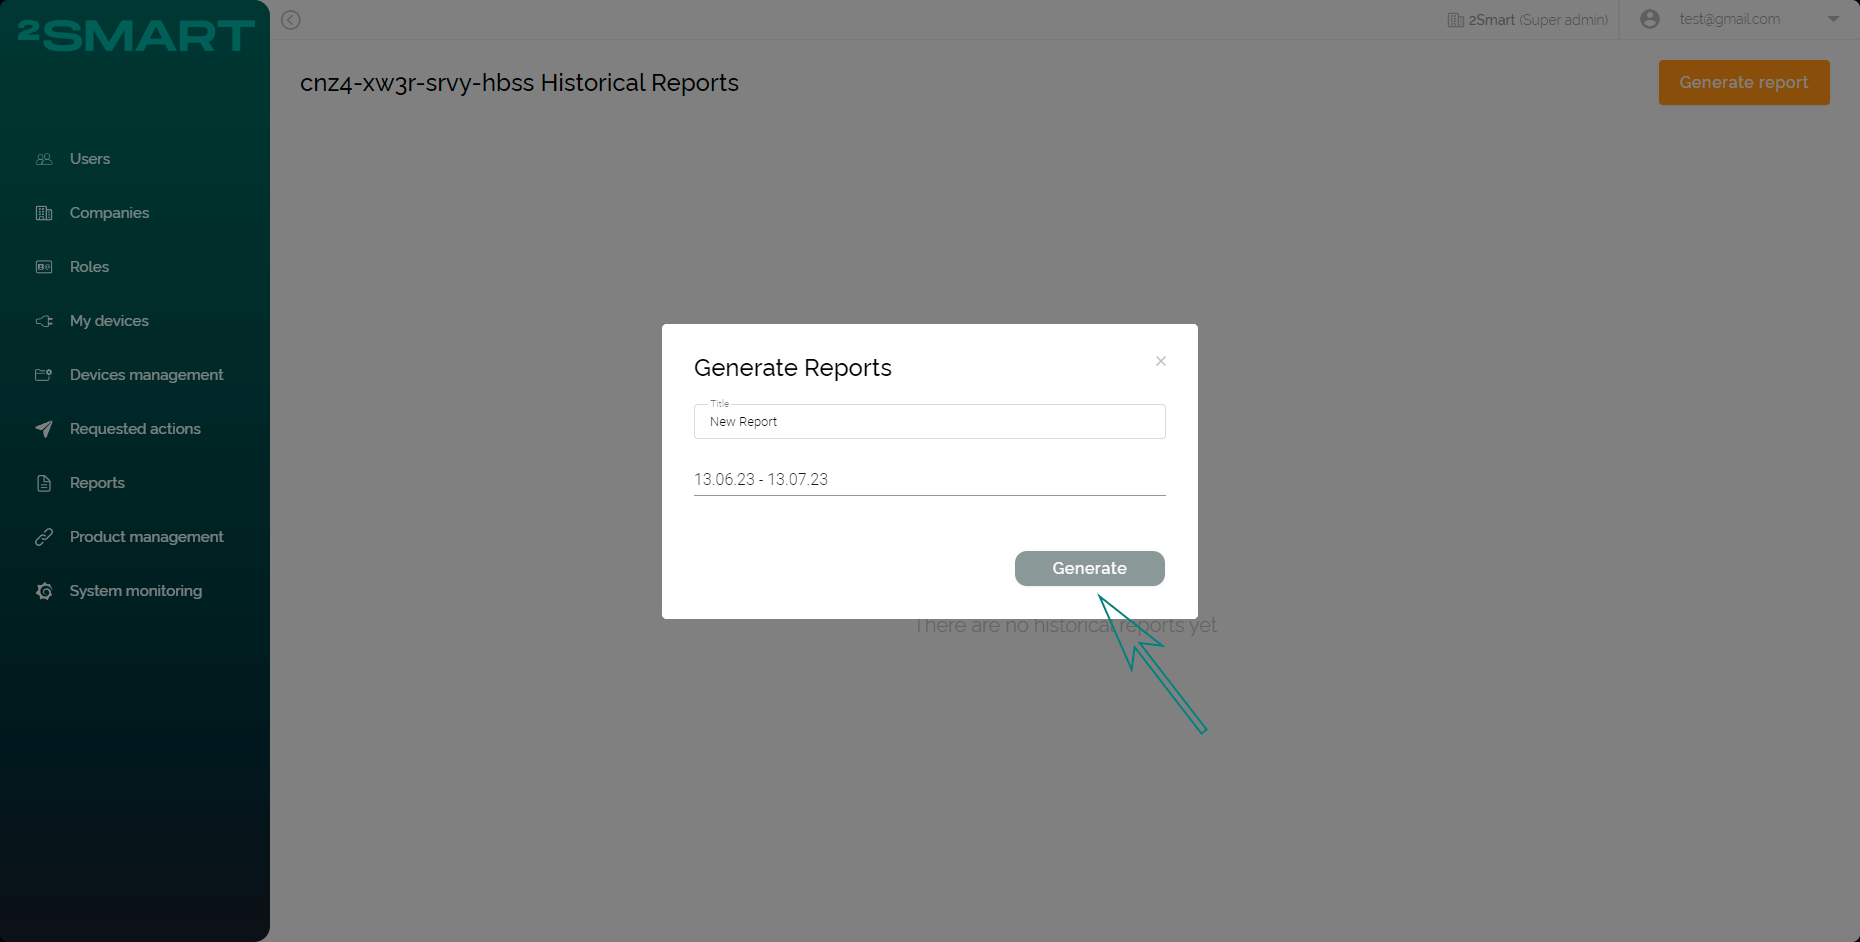
Fill in the “Title” and “Date” fields with the valid data and click the “Generate” button.
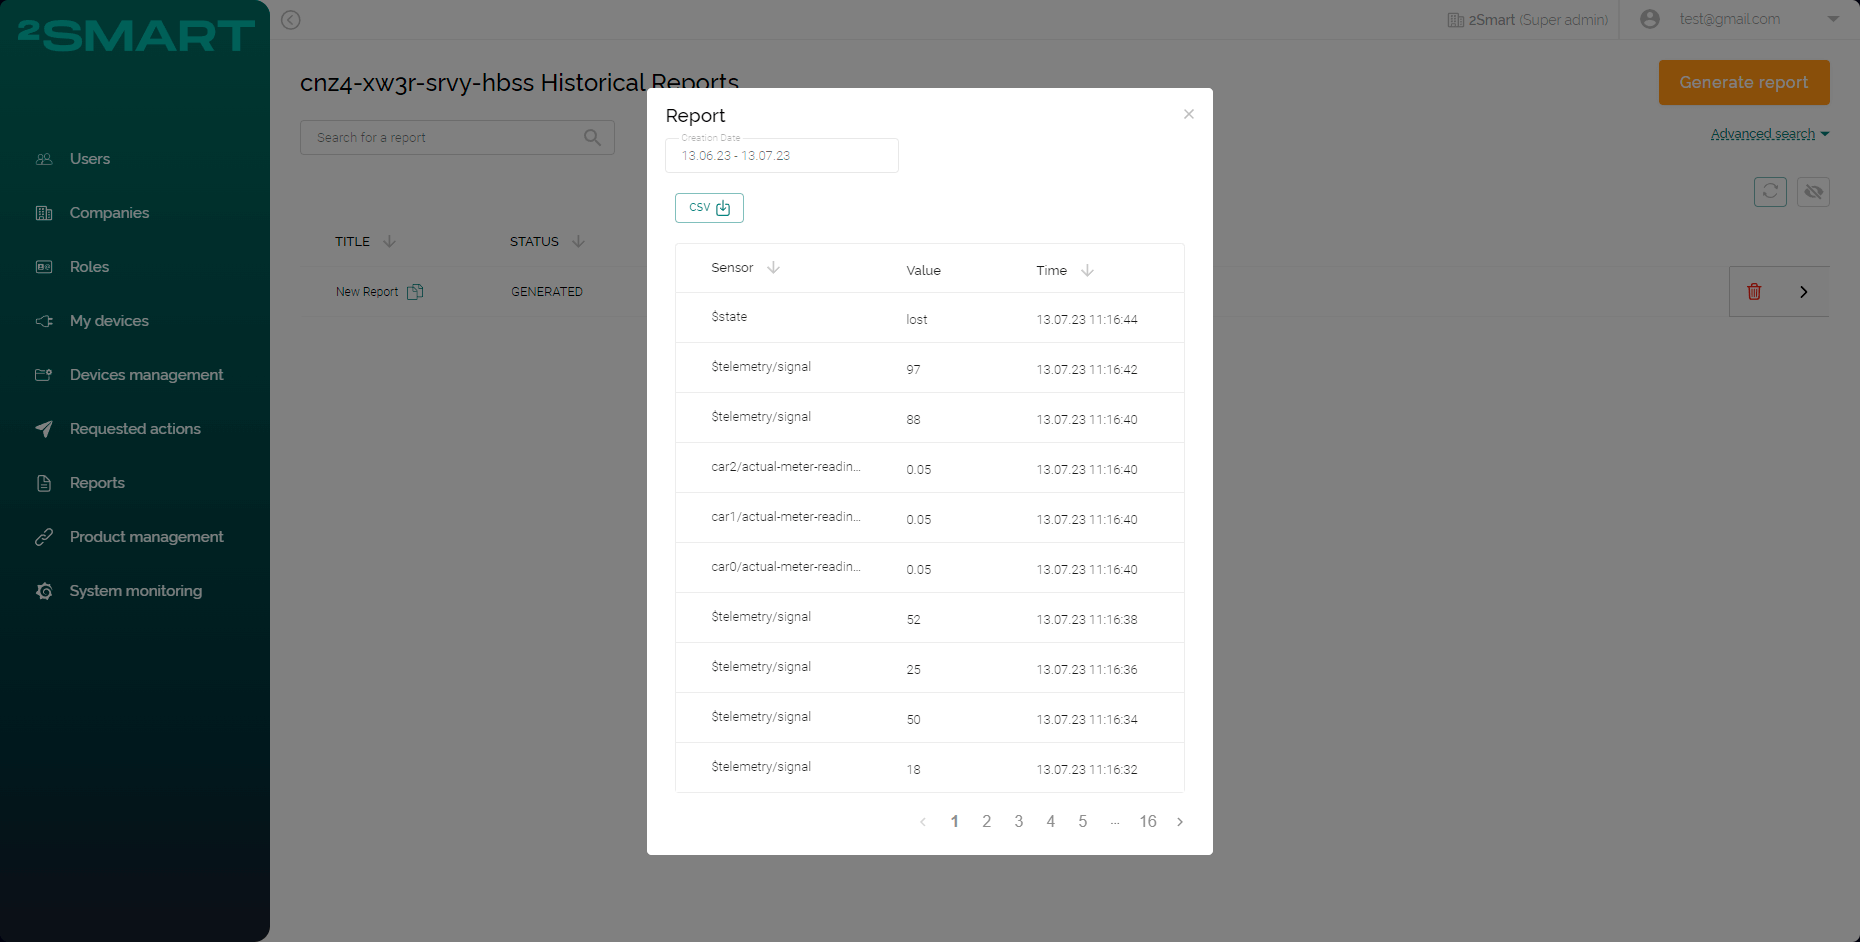
Wait for some seconds while the report’s status will change to “Generated”. If you need, you can copy the report’s name or delete the report; filter reports by status or created date.

Click the “>” button to open the created report. In the shown modal you see all device’s sensors and their values for chosen dates. By clicking on the “csv” button, you can download the report.
To have the data in the report, the device shoud be paired previously, to have the values for its sensors.
Ability to pair the device without the mobile application
This feature allows you to pair the device without the mobile application, set up the device and send it to the end user with all required settings. It reduces the amount of effort that the end user should make for settings and pairing the device from their side.
To make it possible, the company account entity was created. Company account is created/deleted automatically after the new company creating/deleting. Such accounts are marked as a “System created”, they can’t be edited, deleted etc even the super admin.
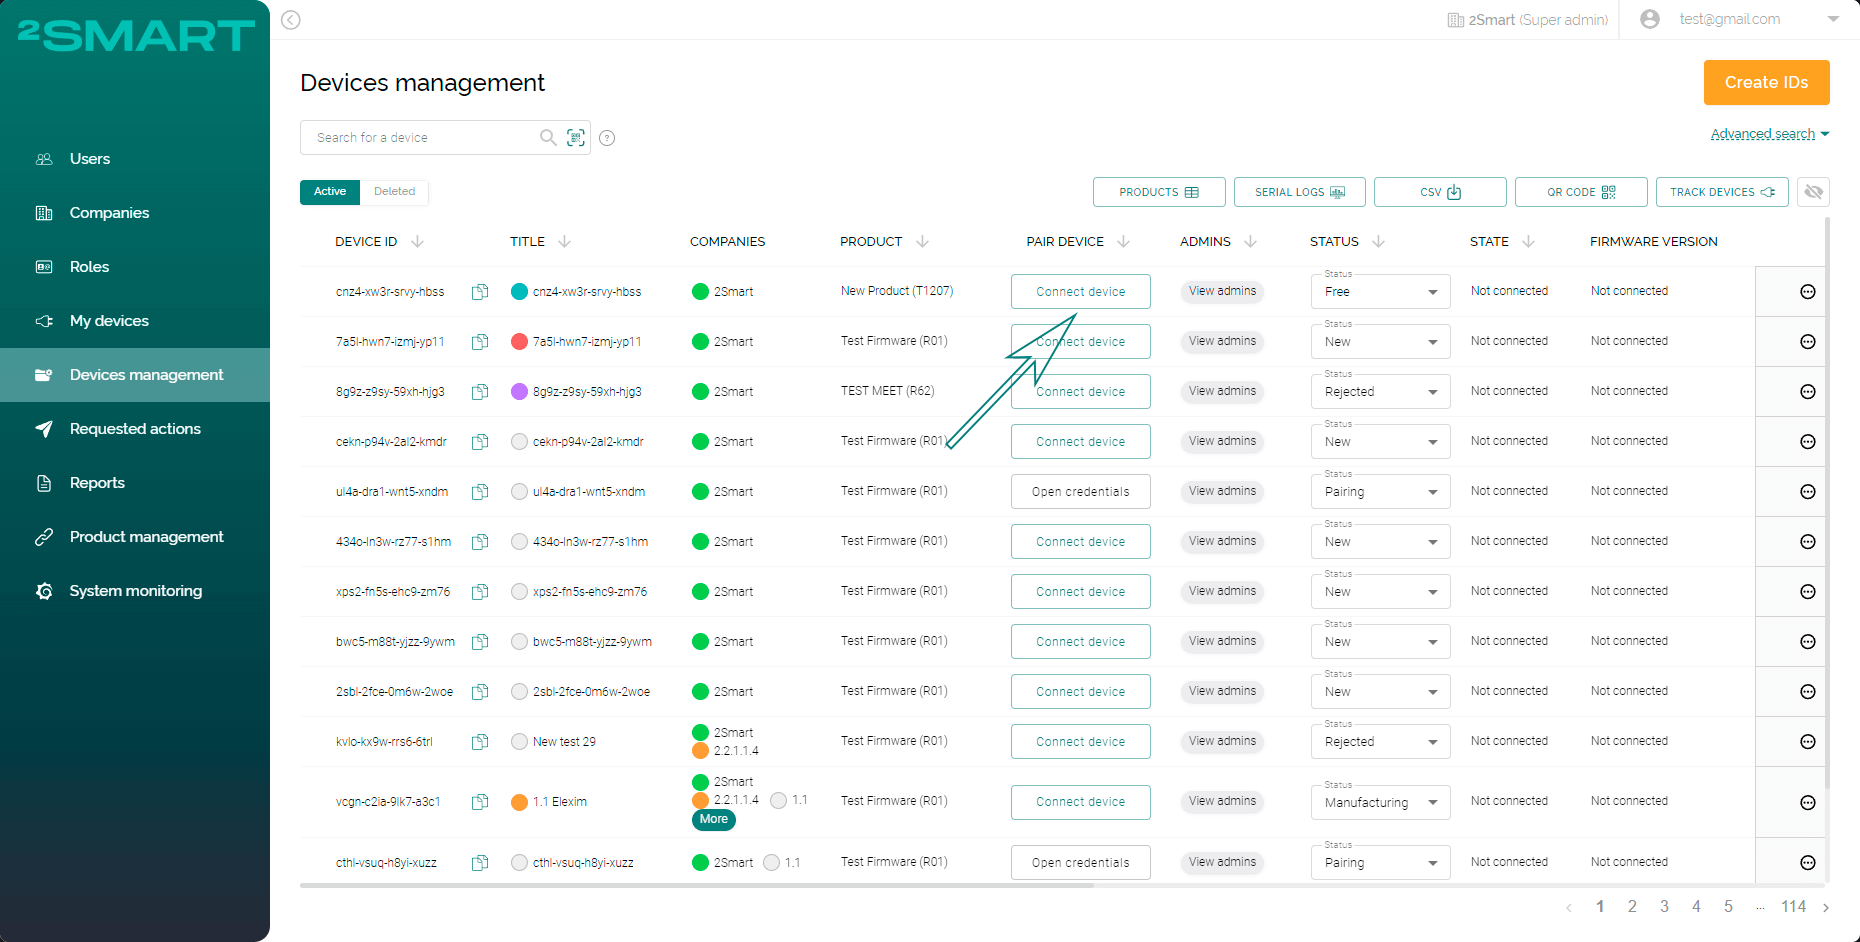
To pair the device using the admin panel, you need to get credentials for pairing. To get it, go to the “Device management” page, click the “Connect device” button.
Please note that credentials are generated for the devices with the “Free” status only.
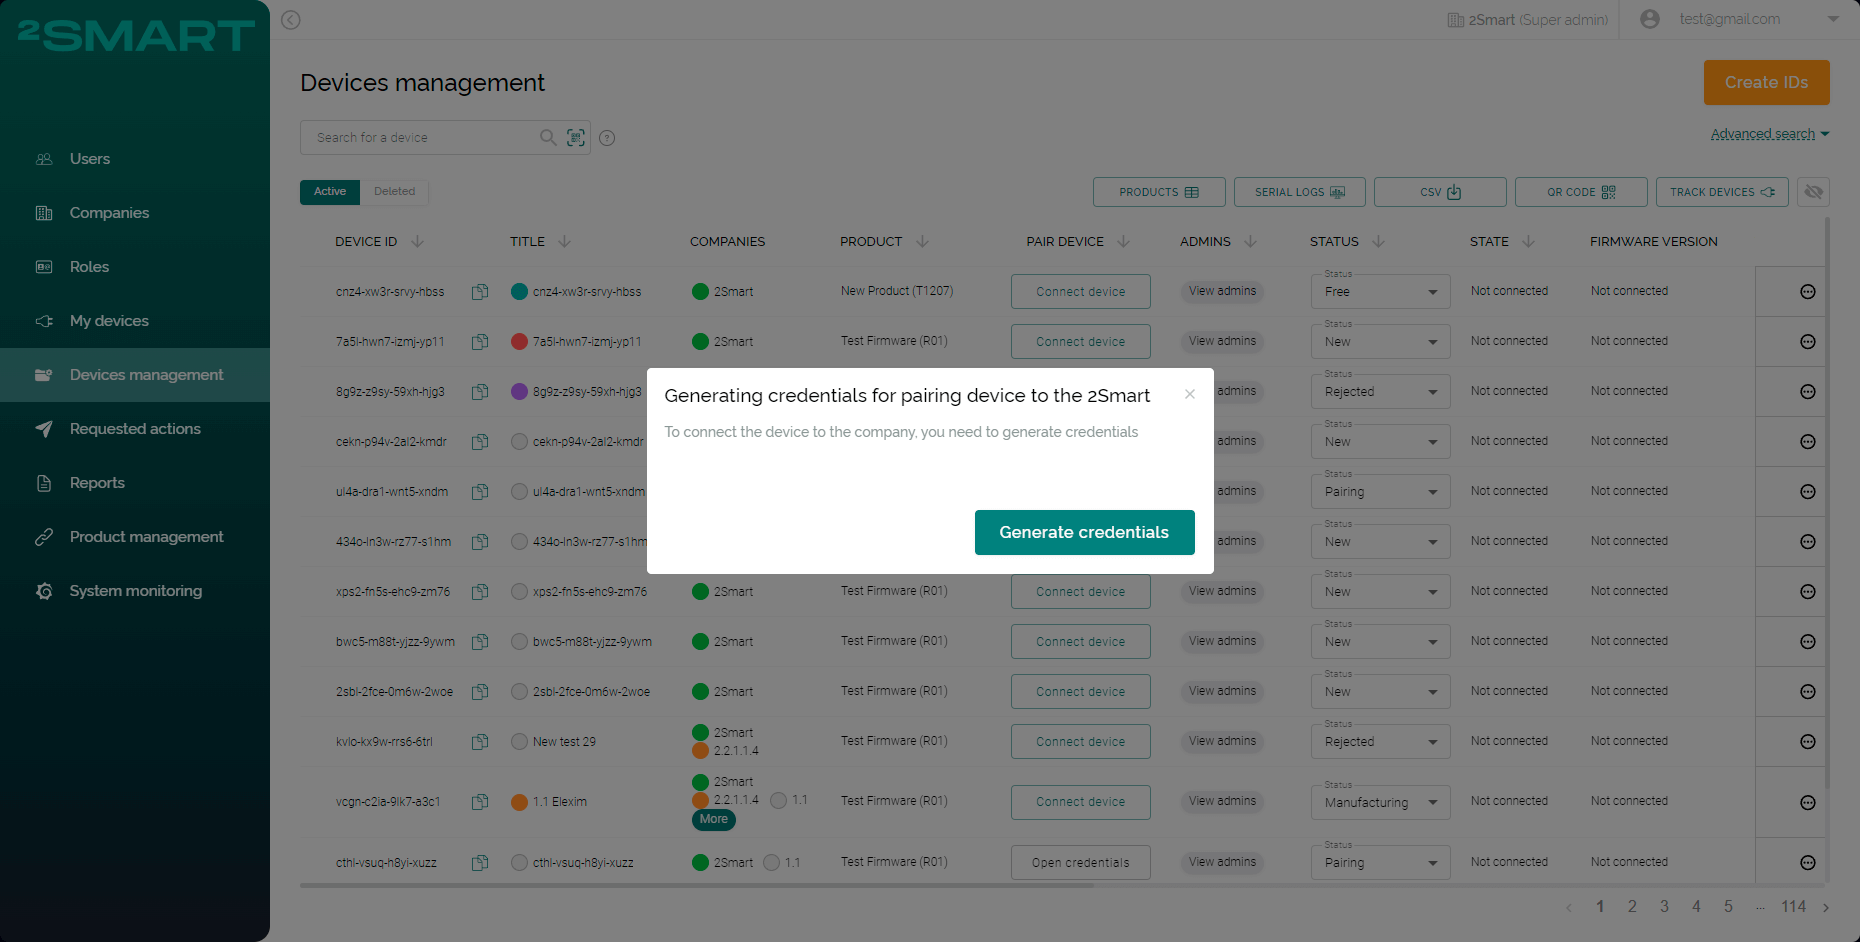
Click the “Generate credentials” in the modal window that appears.
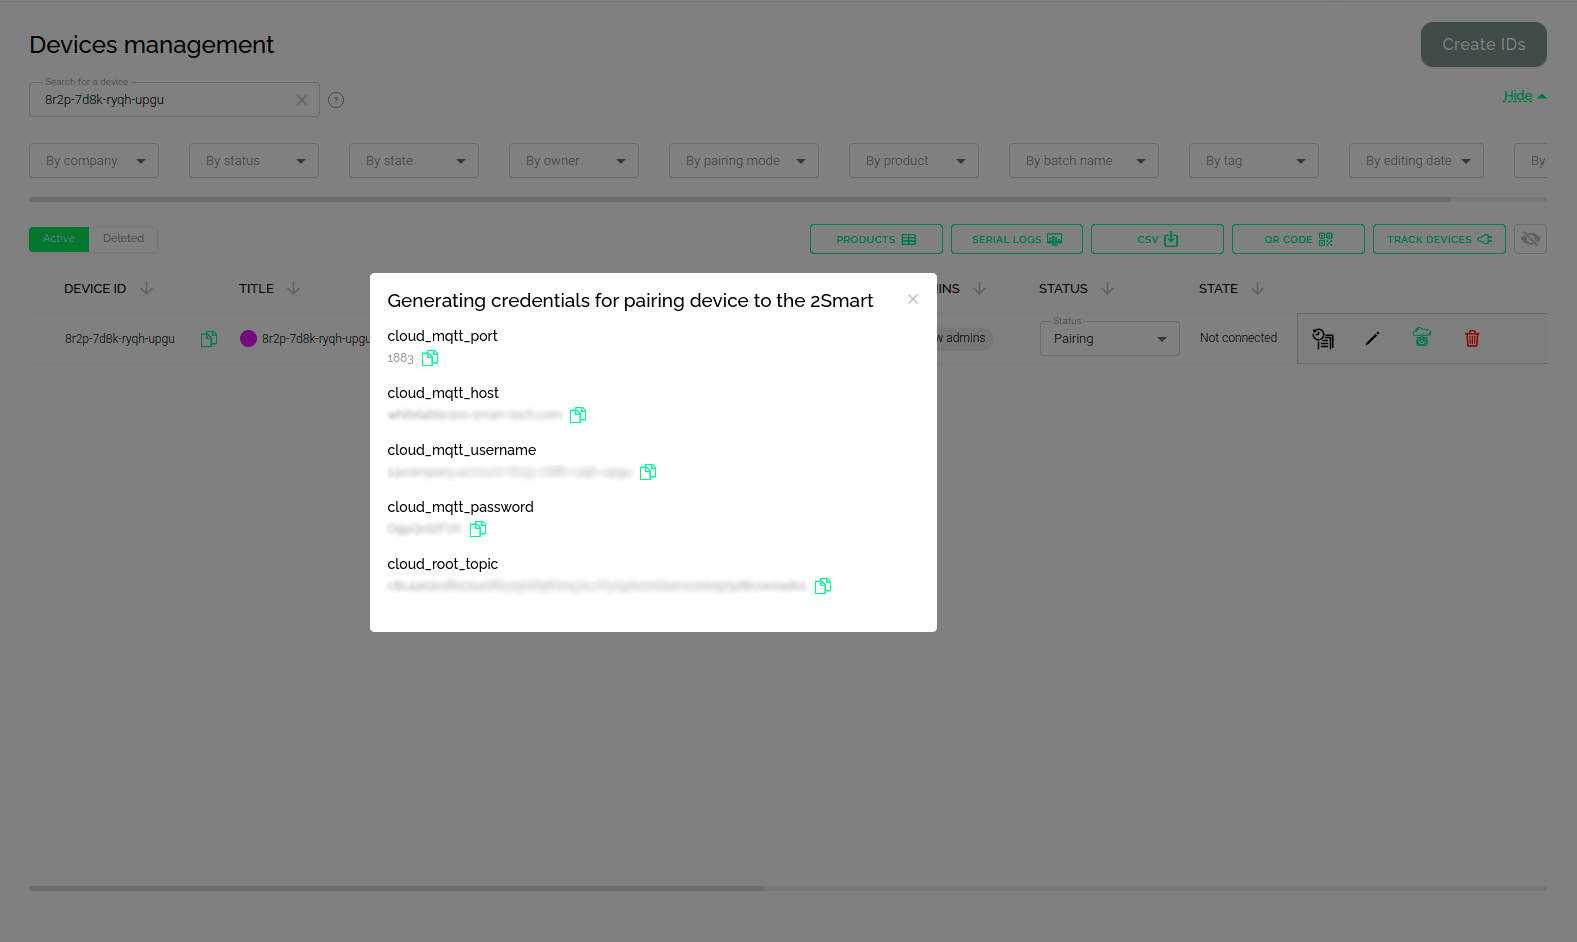
After that, you get credentials you need for the device pairing:
- cloud_mqtt_port,
- cloud_mqtt_host,
- cloud_mqtt_username,
- cloud_mqtt_password,
- cloud_root_topic.
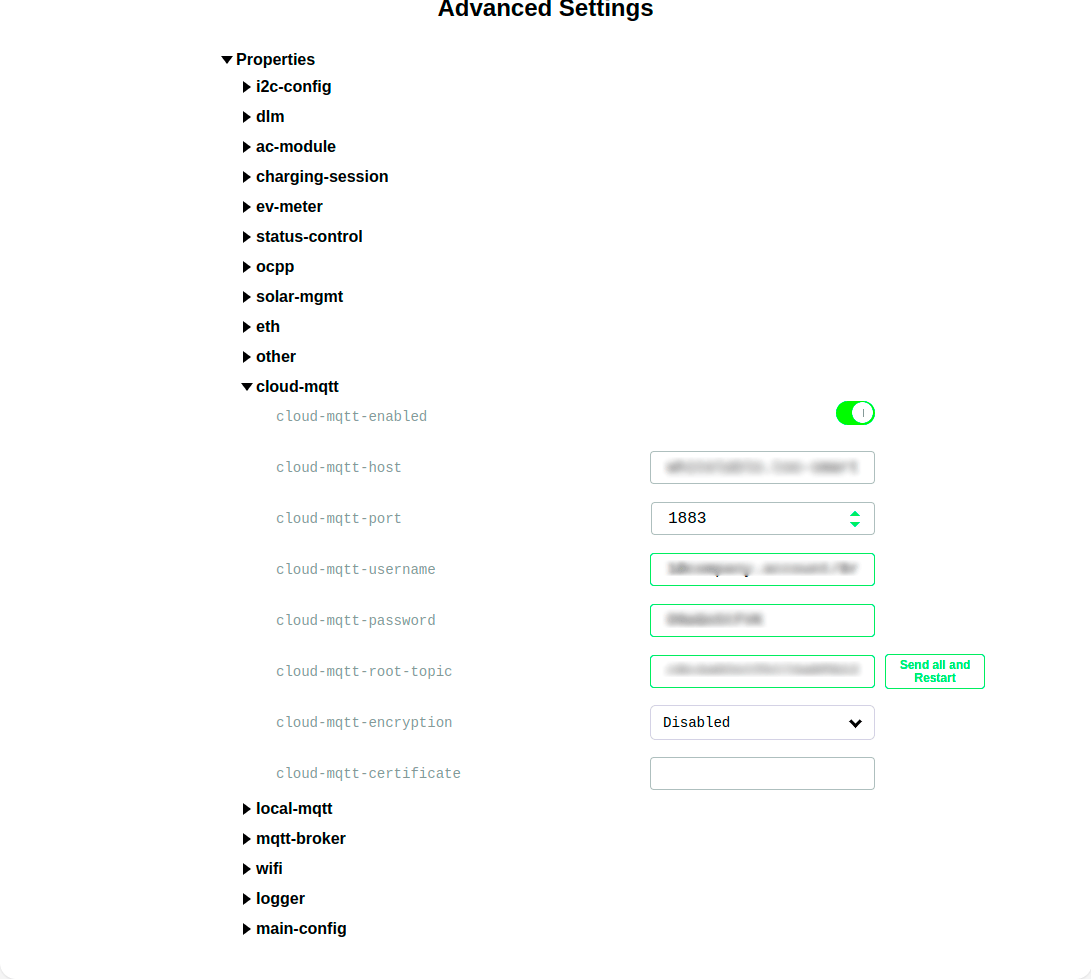
Flash the device, go to its web or another interface, and enter the generated credentials.
Finish the pairing and manage your device via the admin panel.
Another advantage of the pairing to company accounts is that this paired device is available for all company participants with the relevant permissions.
Ability to scan and automatically insert data from barcodes and QR codes in the admin panel
This feature allows the Admin to scan and insert the data instead of entering it manually. It’s really useful if you need to enter a lot of the same data in different fields.
You can scan barcodes and QR codes. Be sure that they are generated correctly and fully. If you want to scan the code, find the marked below icon in the field and click it.
Don’t forget to give an access to your camera.
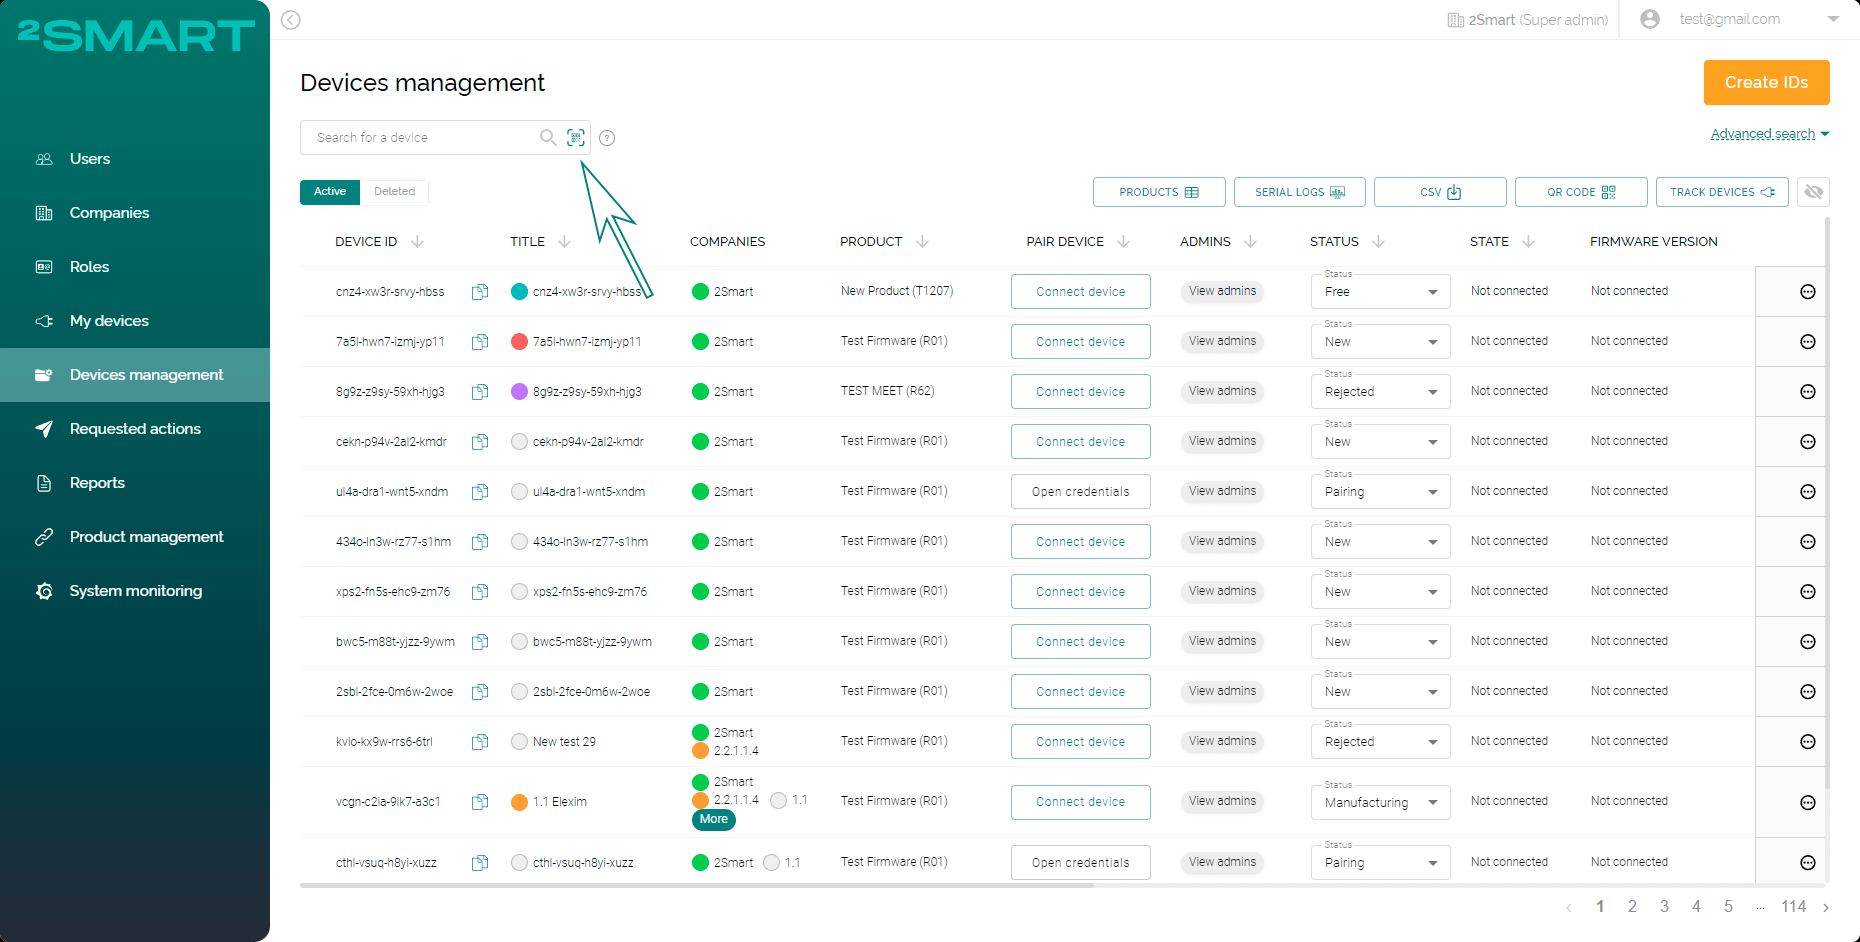
This feature is available for the following fields:
- “Search for a device” on the “Device management” page.
- “Title” and “Machine ID” on the “Edit ID” modal window.
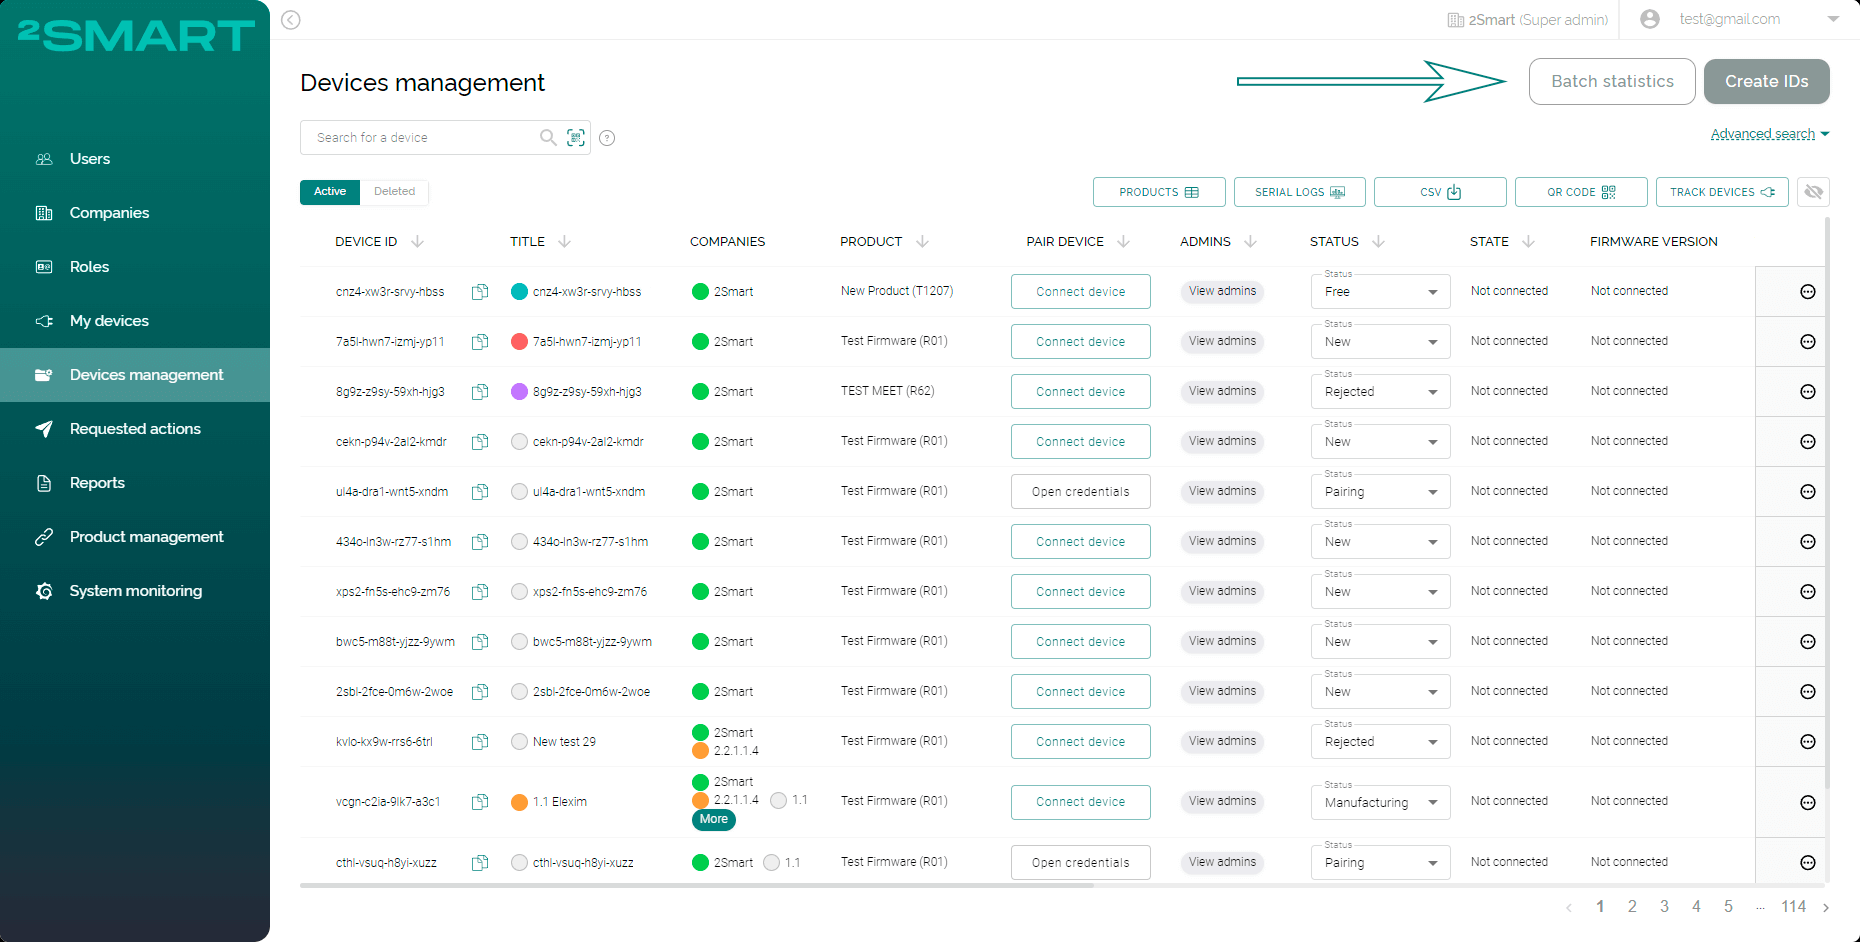
Ability to view batches overview and statistic
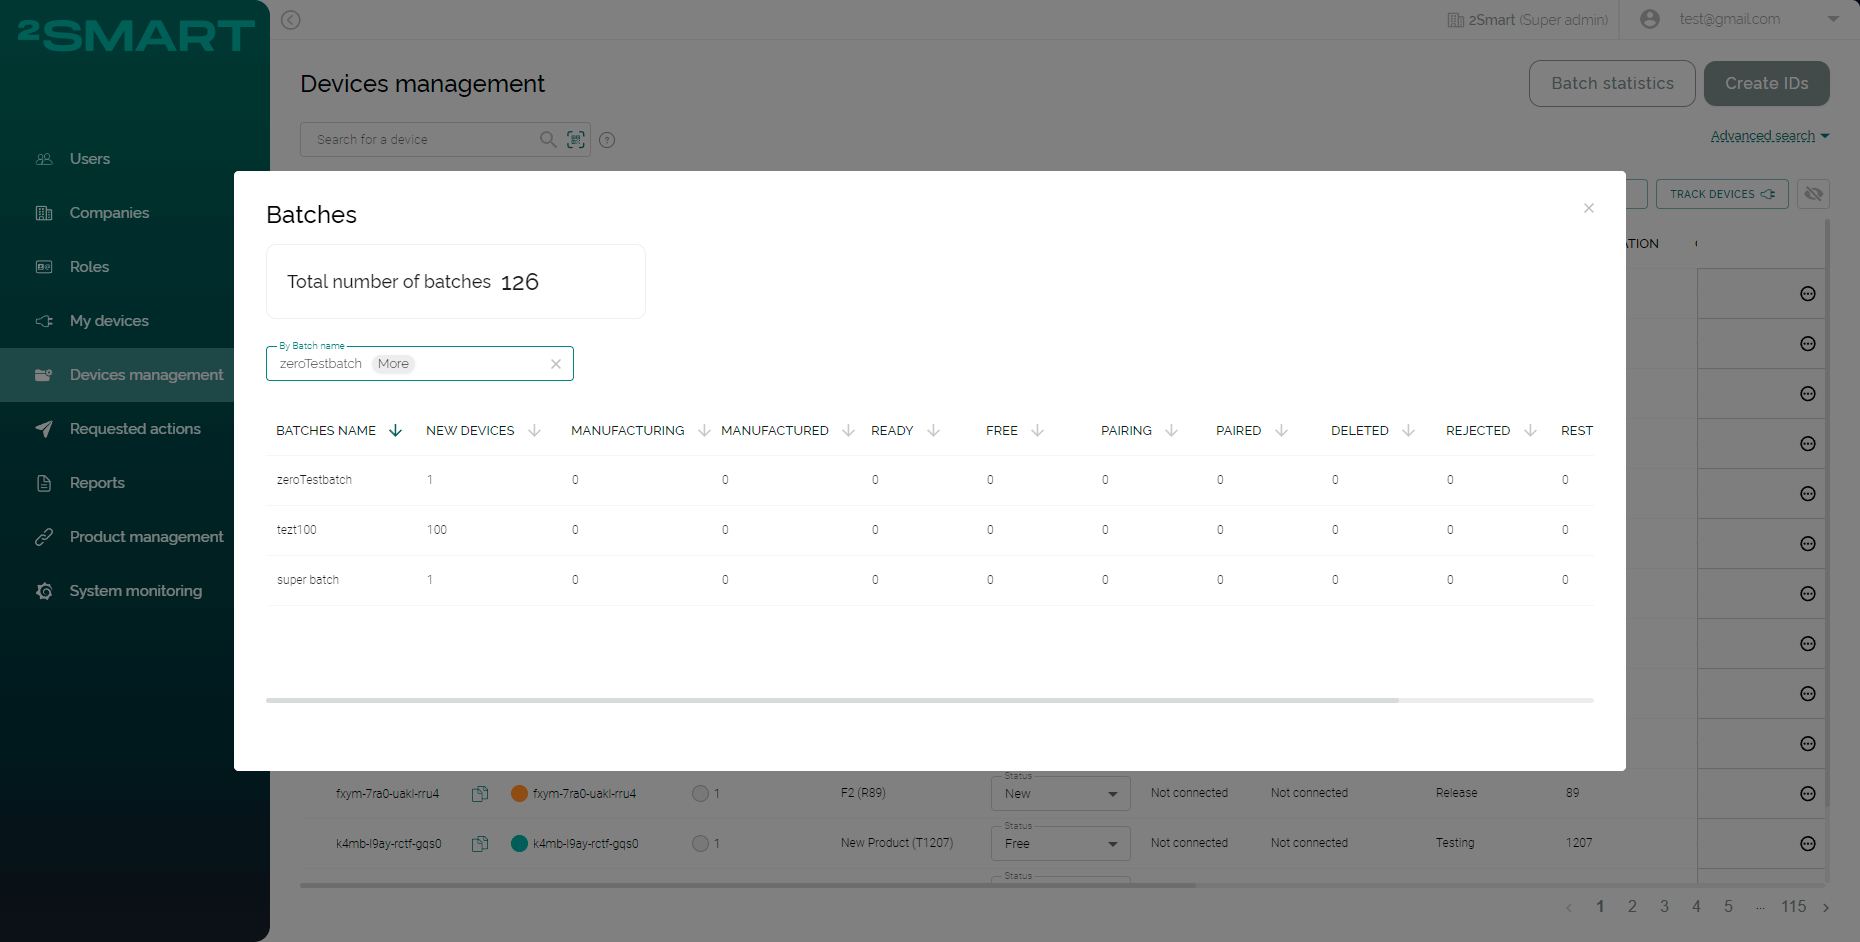
This feature allows Users with a Super Admin role to view the batch list and its statistic. To open the modal window with this info, click the “Batch statistic” button on the “Devices management” page.
In the modal window that appears, a Super Admin sees the total number of batches and a list of batches created on the platform.
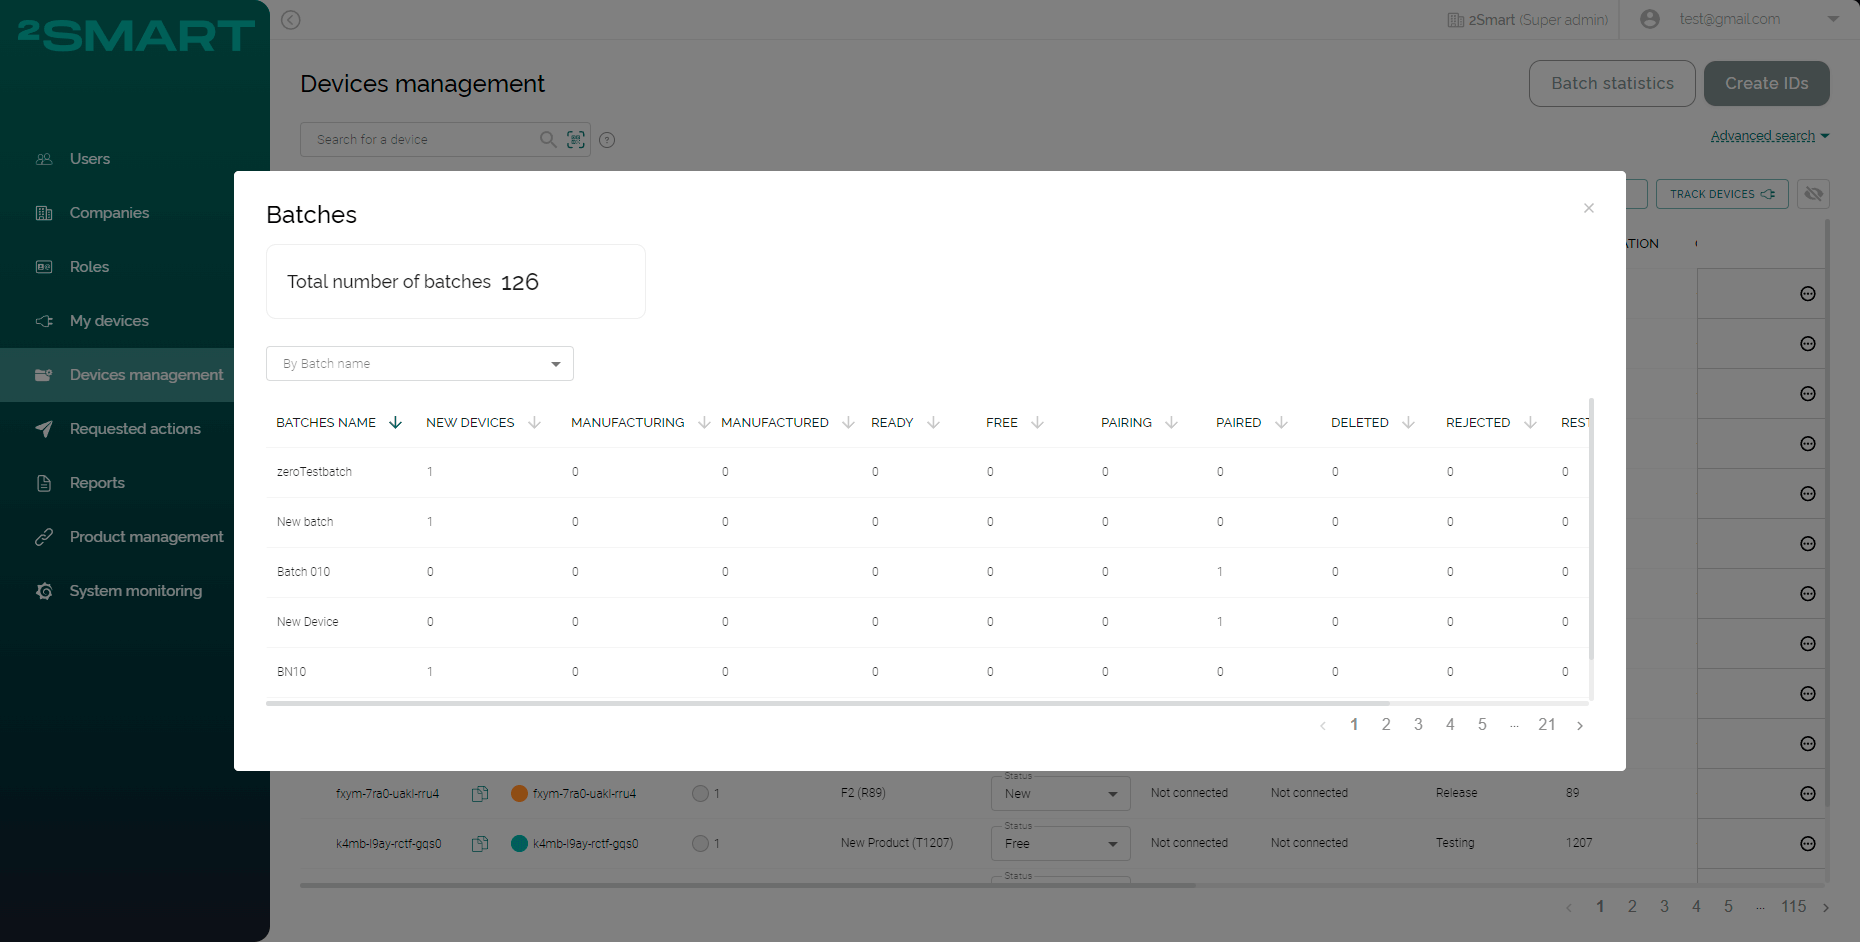
For each batch, there is a statistic for the following device statuses:
- new devices,
- manufacturing,
- manufactured,
- ready,
- free,
- pairing,
- paired,
- deleted,
- rejected,
- restricted.
Also, there is shown a total amount of devices in each batch.
The User can also see the overall statistics for each status - all and filtered batches.
For Users' convenience, filters and sorting are added. Click the "By Batch name" button and choose one or a few batches in the dropdown list to filter statistics. Sorting is available for all columns.
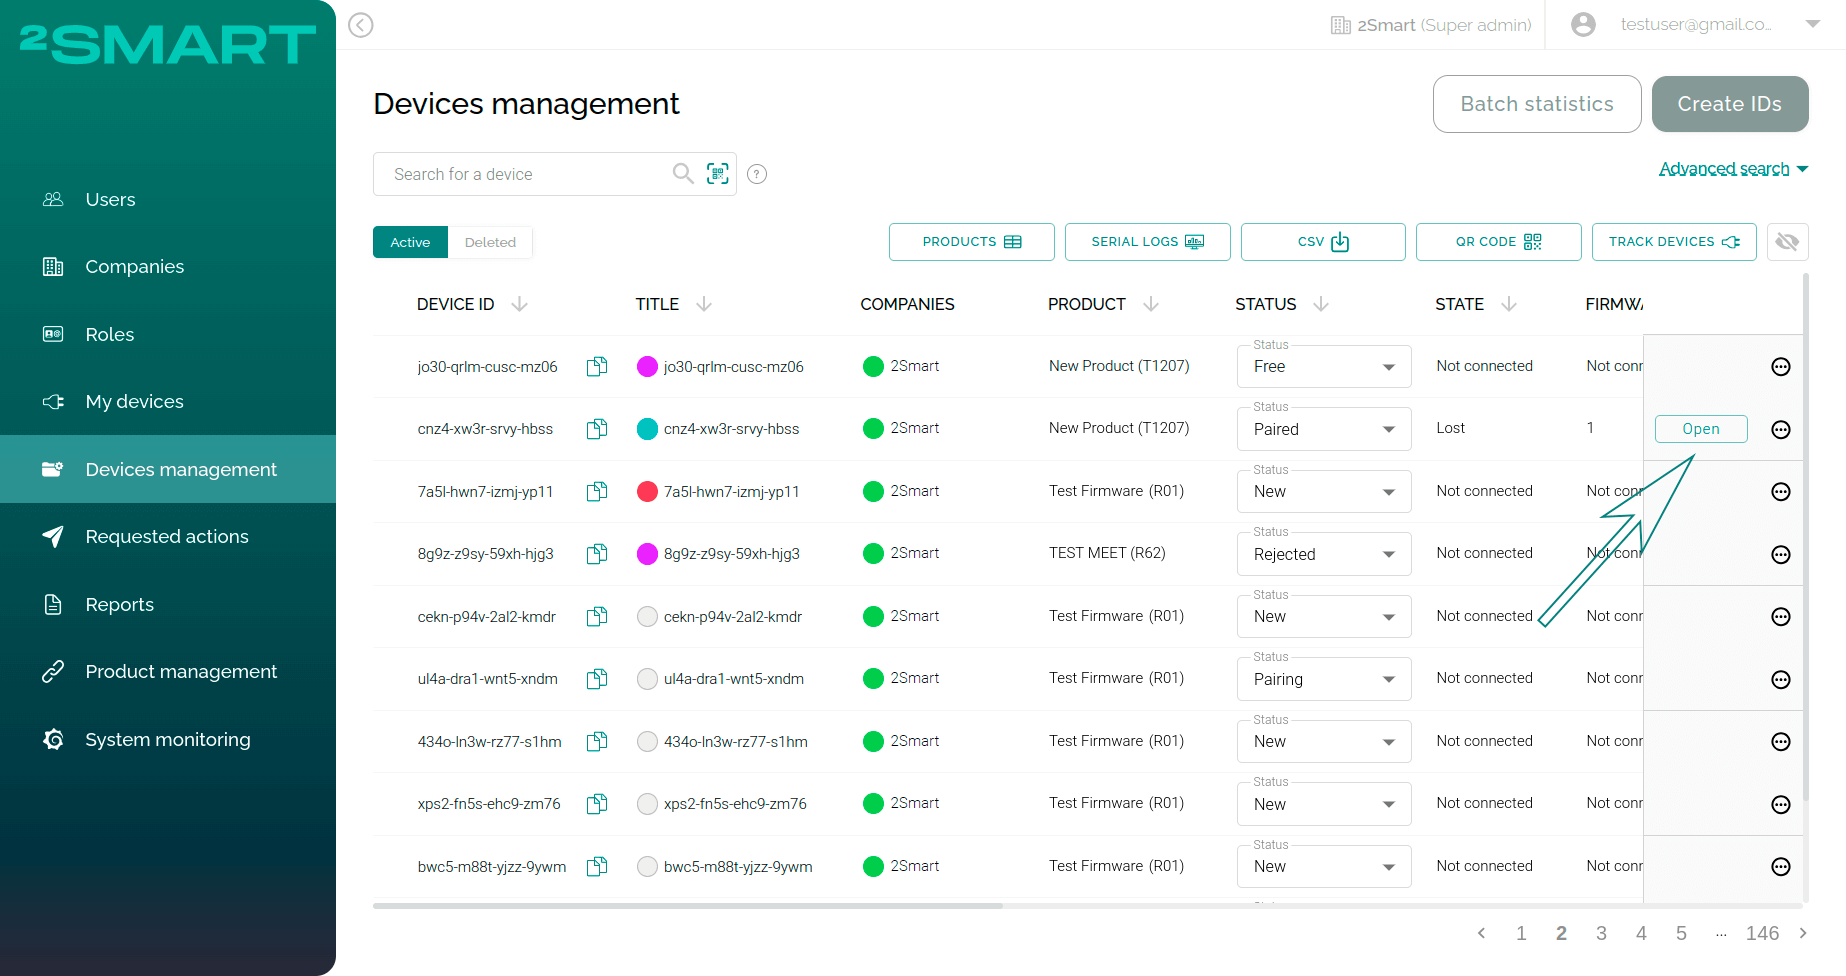
Ability to view description of the sensors for specific device
The Users with access to the “Devices management” page can see the sensor descriptions of their devices. To do that, open the device page by clicking the “Open” button.
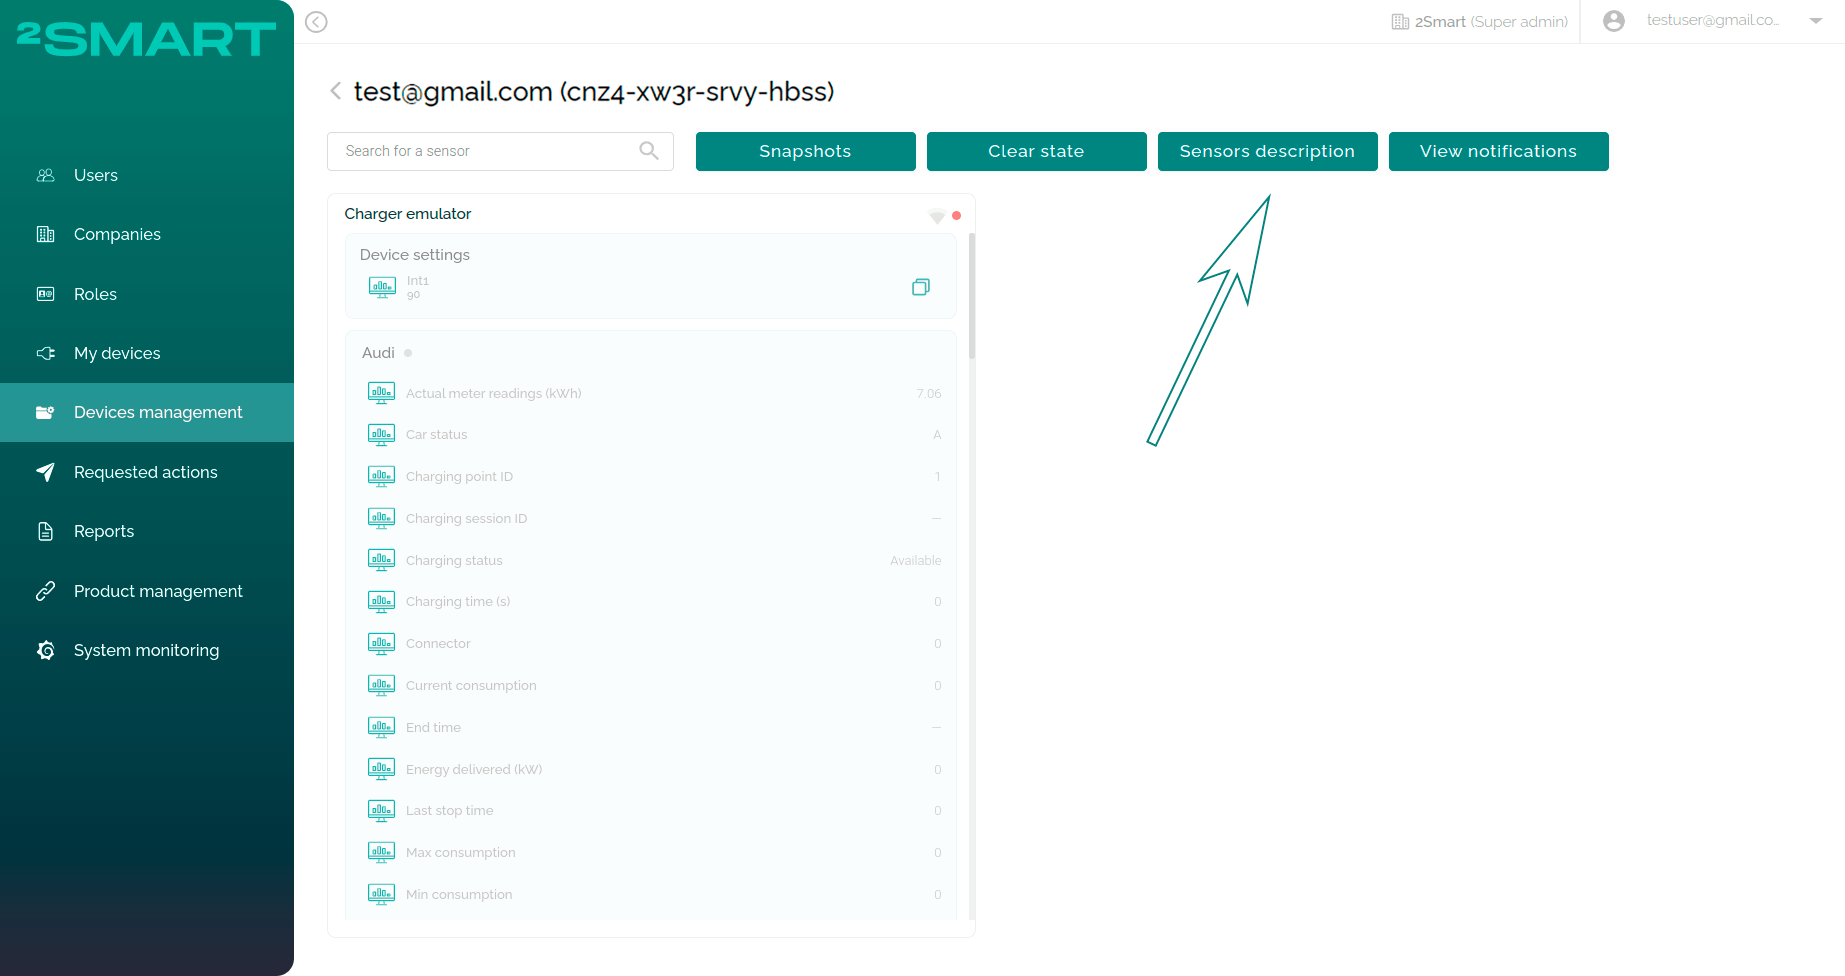
Click the “Sensors description” button.
In the modal window that appears, you see the list of sensor descriptions of a given device - sensor, title, description, HTML, and possible value.
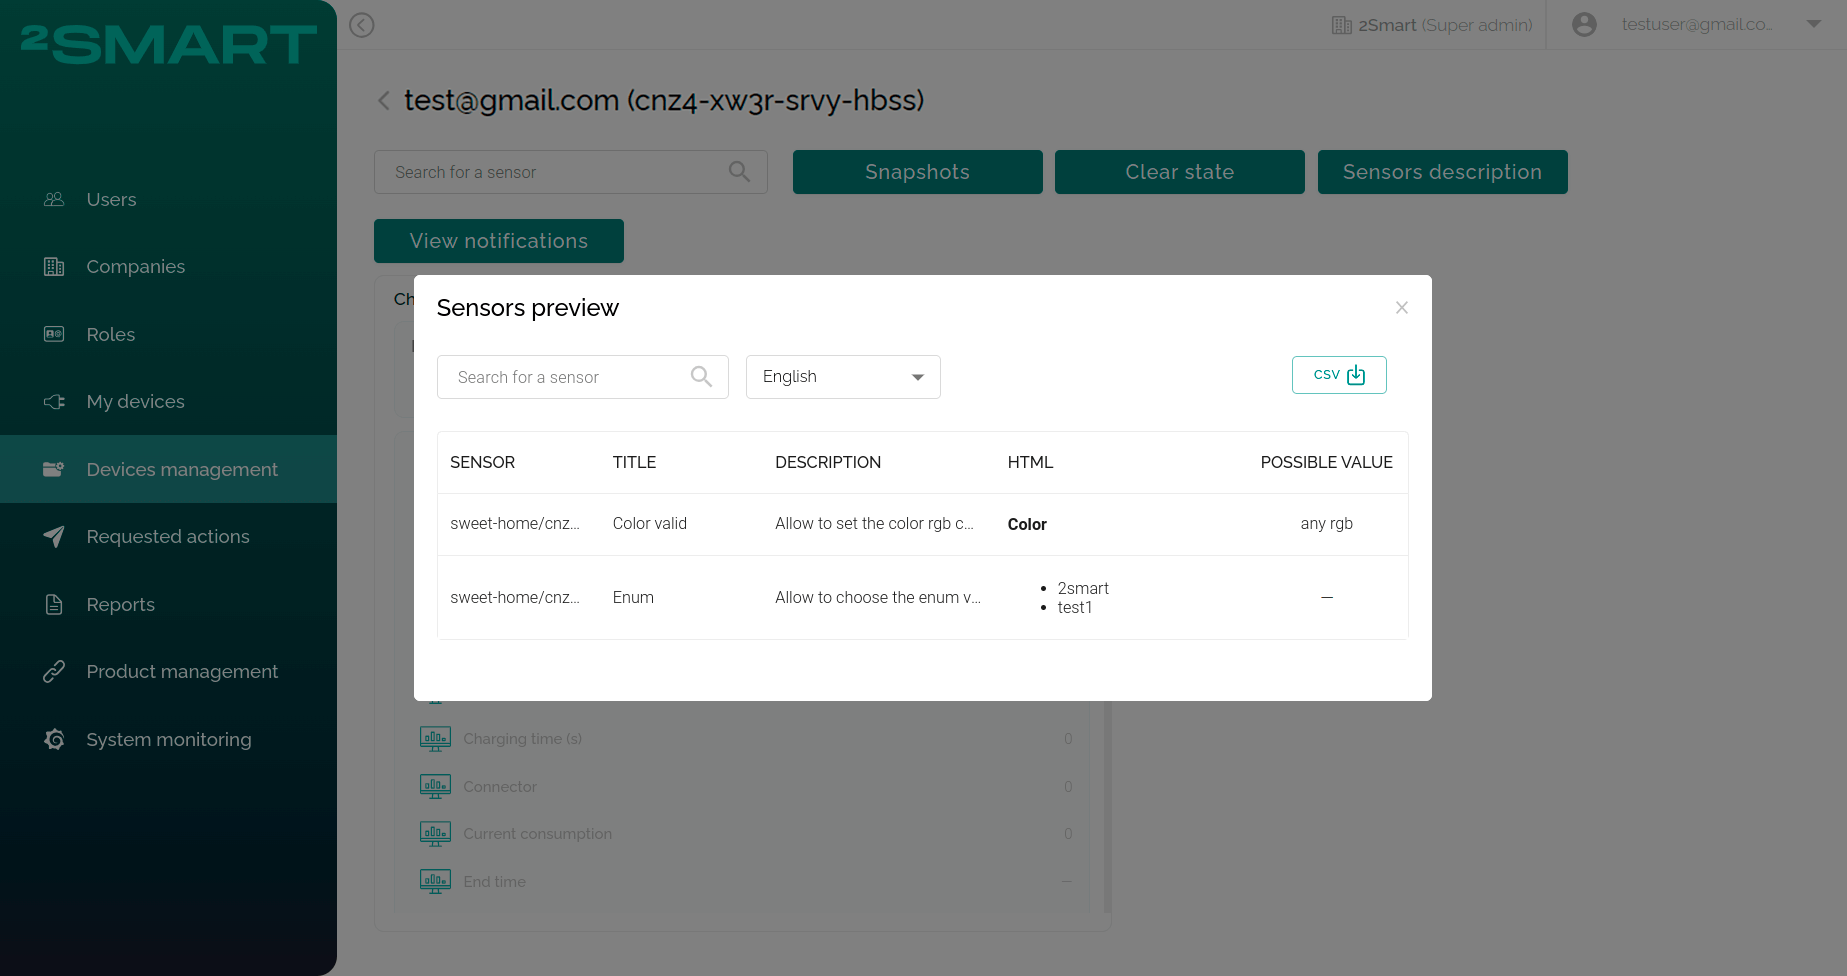
You can search the description by a sensor, filter by language, or download it in the CSV.