“Product management” link
The menu link "Product management" lets administrators quickly jump to the vendor platform designed to create a new product. In the vendor platform, an administrator can create a product, write firmware or upload an already written one, and customize the unique mobile application interface for Users with different Roles.
Special vendor platform features for business platform administrators
Unique mobile app design for Users with different Roles
To customize the unique design of the mobile application depending on the User's Role, create the necessary layouts in the vendor's platform. For example, give the Super Administrator full access to all features and telemetry of the device, and the end-user - access only to the product's primary features.
See the mobile app interface updating instructions to add an additional layout for a published product. Make the necessary changes and publish the new product version to the platform.
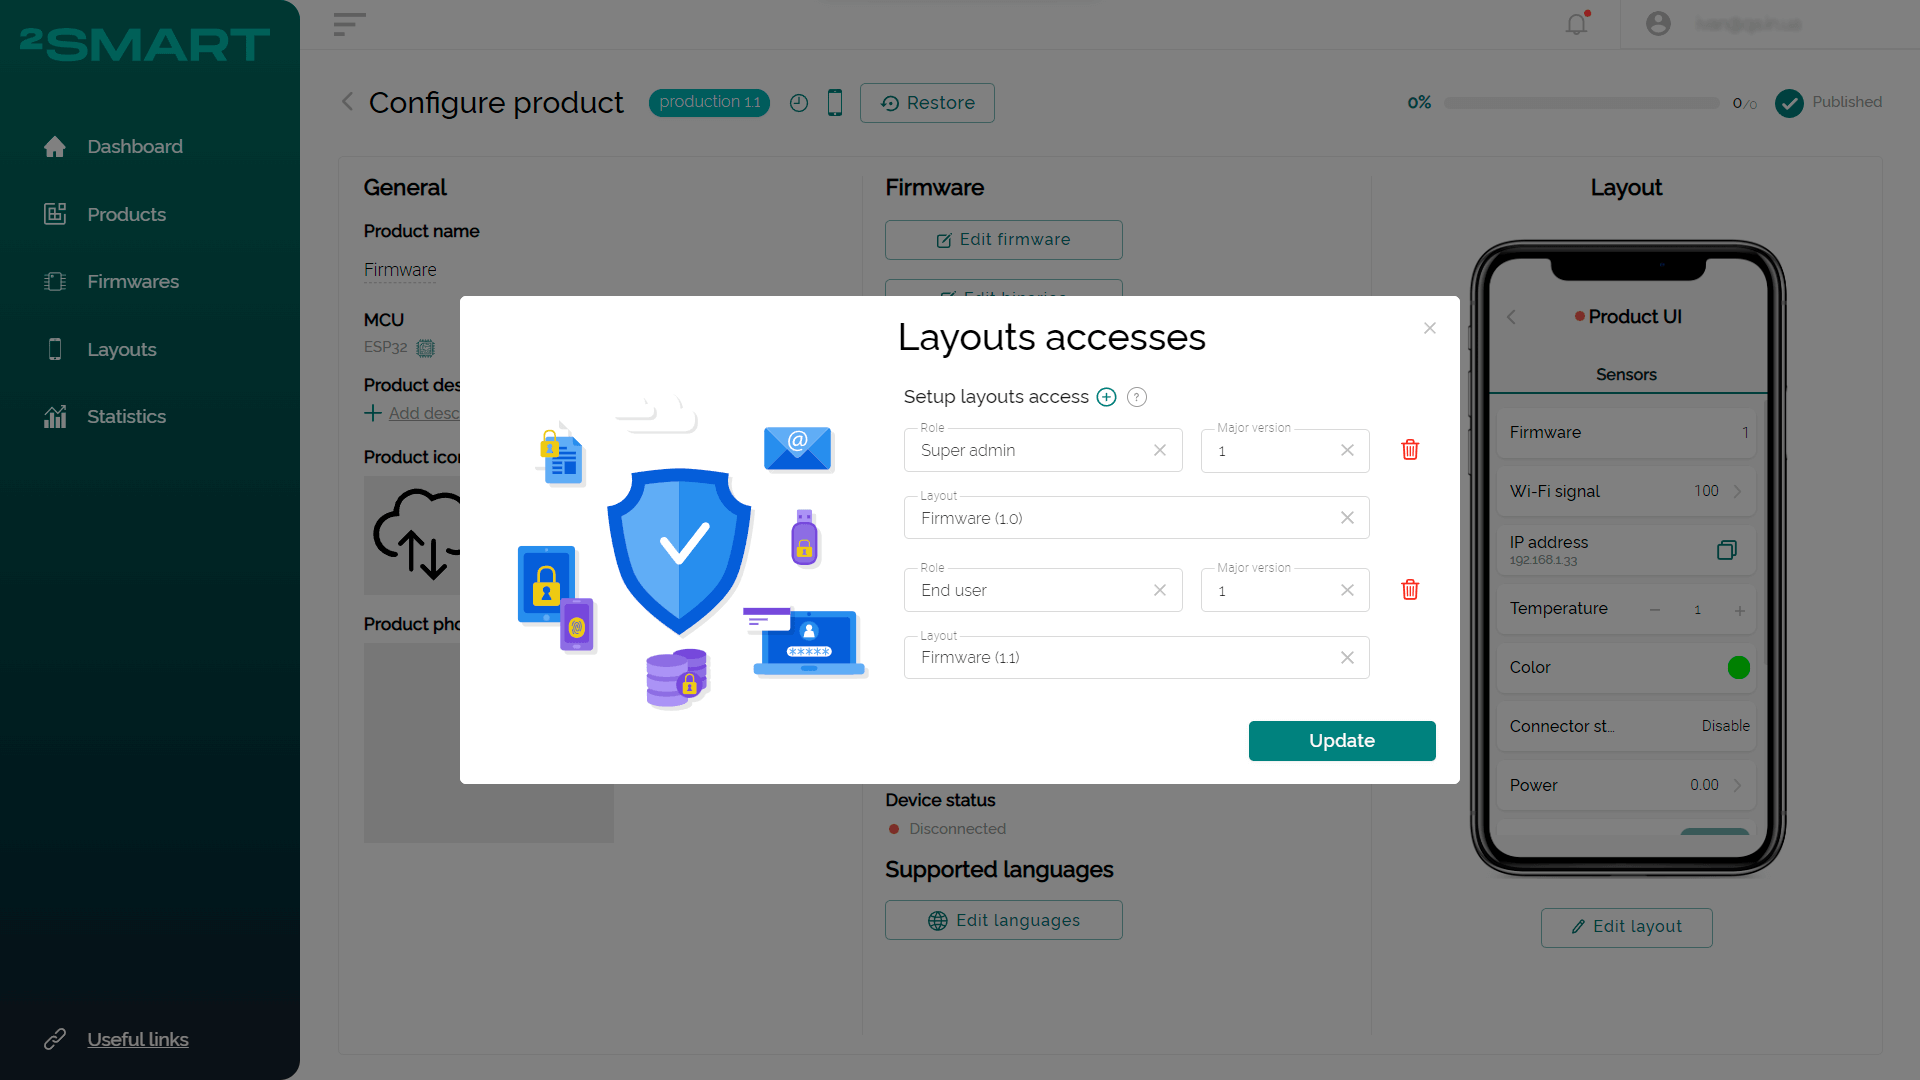
Click on the "Manage layouts access" icon when finished.
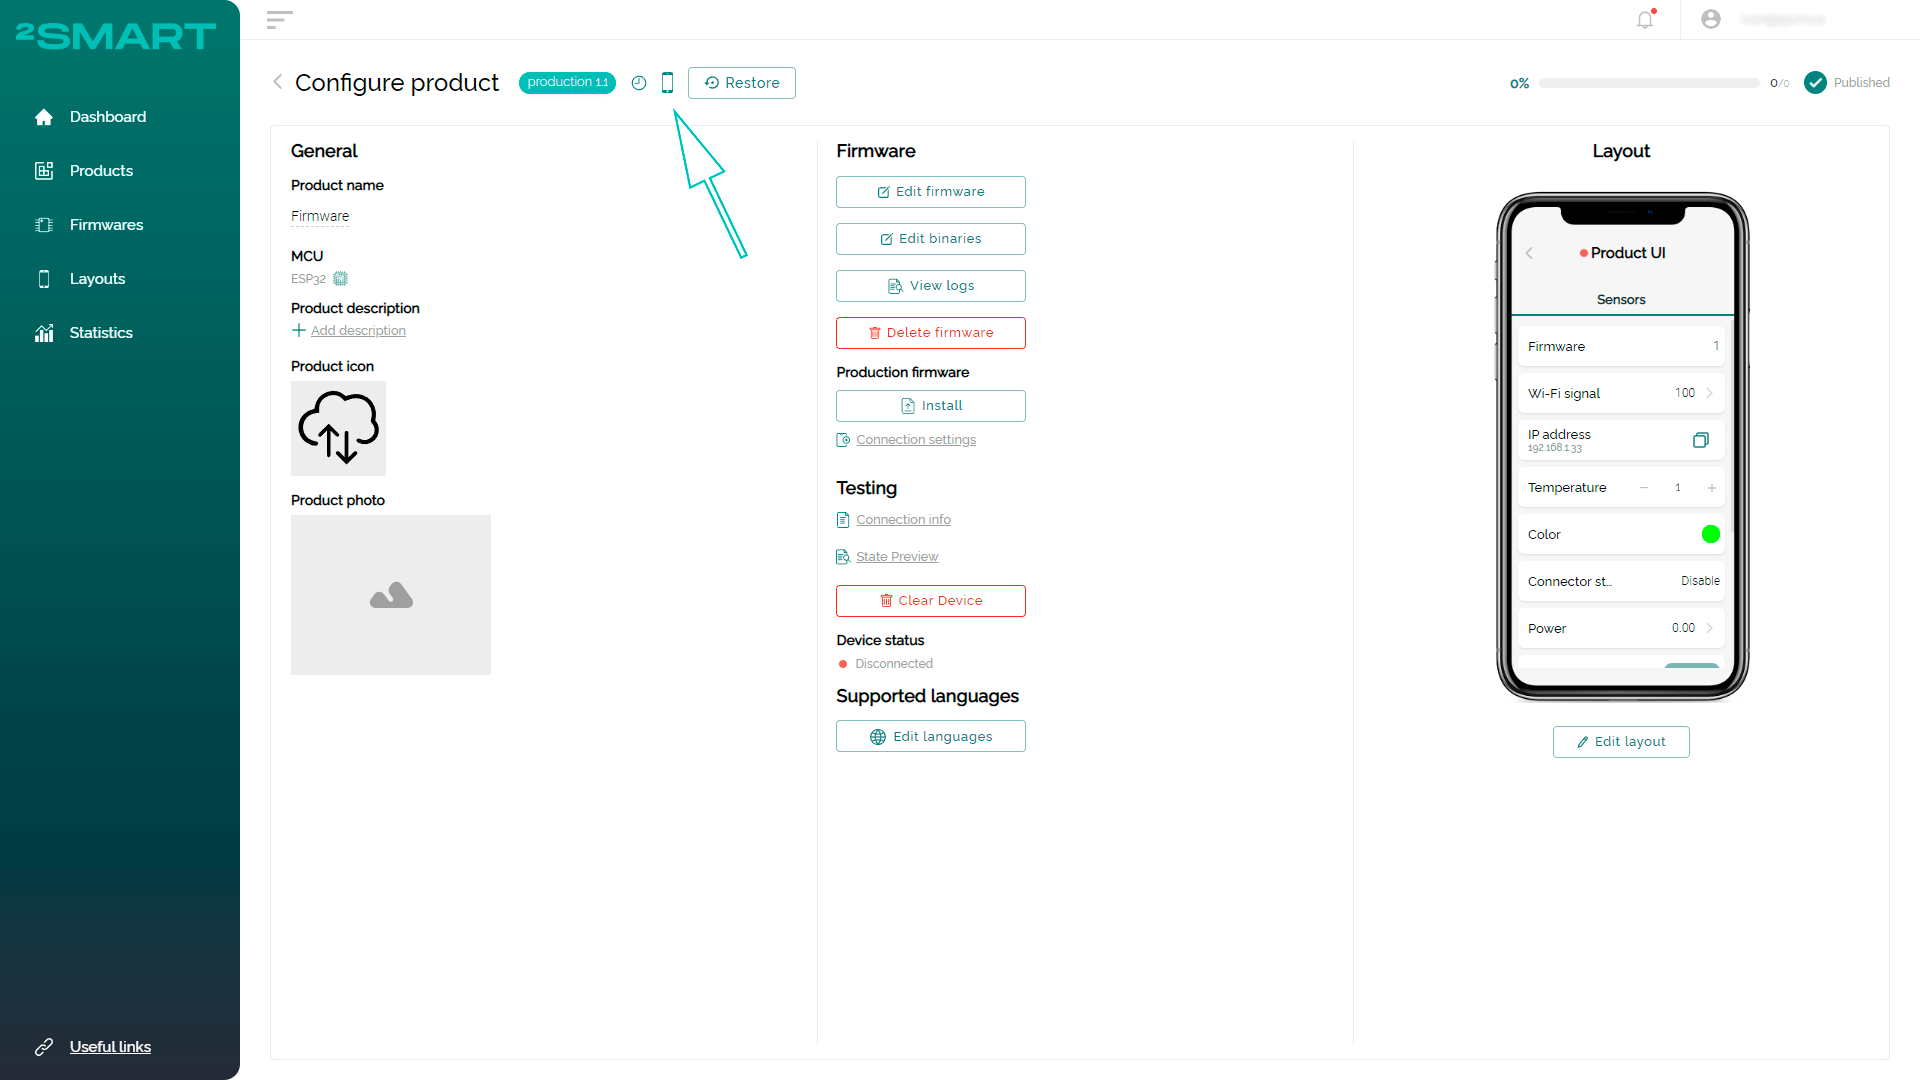
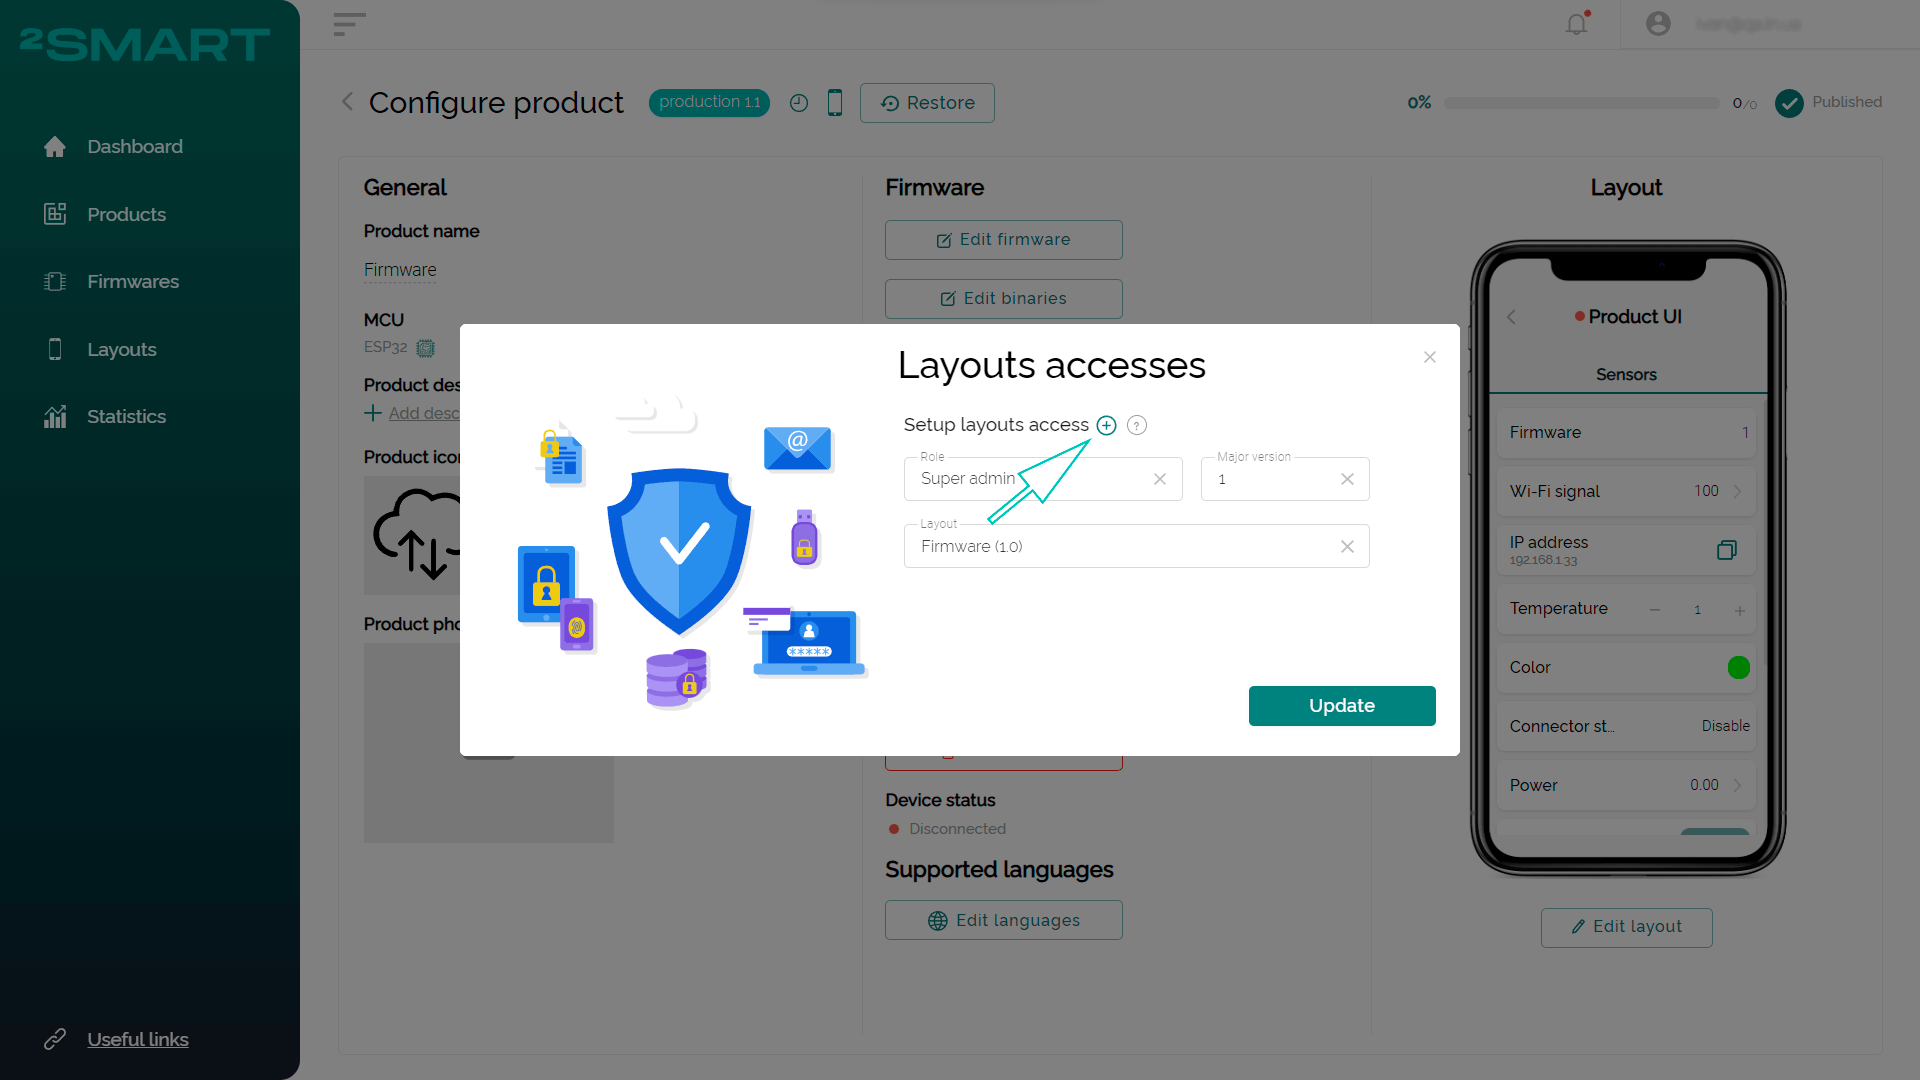
In the modal window that appears, match the Role, Major version of the product, and Layout.
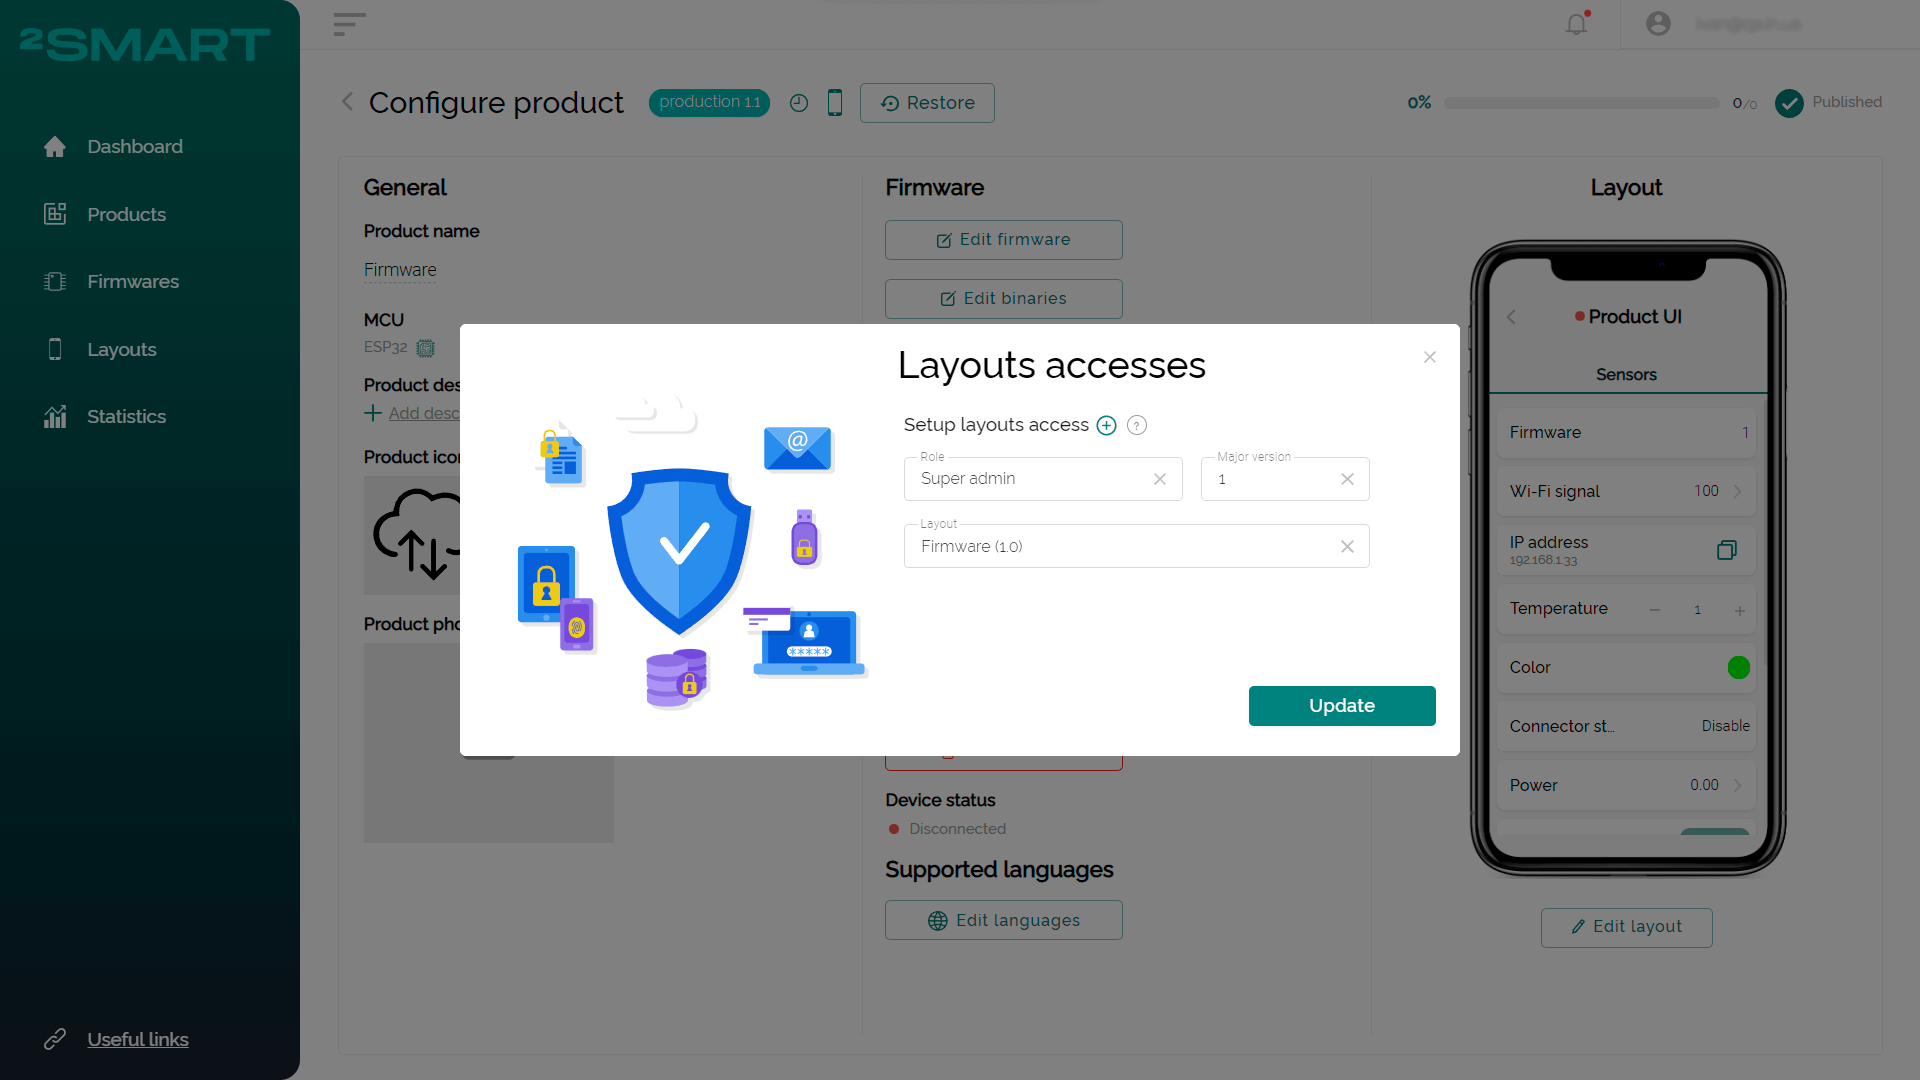
Click on the "Add layouts access" icon and make settings for the next Role. Repeat as many times as necessary and click the Update button when finished.
Automatic layouts copying
When there are different layouts setted to the different roles, you can copy them to the new major version during the product publishing.
After clicking the “Publish” button for the product with the major updates, you’ll see the “Copy layouts” modal window.

Click the “Copy layouts” button to copy the layouts and their access from the previous major product version. Click the “Skip” button to refuse such copying.
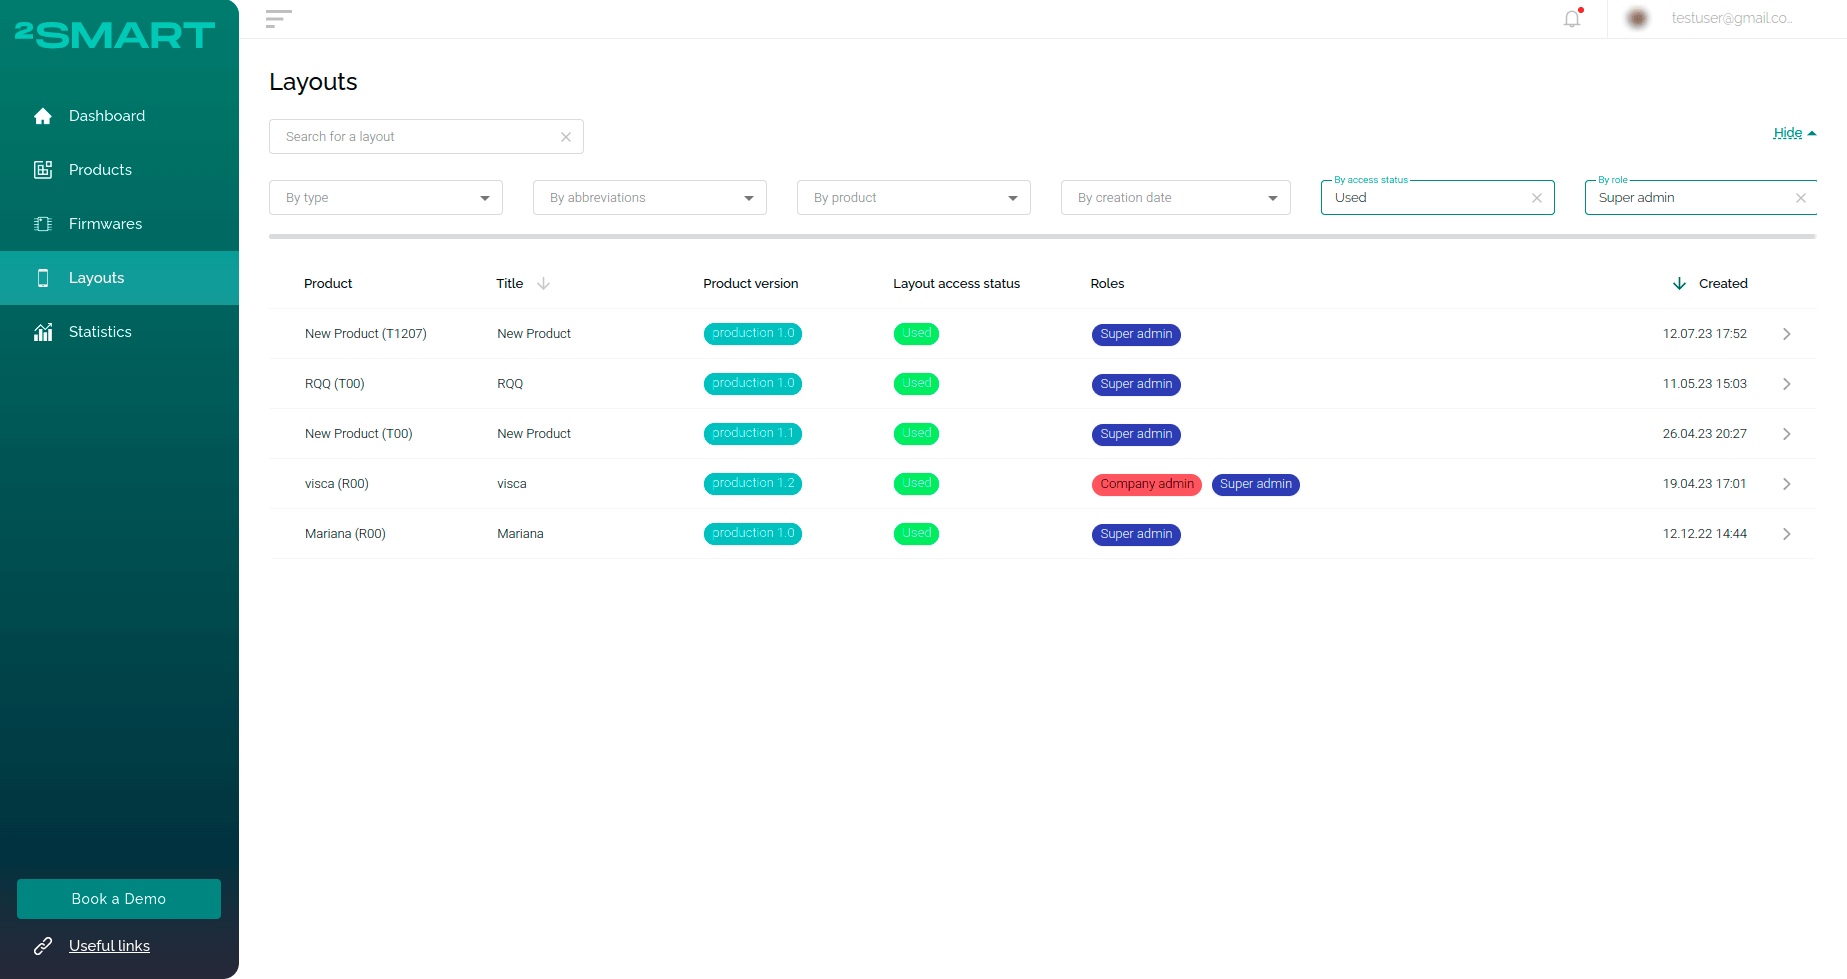
Status of the used layouts on the “Layouts” page
This feature allows the vendor to view the layouts access status on the “Layouts” page. As the vendor can set different layouts for different roles, and there can be really many layouts versions on the platform, it’s really useful to see which of them are used already.
Go to the “Layouts” page.
The “Layout access status” column shows the layout status (used/not used) and the “Roles” column shows for which role this layout is applied. In the advanced search, you can filter layouts by access status and by role.
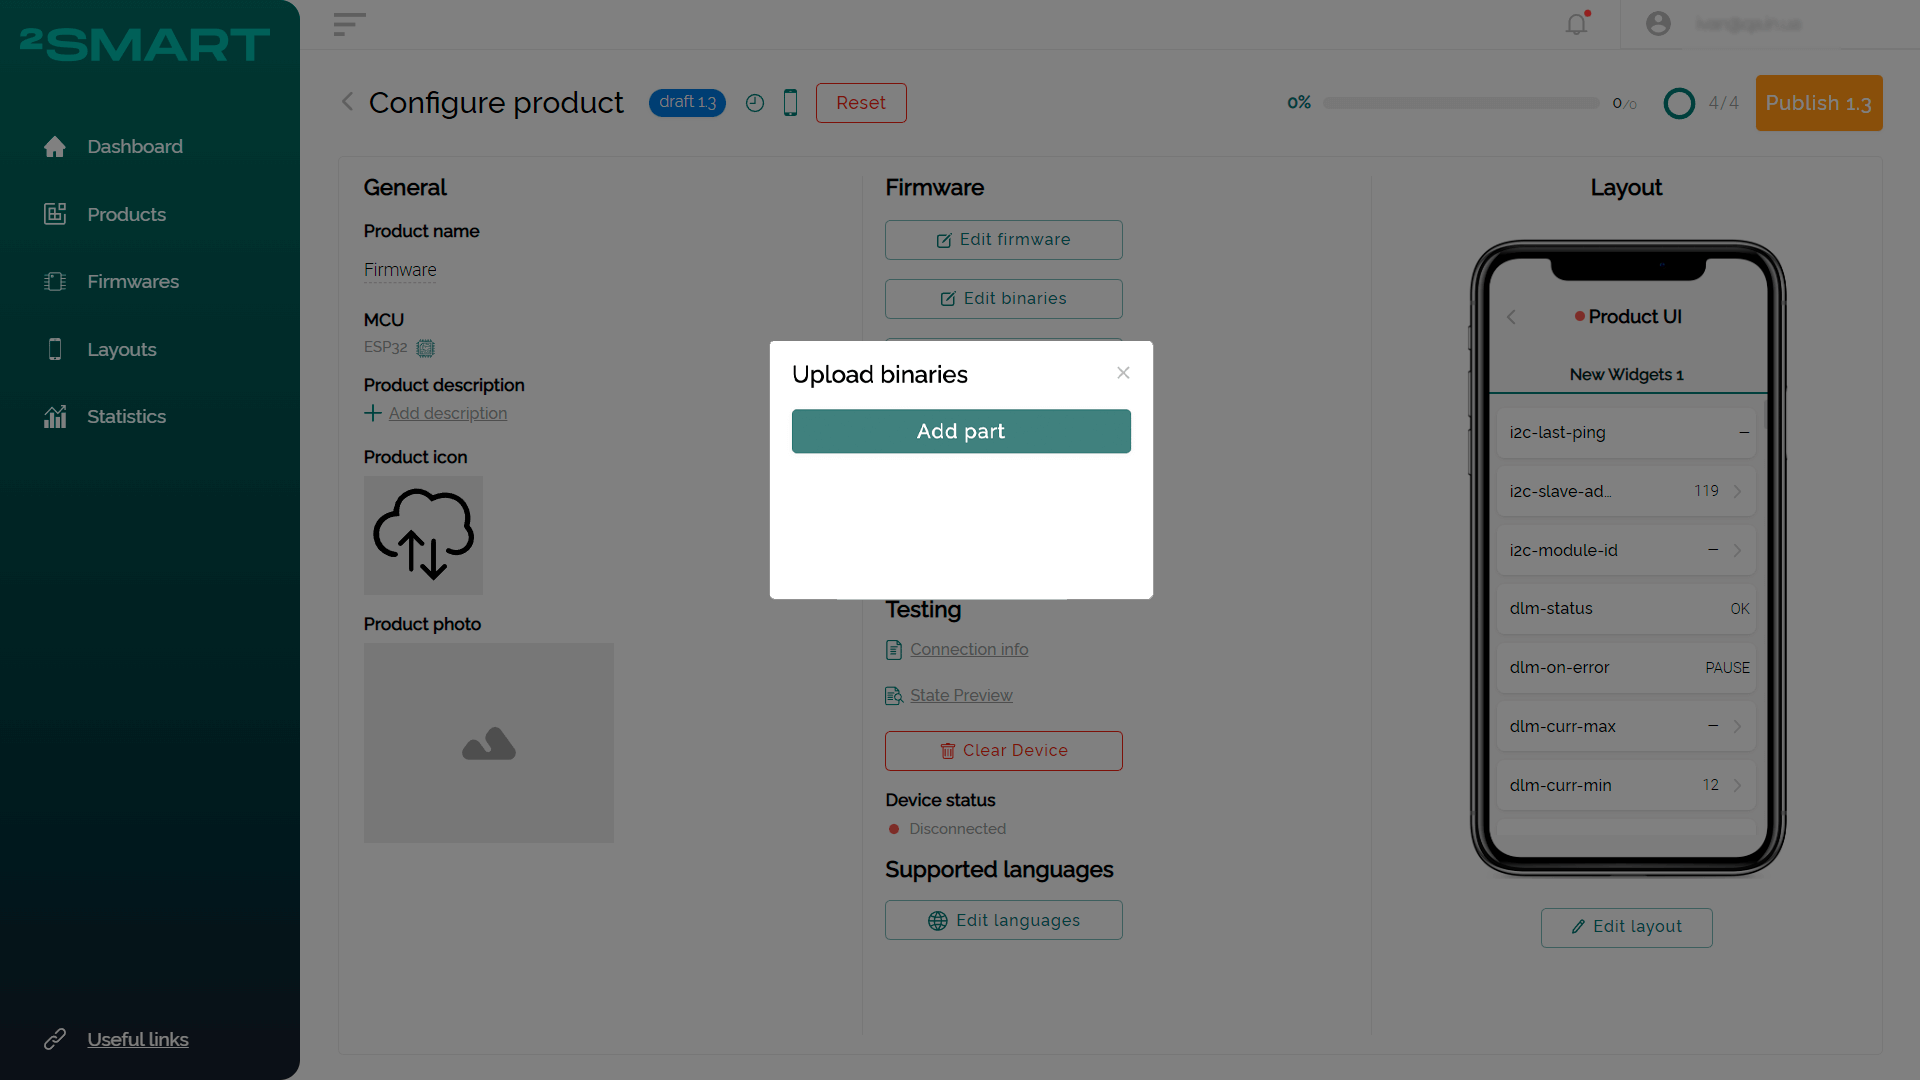
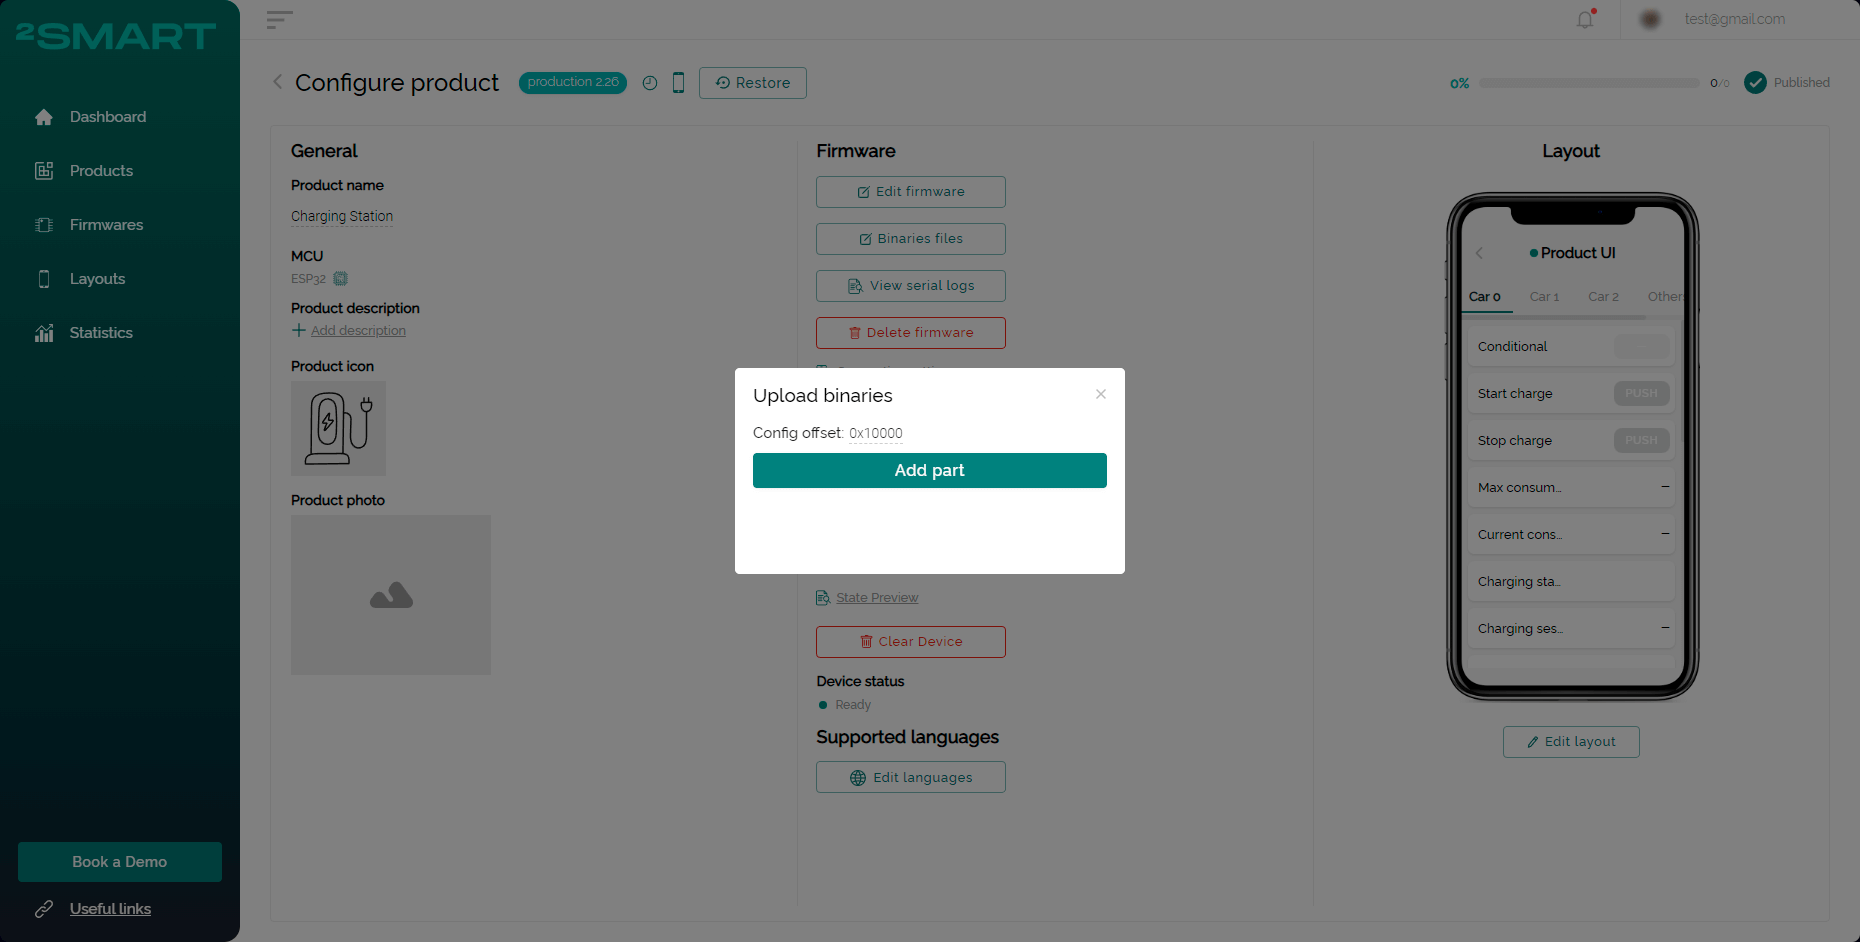
Uploading and editing binaries
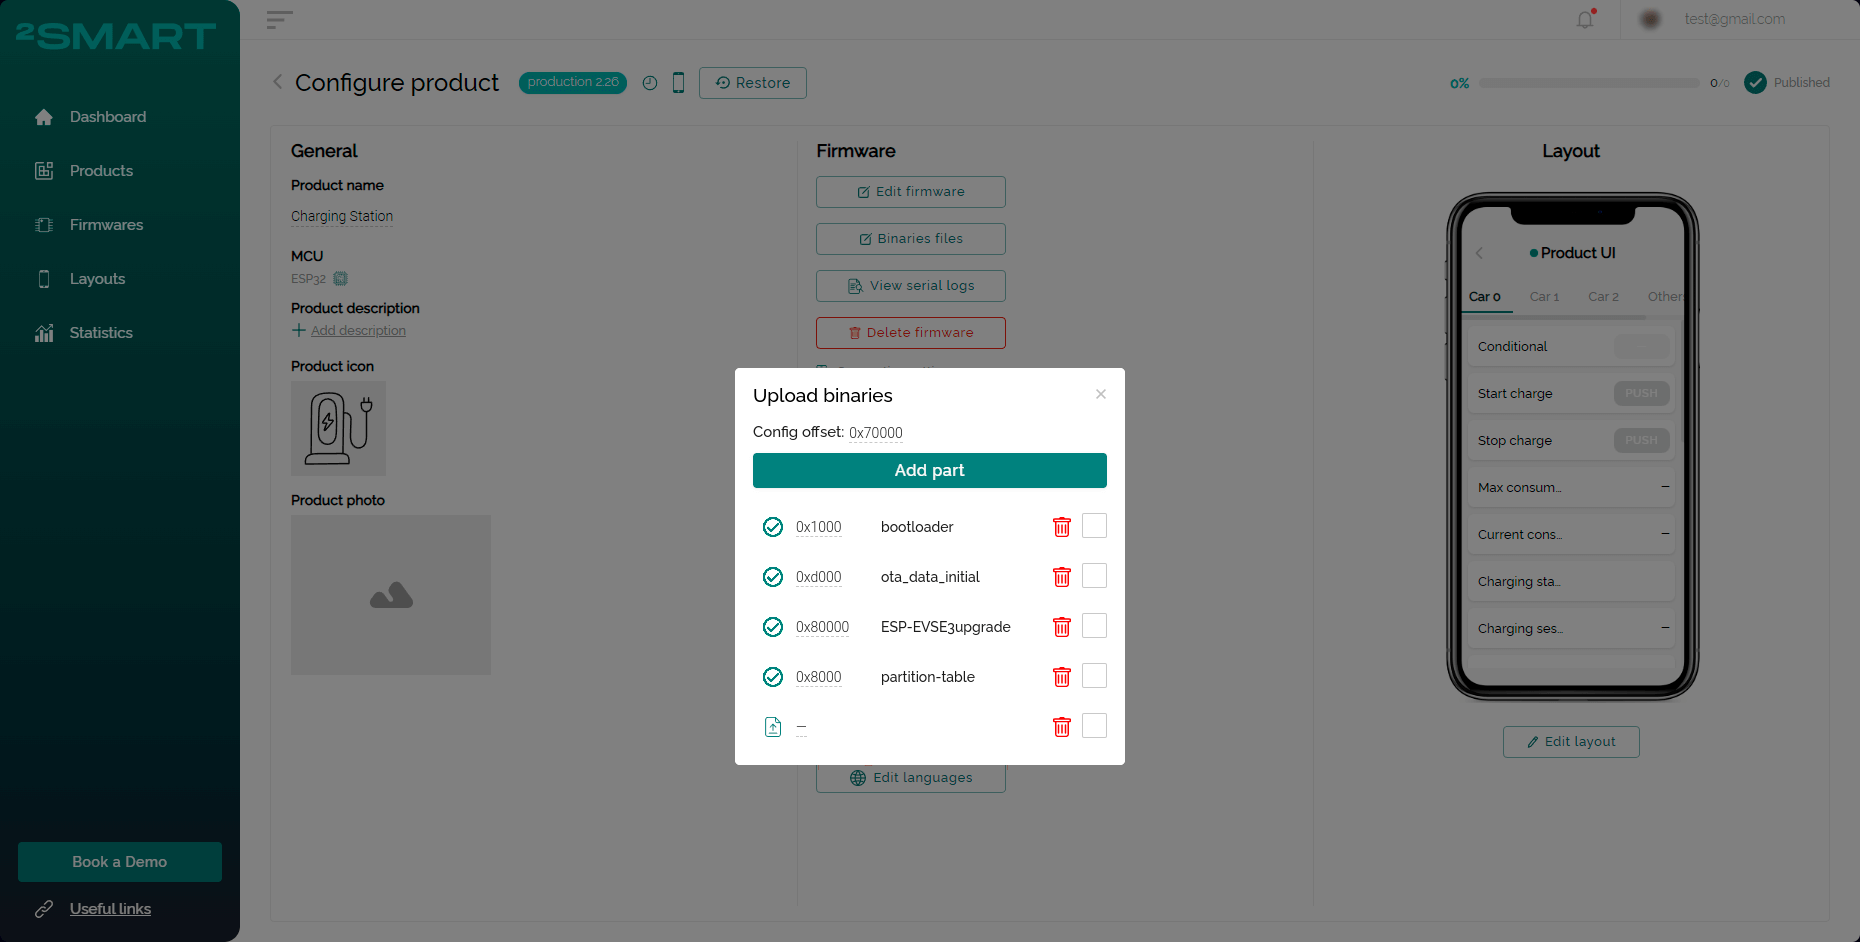
Click the "Upload binaries" button to add the firmware file, bootloader, partition table, and other files necessary for flashing the device.
Please note that this functionality is only used for flashing devices through a browser in the business platform (see details in the "Flashing the device" section).
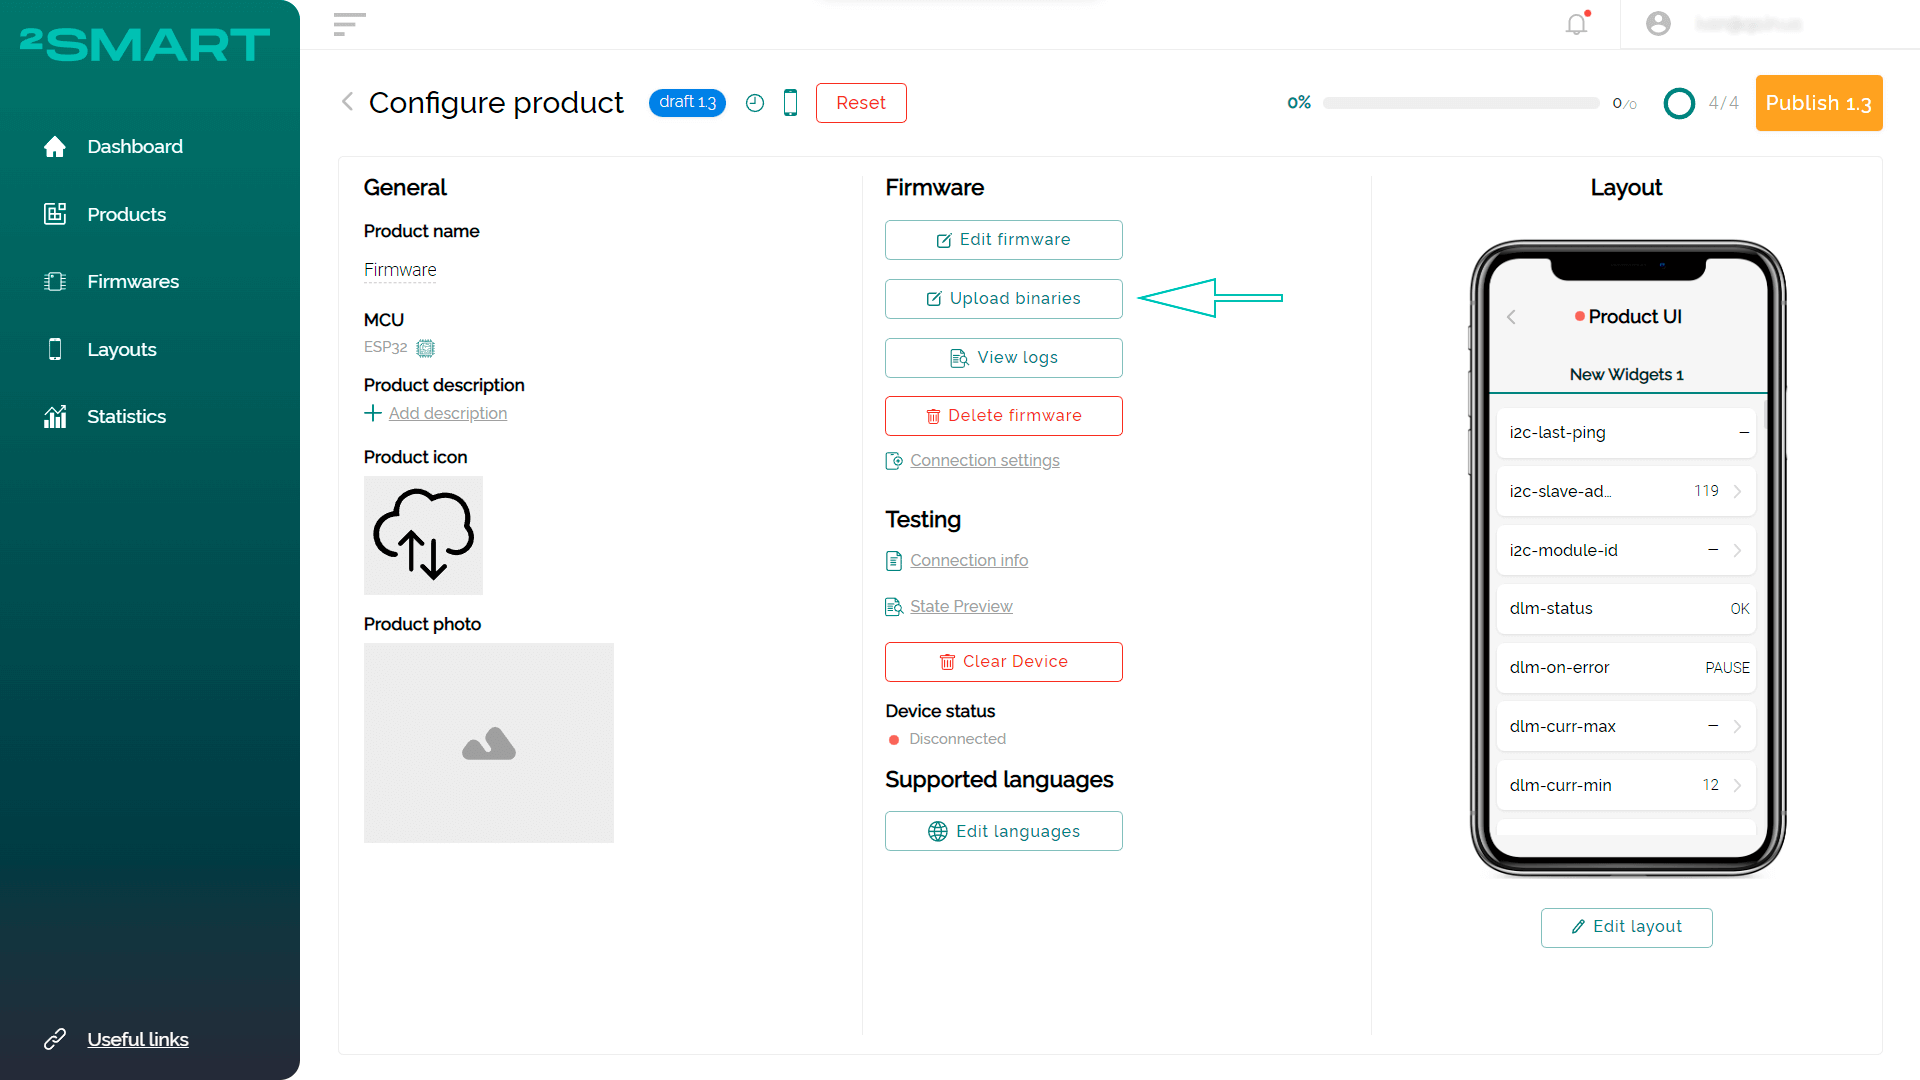
Use the modal window that appears to upload binaries to the vendor's platform.
Changing of the config binary file’s offset
Admins with the product management permission can enter the offset for flashing the config file manually. It’s really useful as there can be different memory volume on different microchips and the offset for one product can be larger than an available memory. Different products can have different offsets for the config flashing so it’s convenient to have an opportunity to change it for each product.
After creating the product, the offset has a default value.
Click the “Binaries files” button to open the “Upload binaries” modal window.
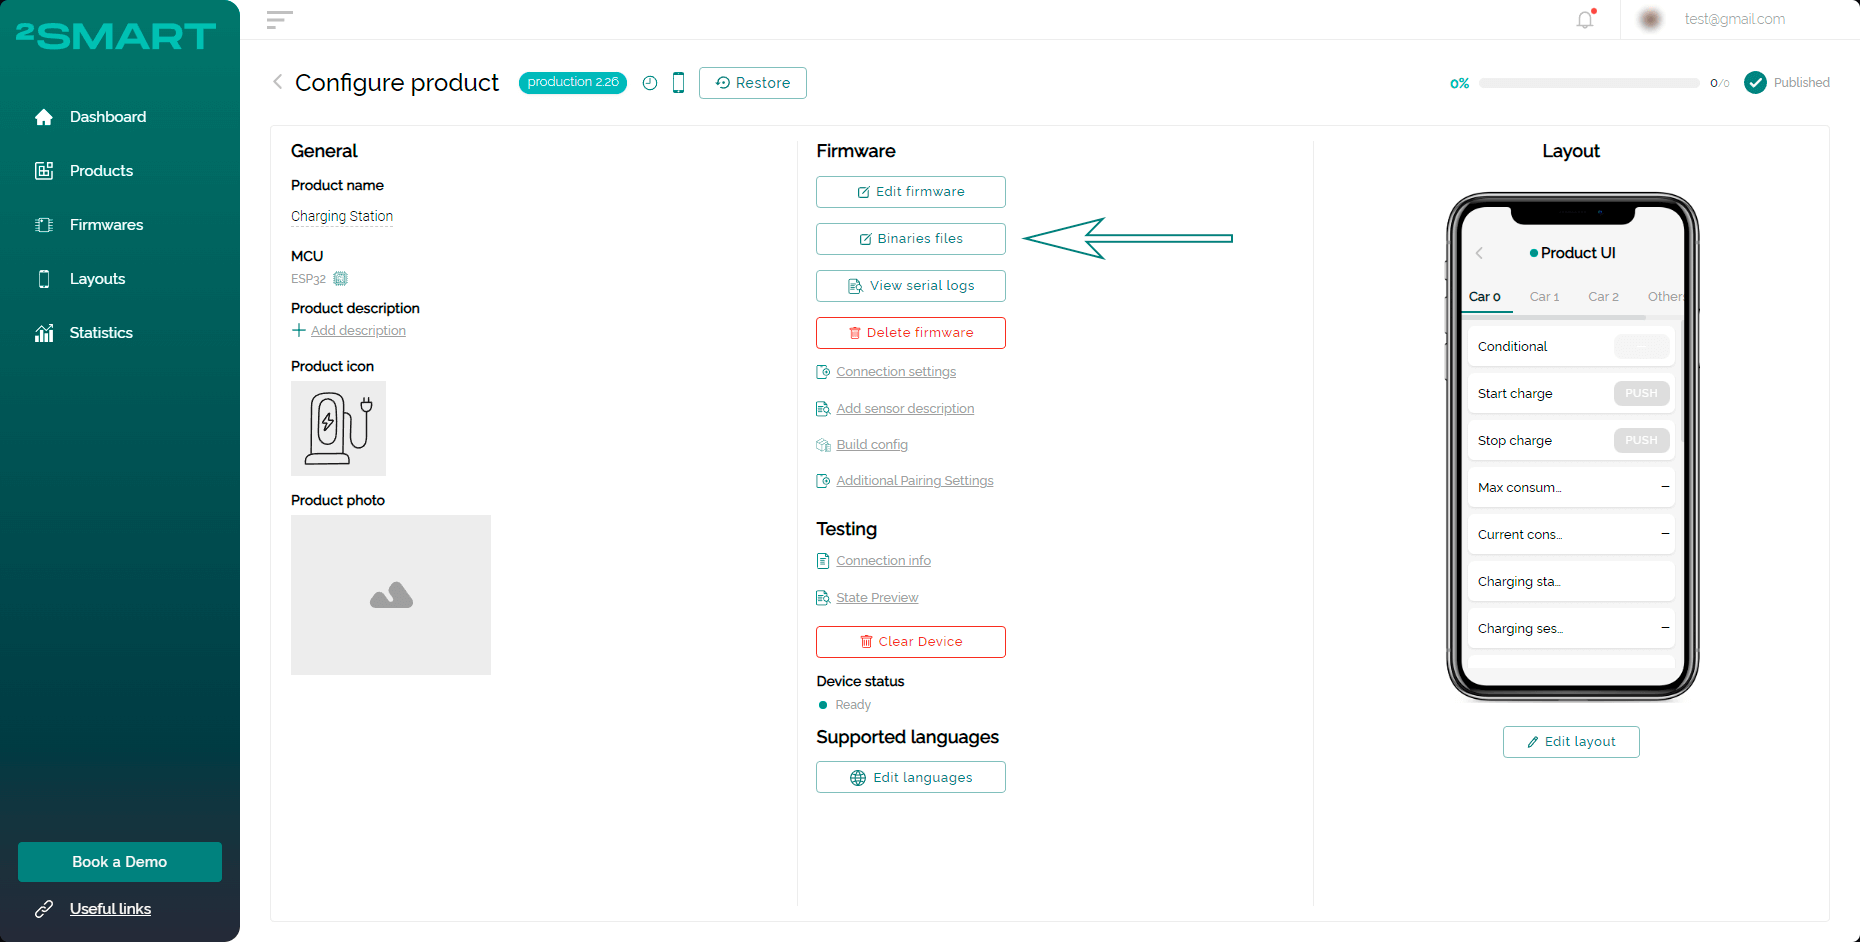
In the modal window that appears, you can upload the custom config and change the default offset to the custom.
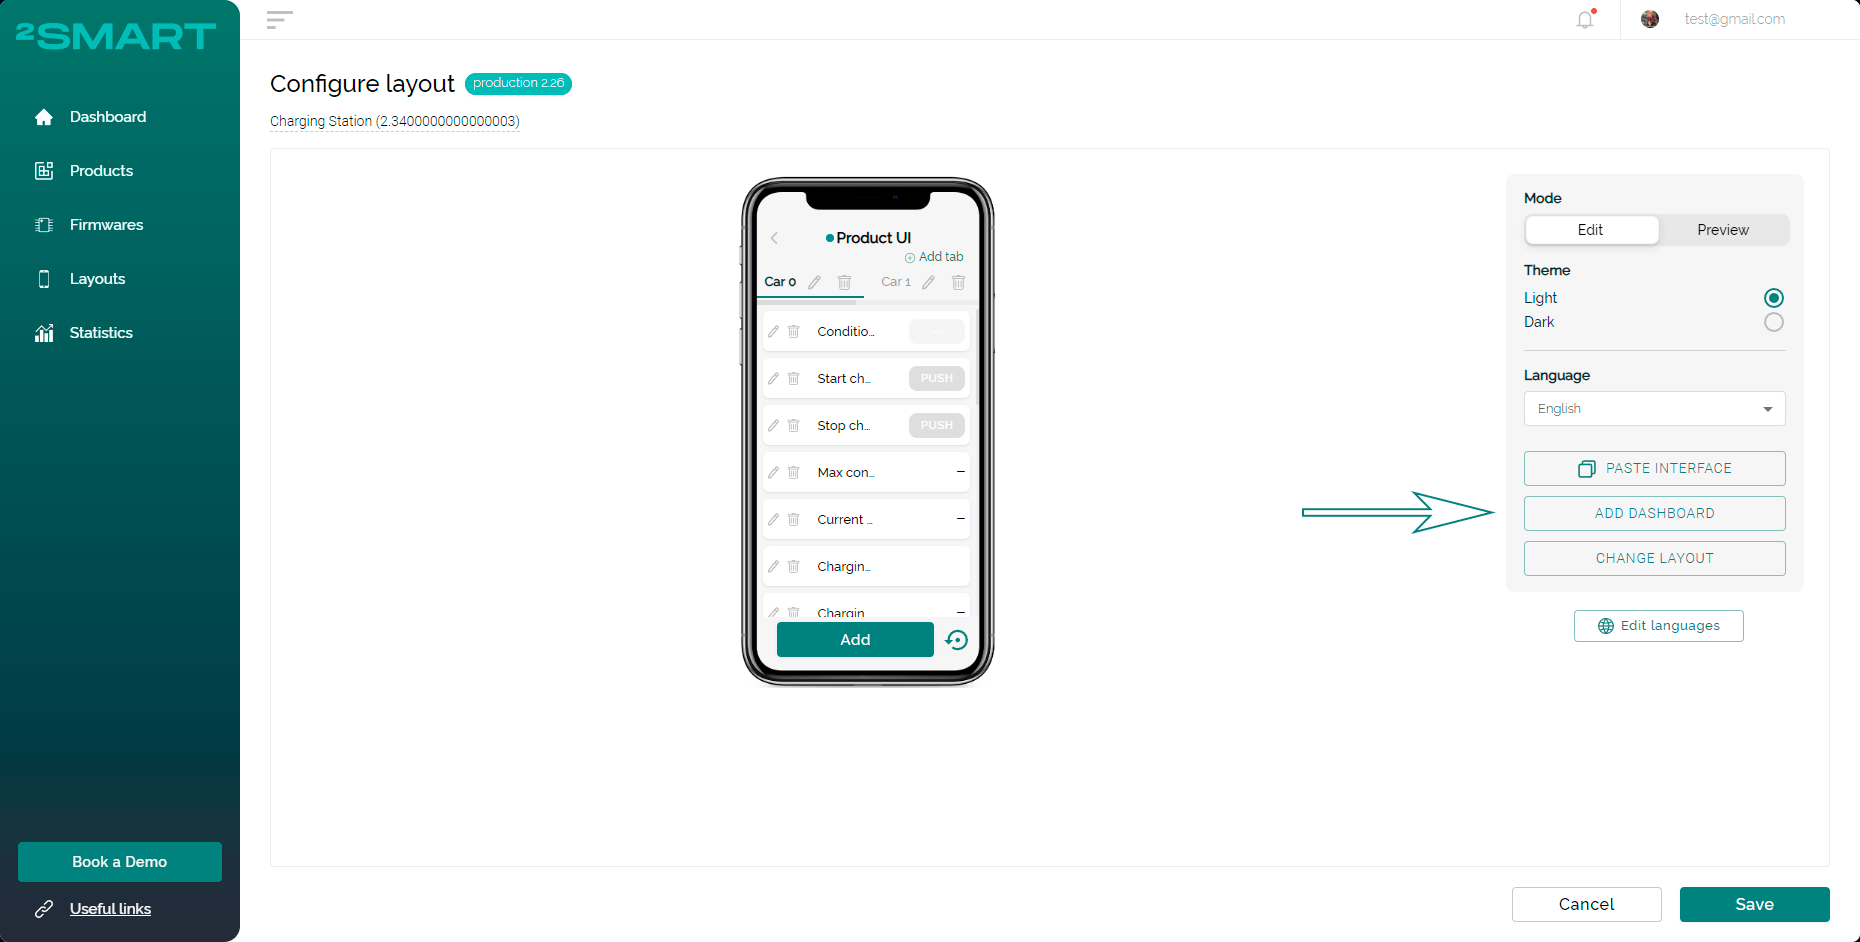
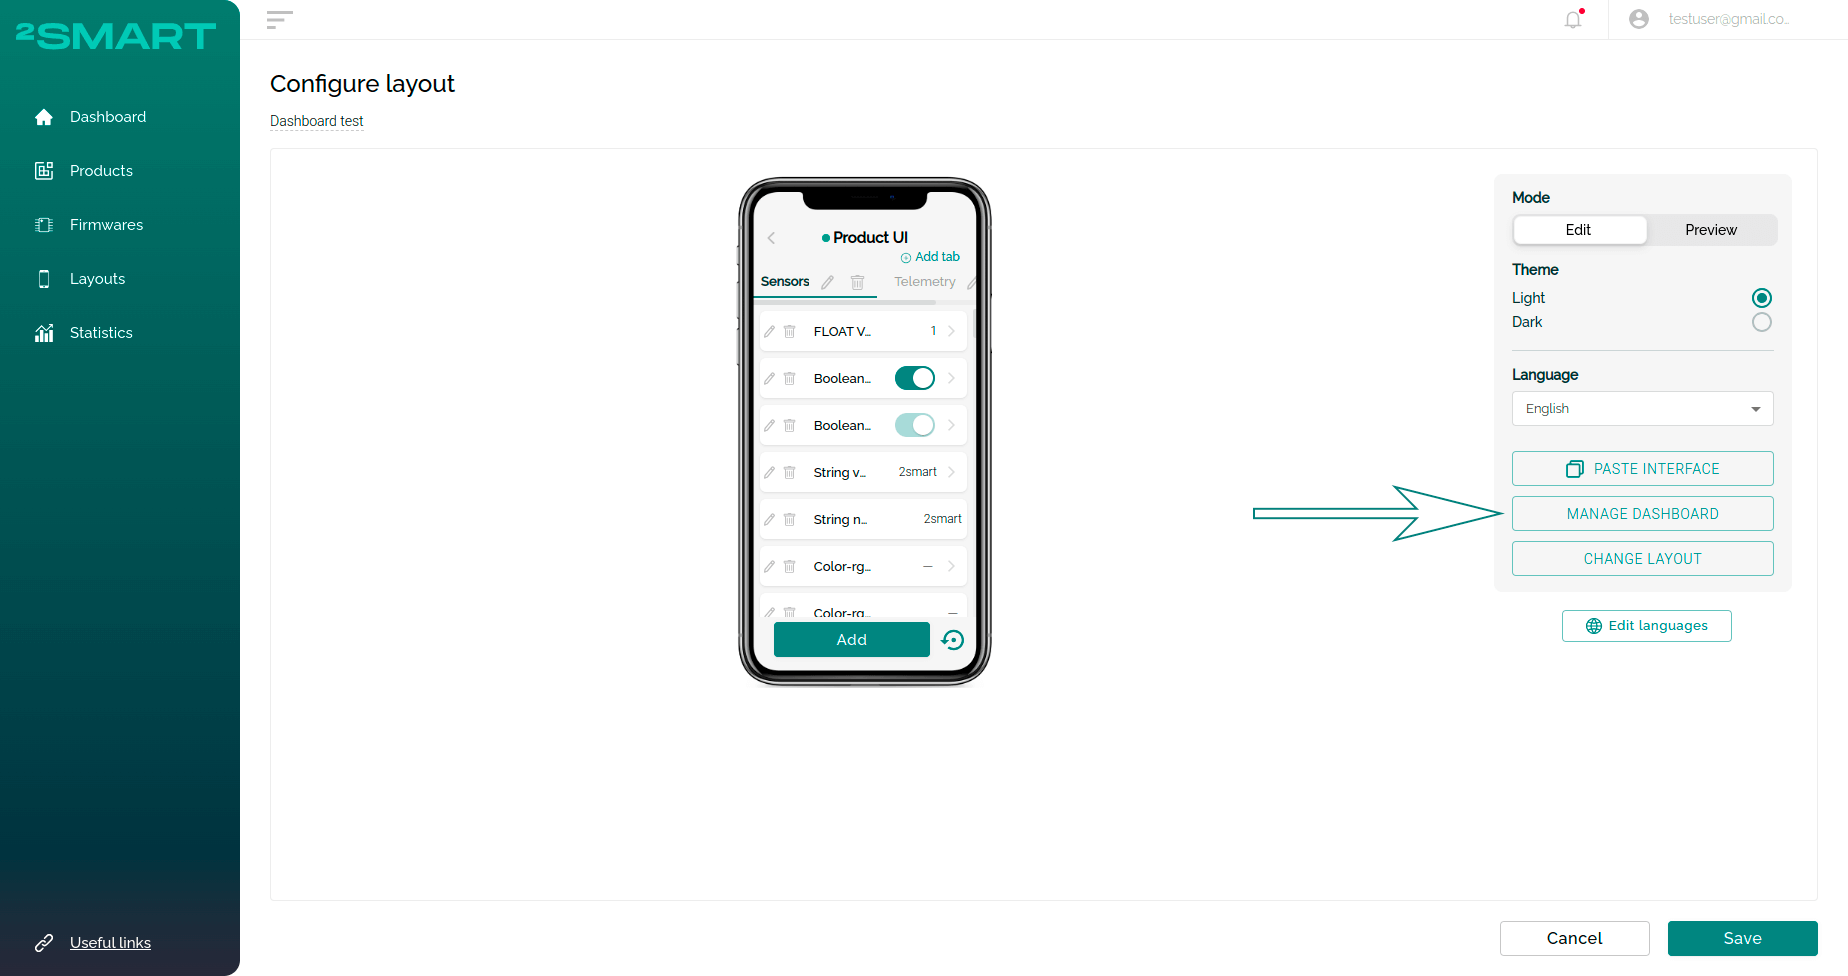
Dashboard managing
The dashboard is a feature accessible for the Admins that allow them to create and manage the list of widgets for device control by end users. The dashboard is configured for each product and it appeared in the user’s mobile app after the device’s pairing.
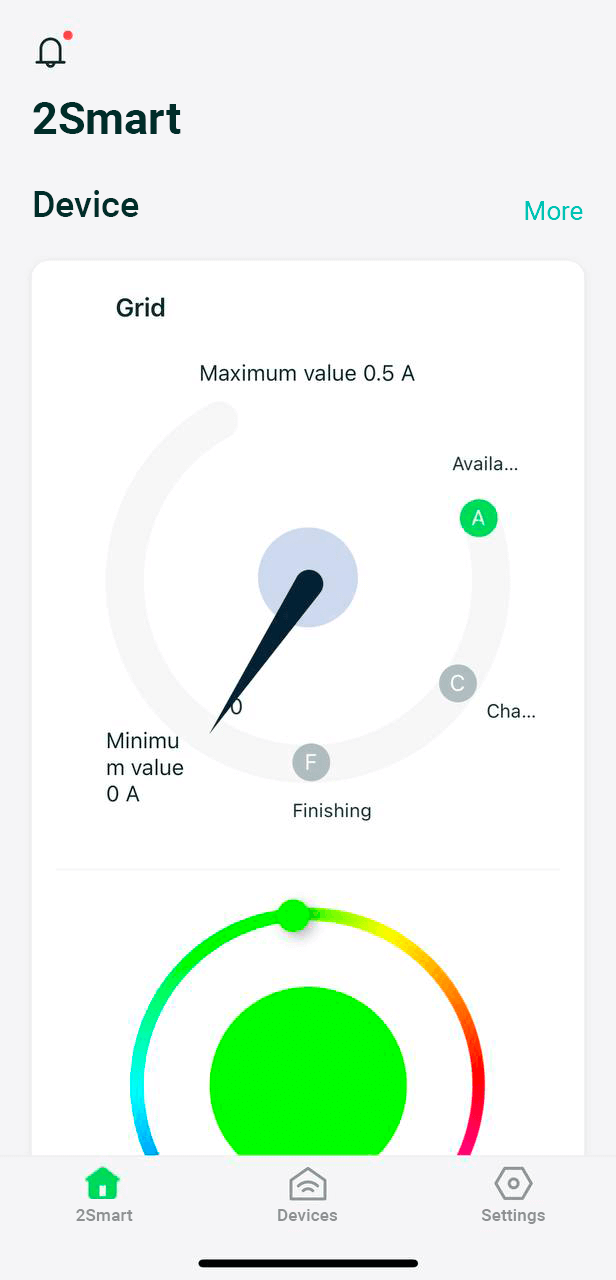
The end user can fall into the device by clicking the “More” button.
To create the dashboard, click the “Add dashboard” button on the “Configure layout” page.
The Admin can add any widgets that available for layouts.
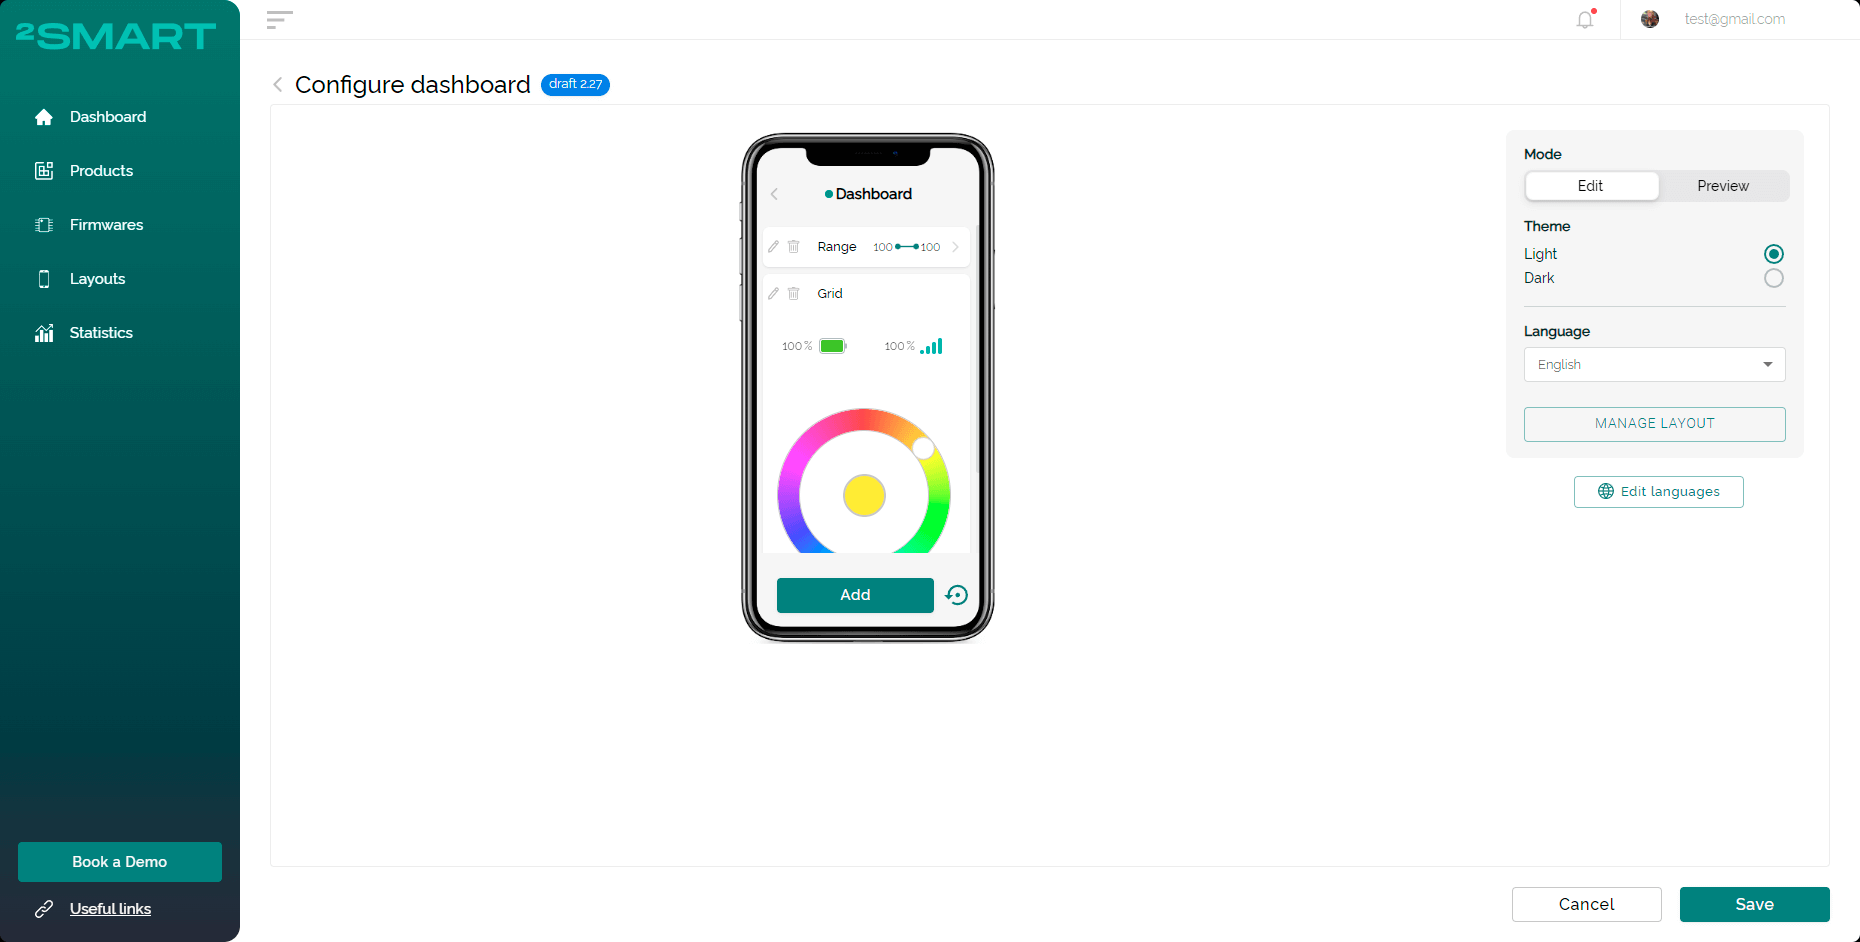
The dashboard can be edited anytime by clicking the “Manage dashboard” button.
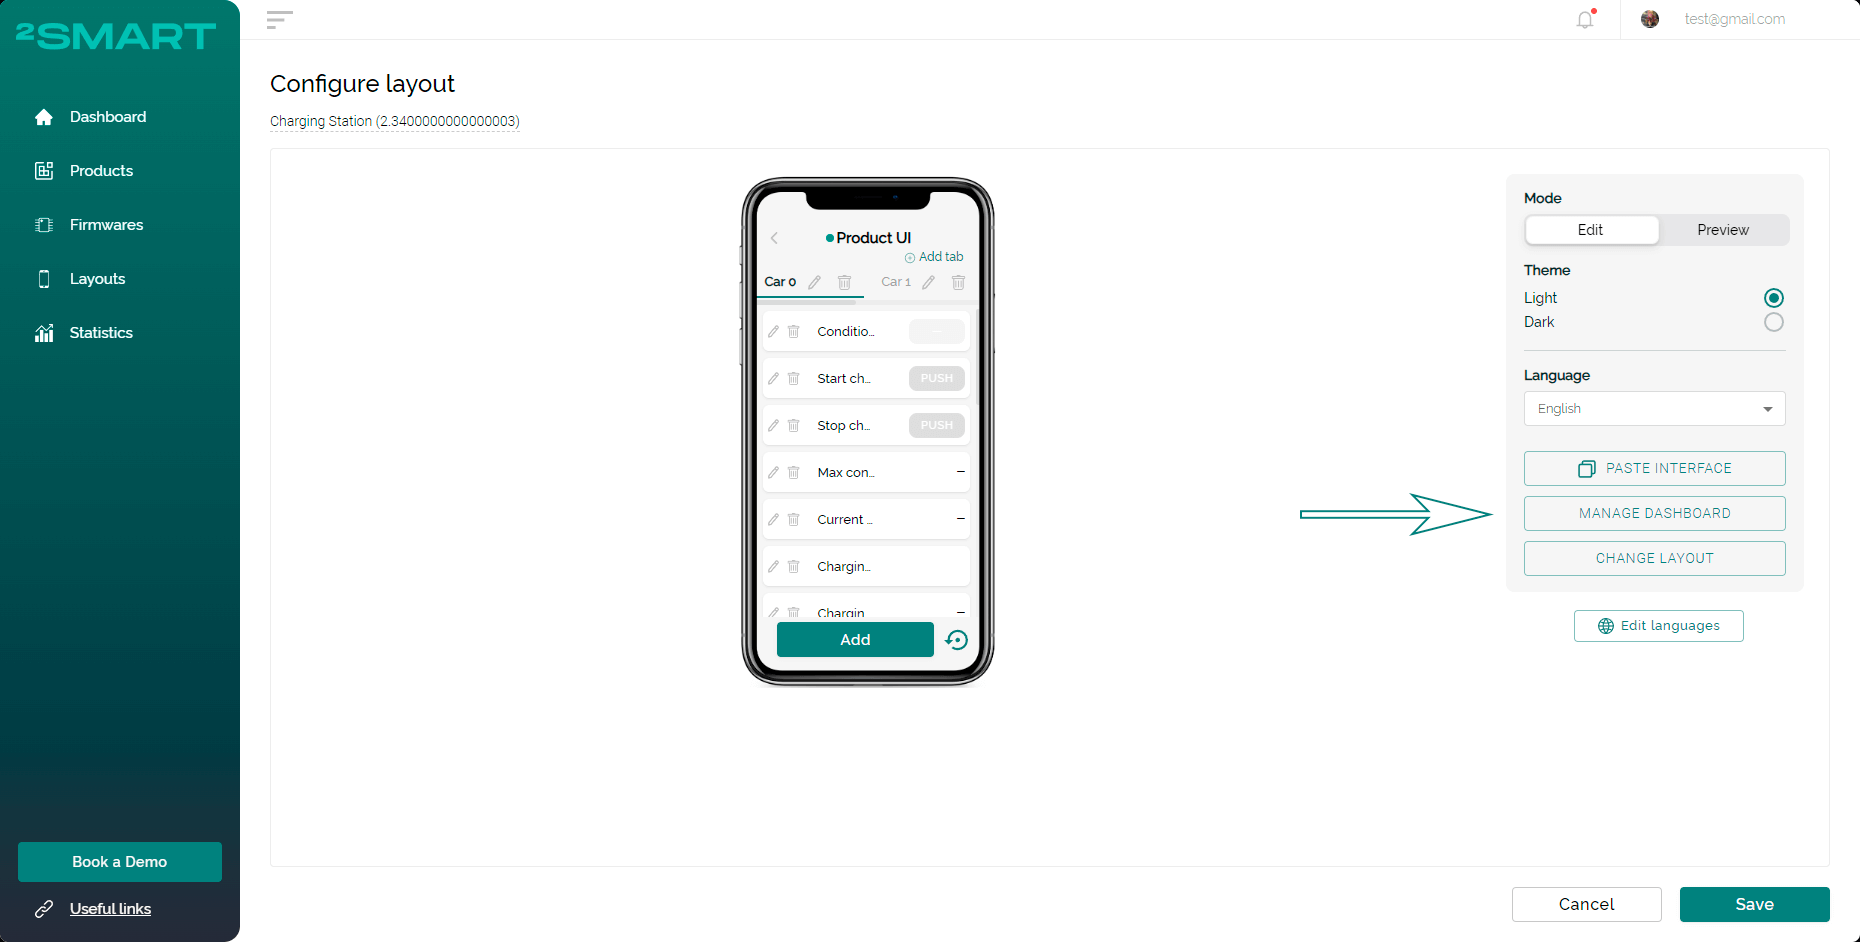
Don’t forget to publish the product to apply changes.
Ability to edit the dashboard of previous major versions of the product
The feature allows Admins to configure dashboards for different major product versions. A modal window with dashboard versions appears after clicking the “Manage dashboard” button.
You can see the dashboard version list containing their title, version, and update and creation dates.
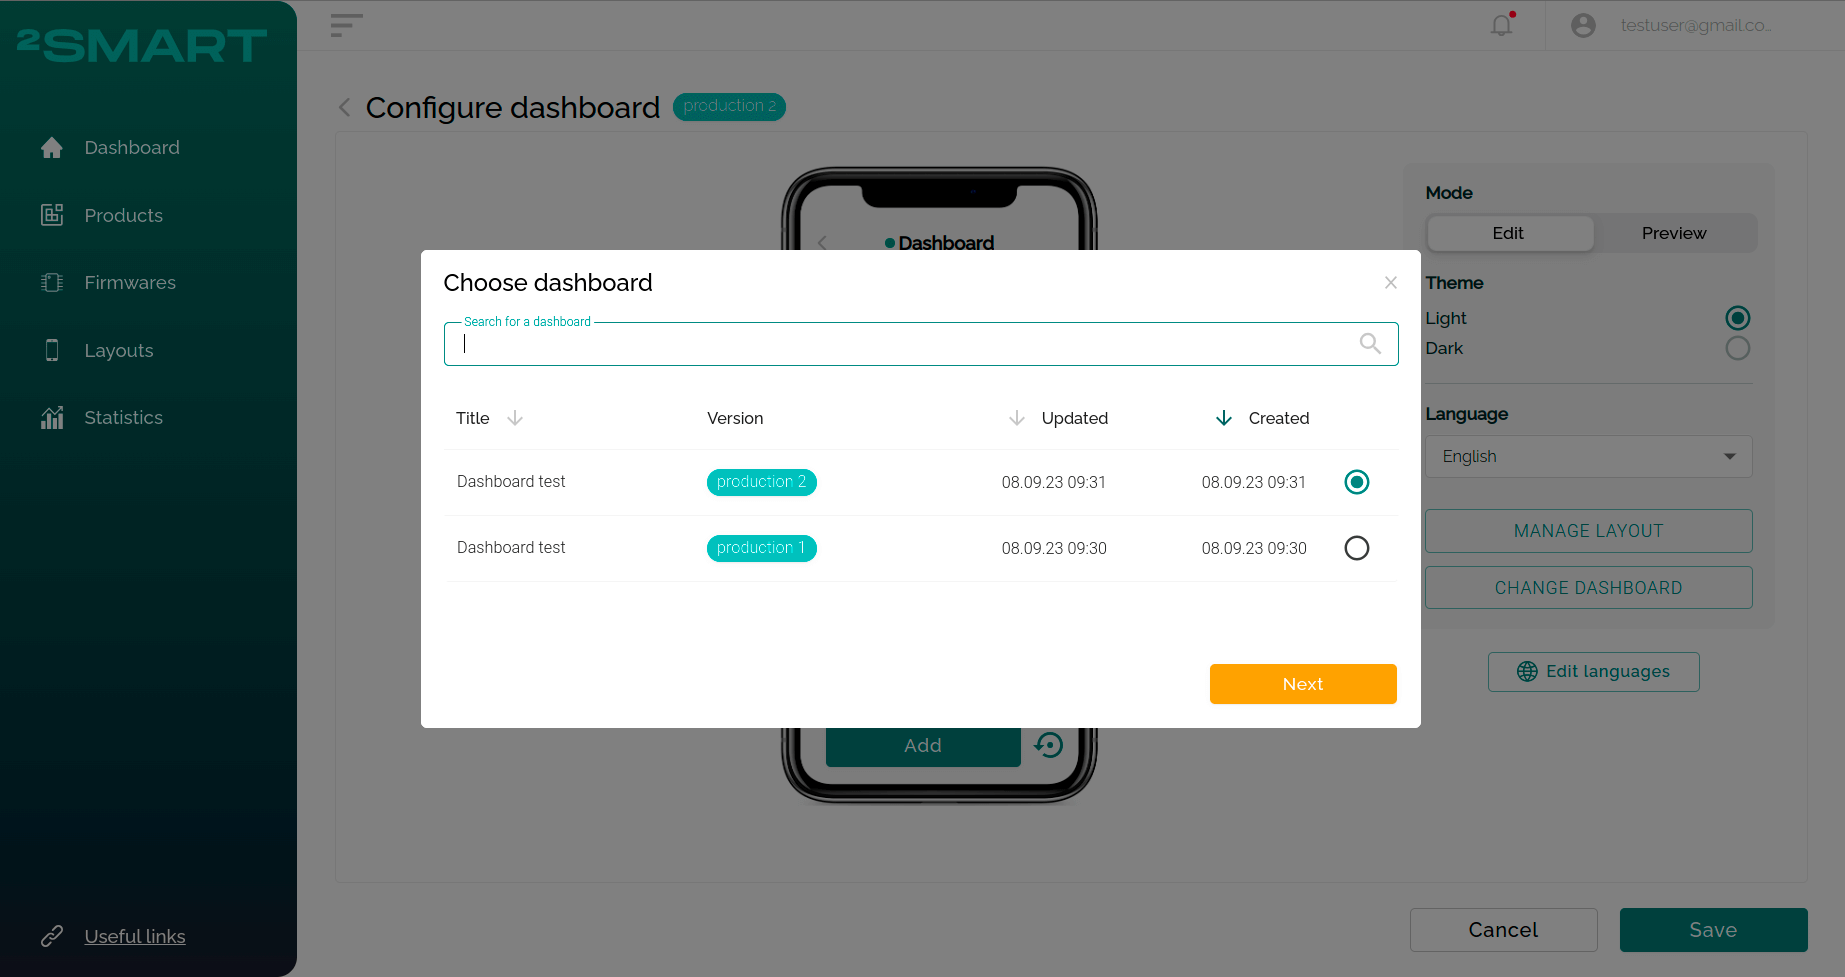
For comfortable managing, you can search by a dashboard title and sort by title, date of update and creation.
Choose the dashboard you want to change and click the “Next” button.
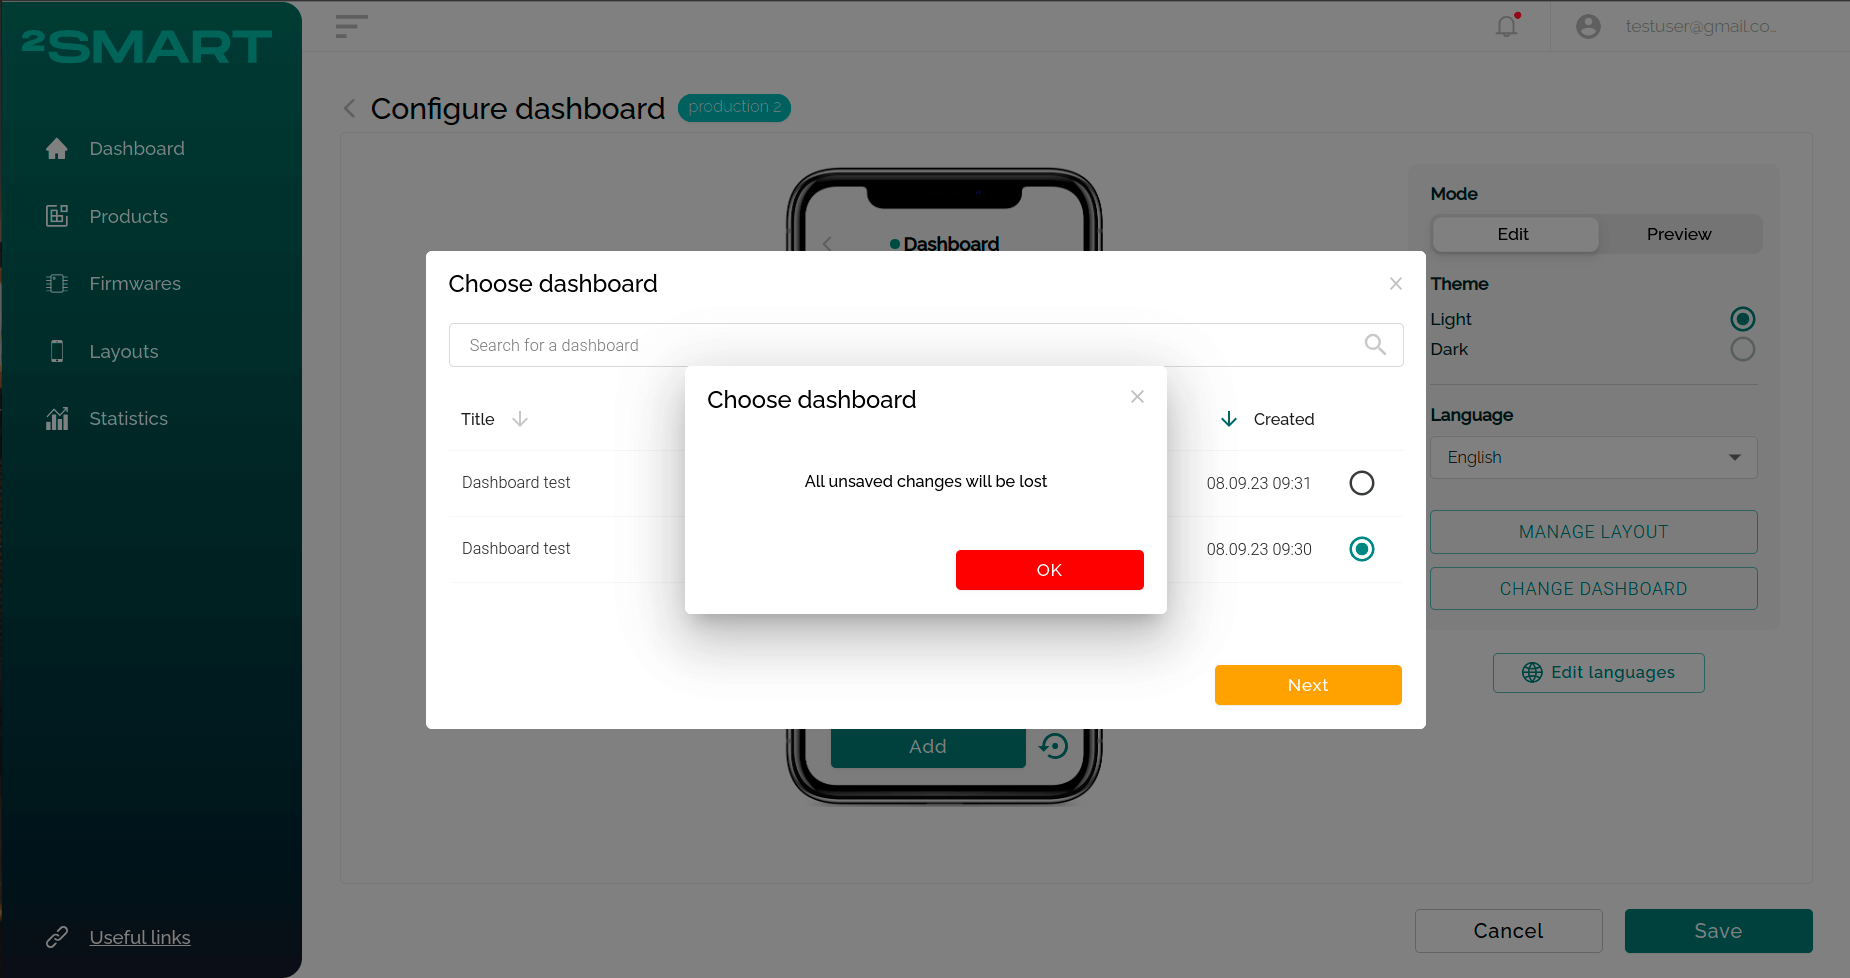
Please, be careful. If you make any changes on the current dashboard and don’t save it, all changes will be lost. You should save them before editing other dashboard versions.
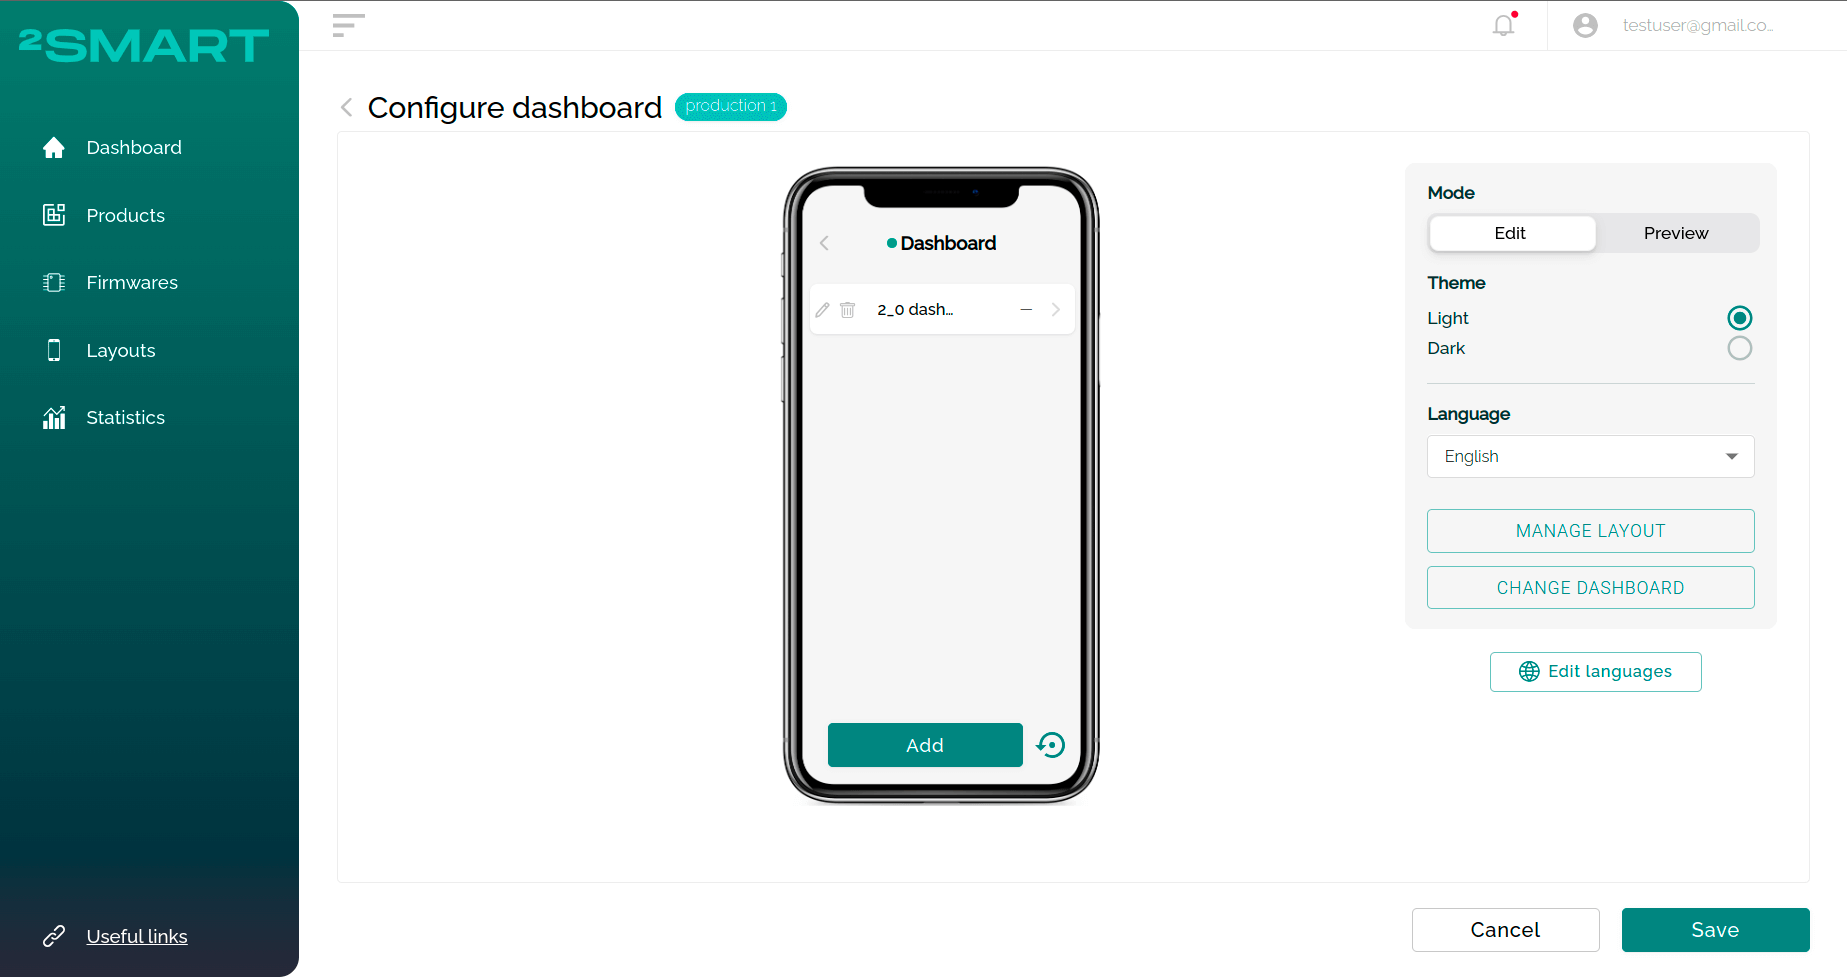
Make changes on the chosen dashboard and click the “Save” button to apply.
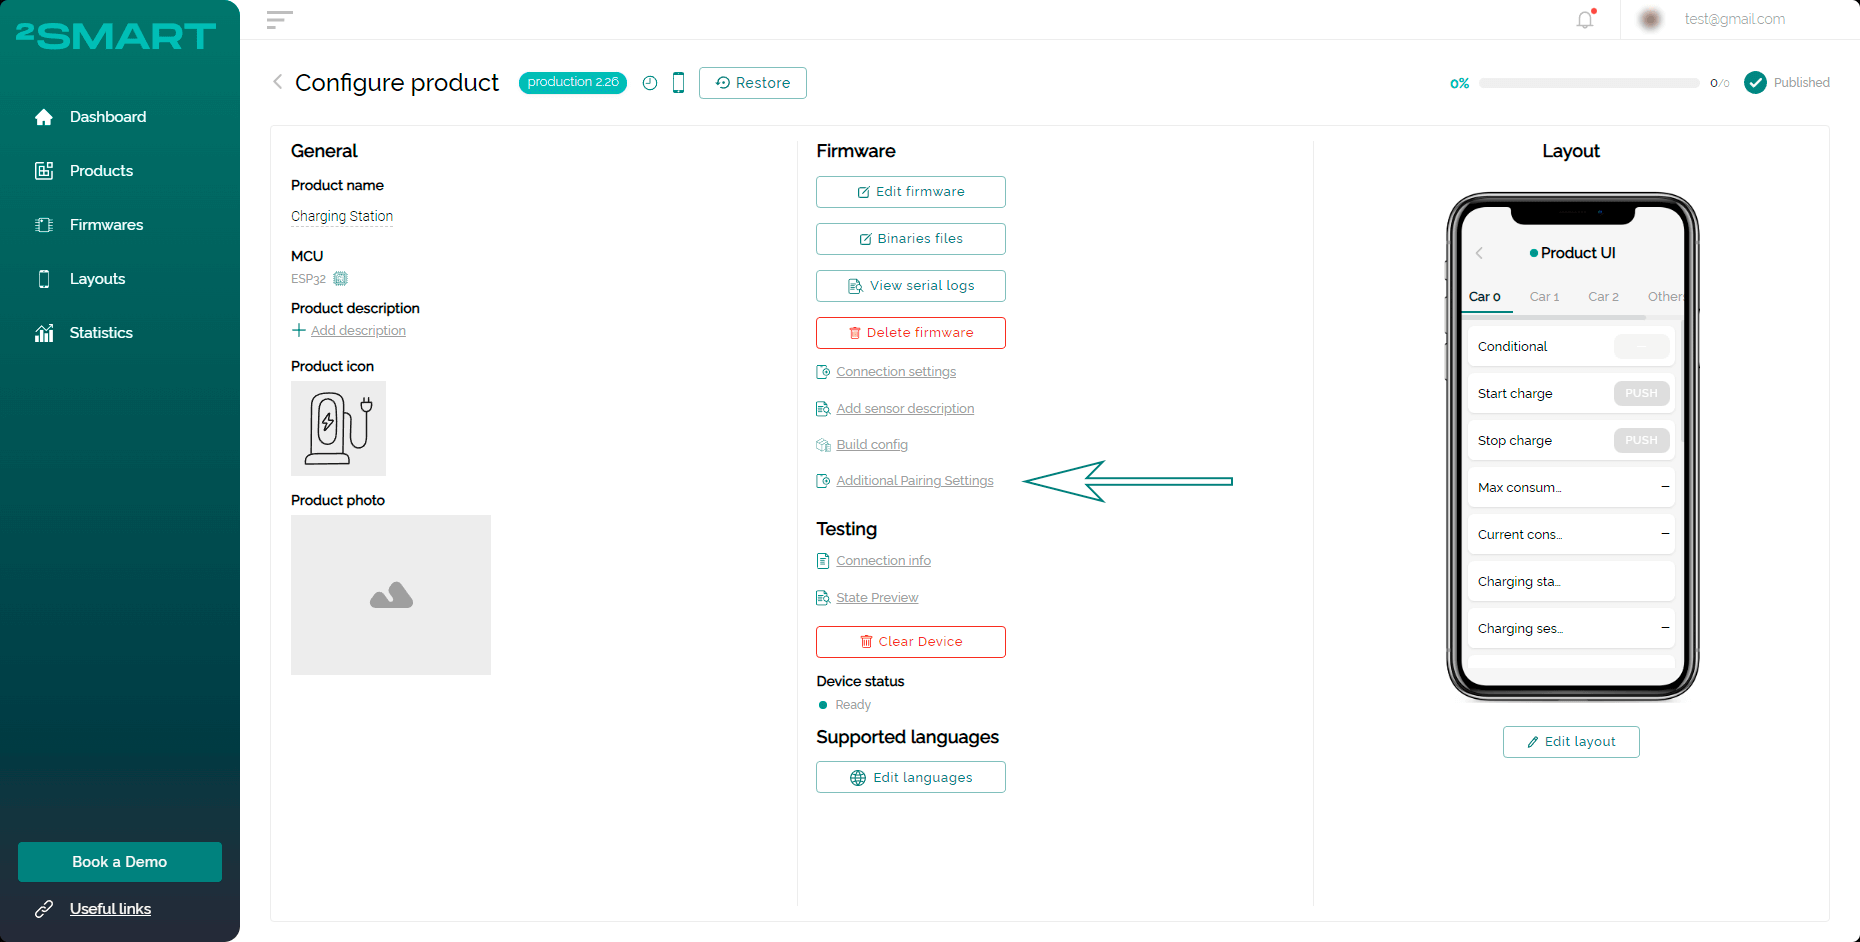
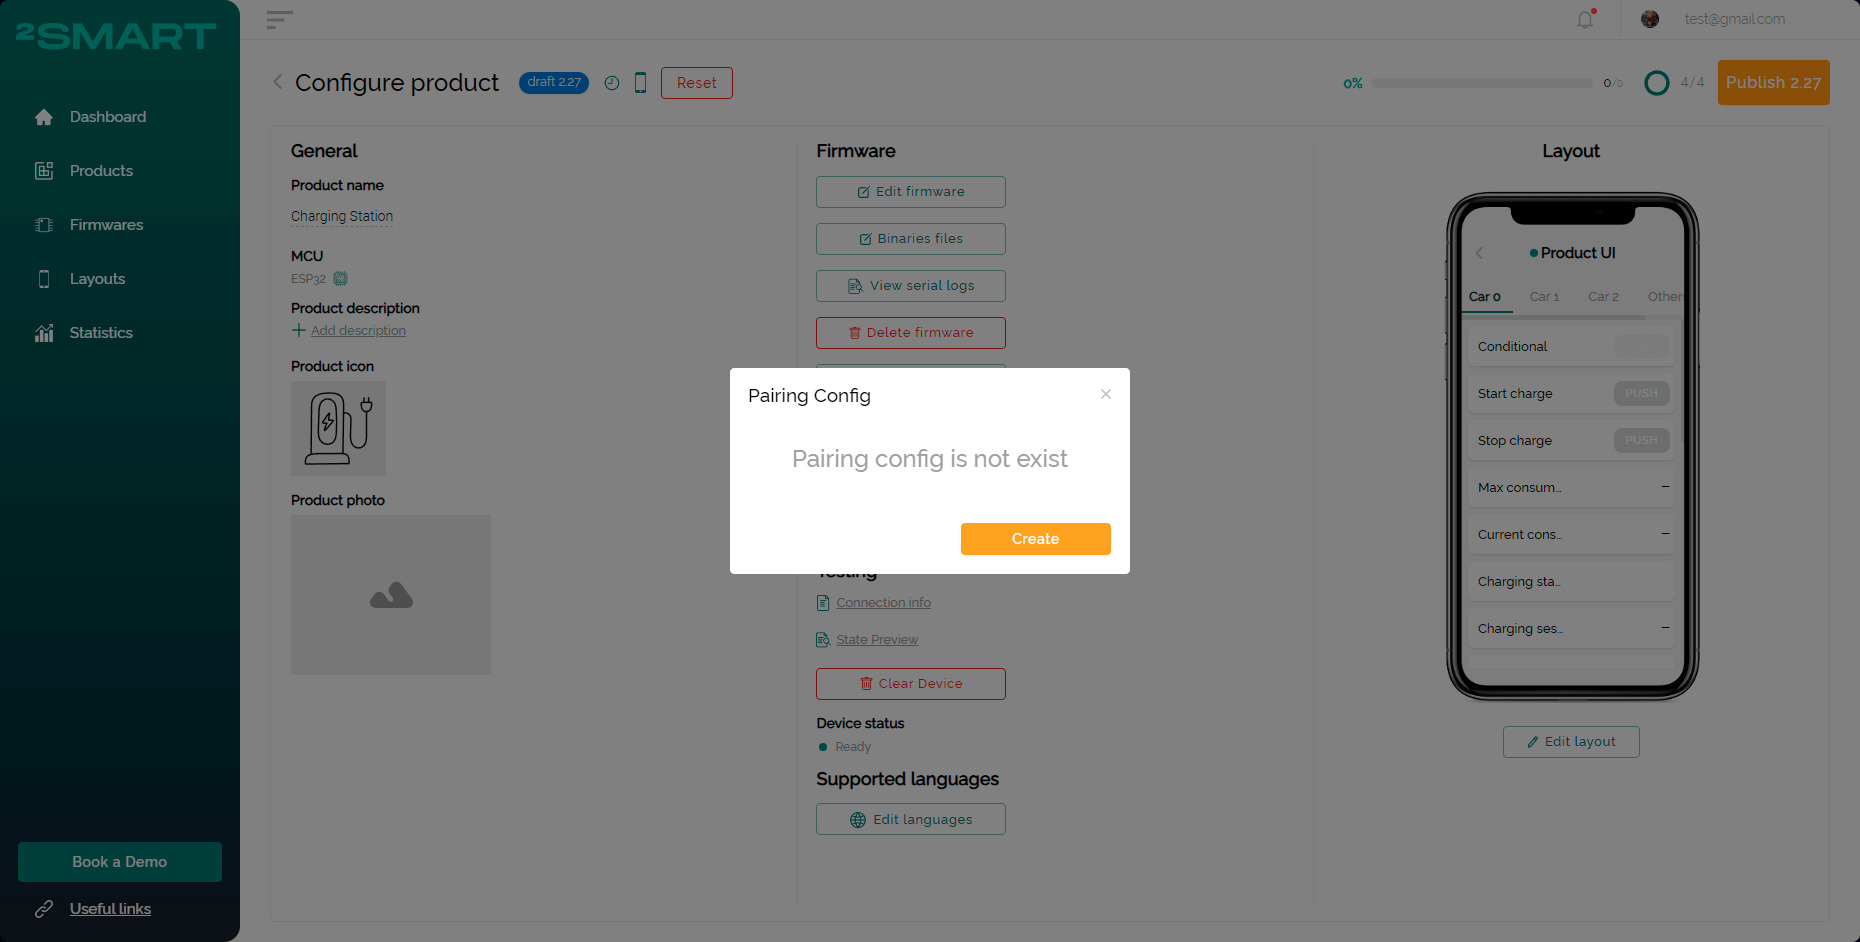
Additional pairing settings
The Admin is able to configure pairing settings if the additional info is needed from the User during the pairing. The User will see the additional modal window during the device pairing and must pass the requested parameters to the microcontroller to proceed.
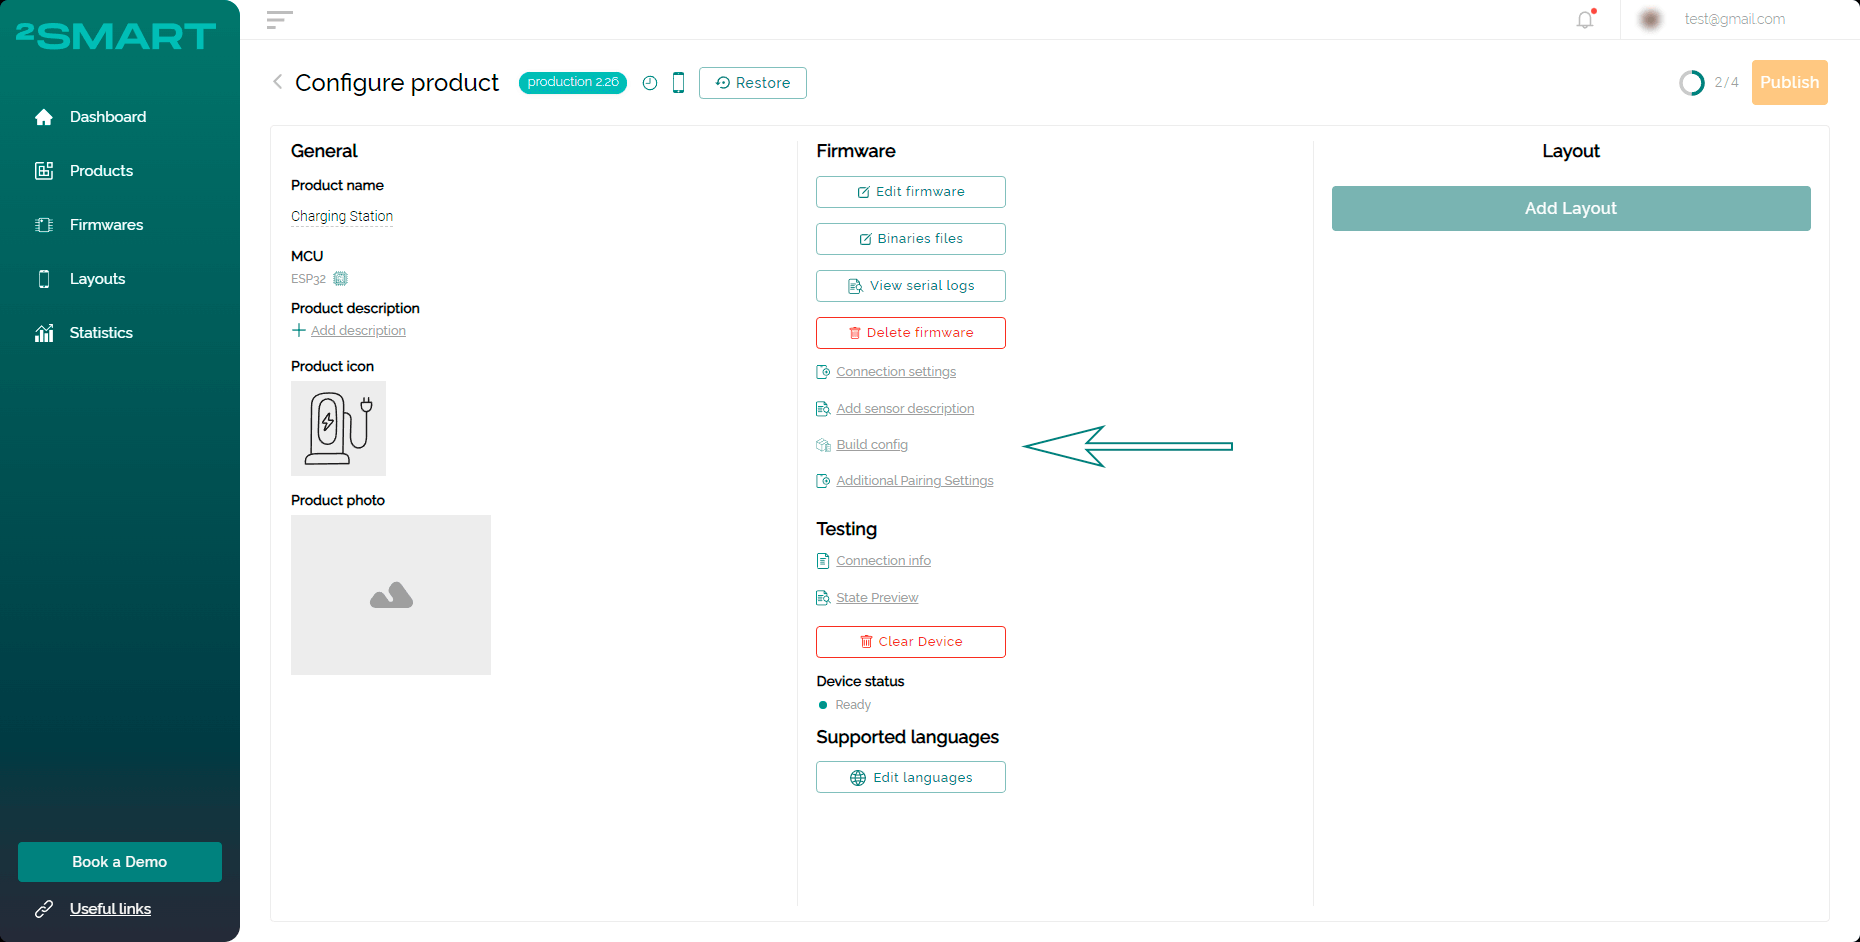
To set up the additional pairing settings, open the vendor panel and click the “Additional pairing settings” button.
If the pairing config does not exist, click the "Create" button.
These settings are created separately for each product and can be activete/disactivate by the admin with switching the “Activate” toggle.
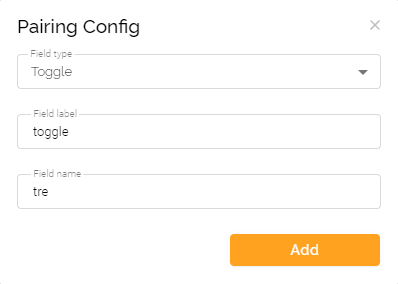
In the modal window that appears, you’re able to add the title, description and fields which Users will see in the mobile app. Additional pairing settings can be localized. You can choose the language in the “Localization” field and add a translation with the “Edit languages” button clicking.
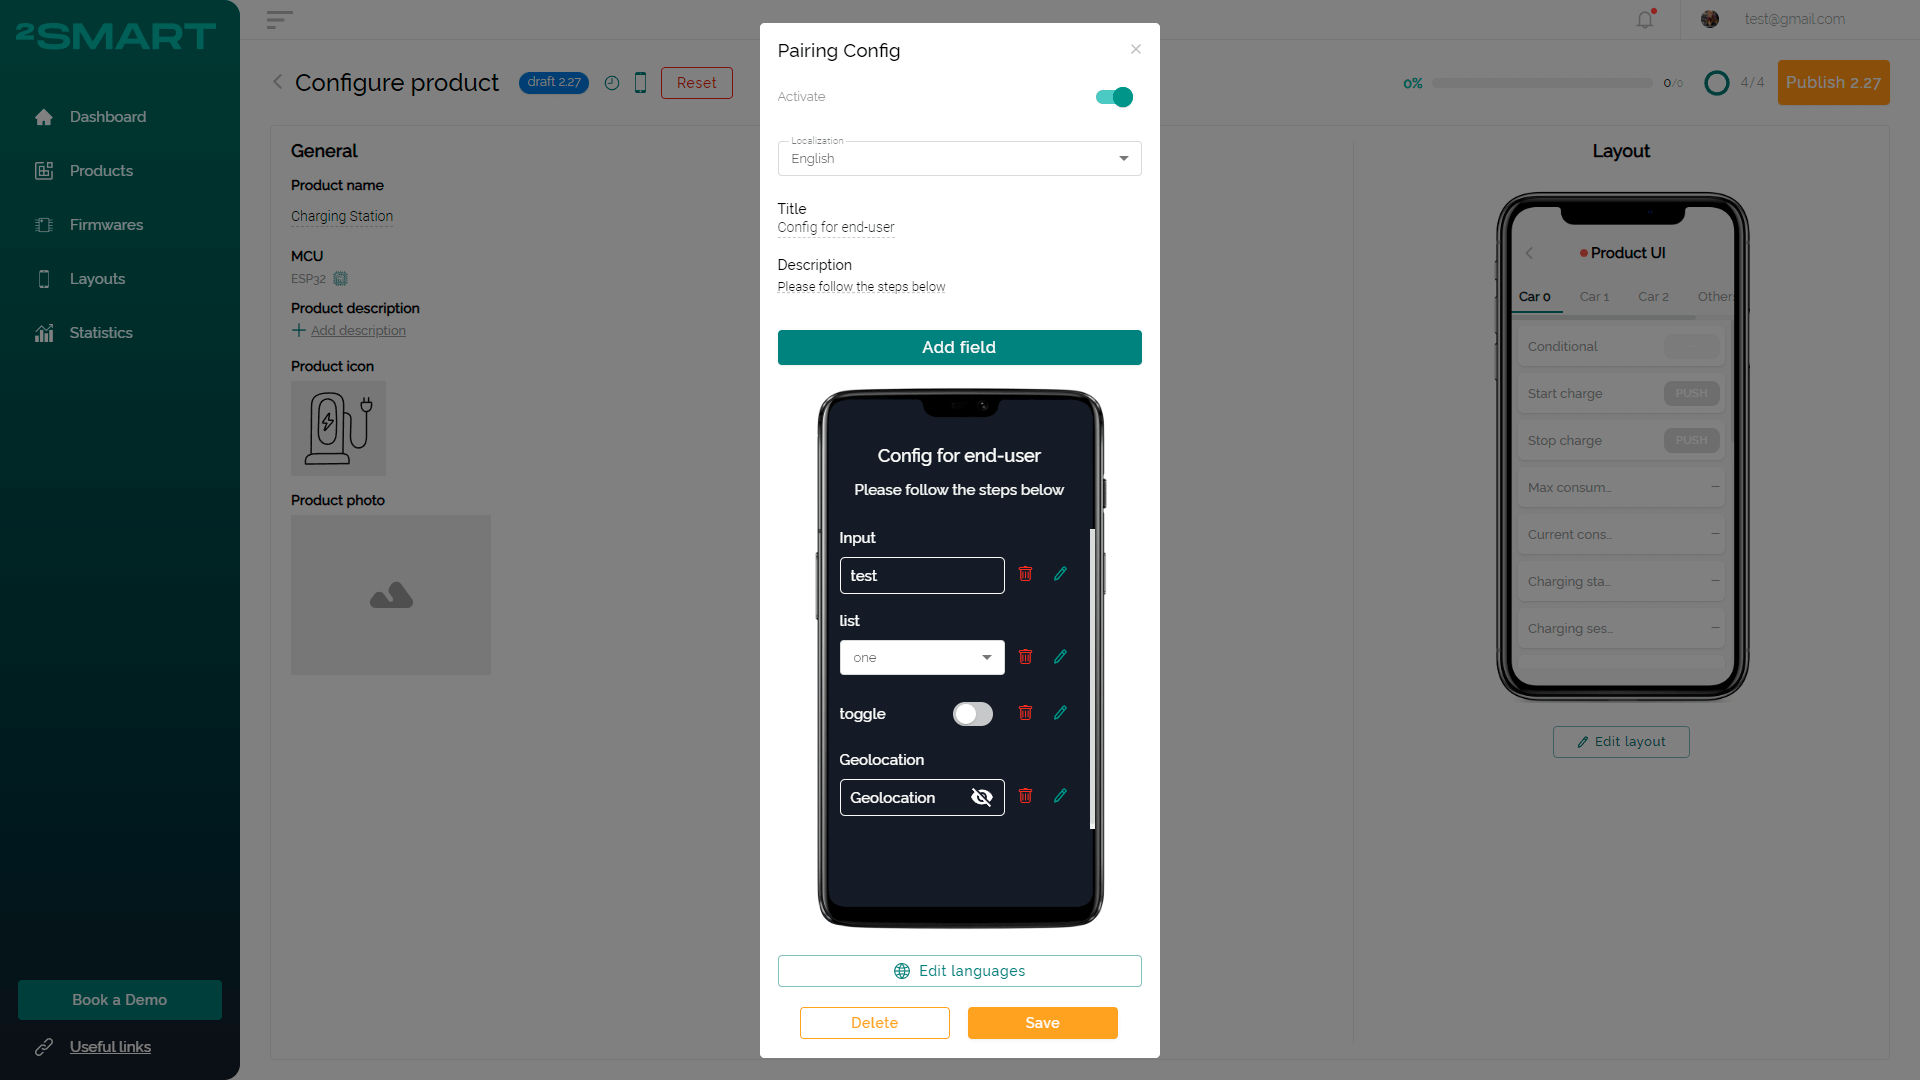
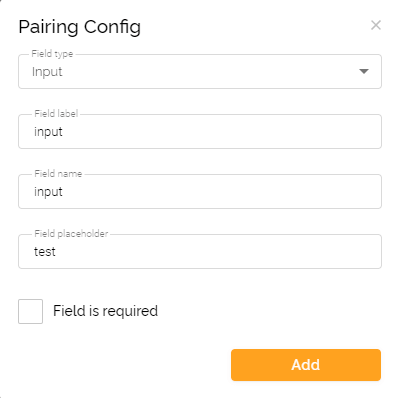
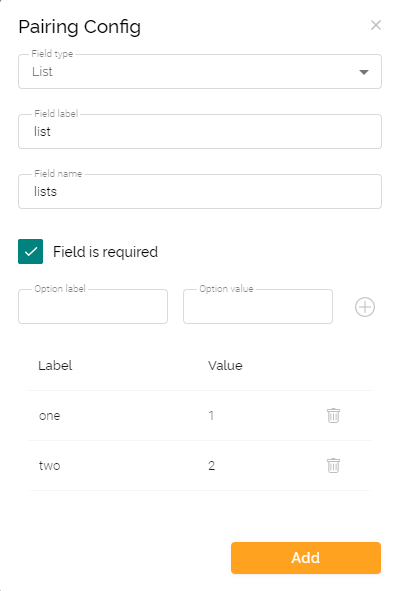
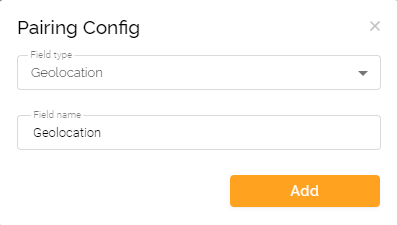
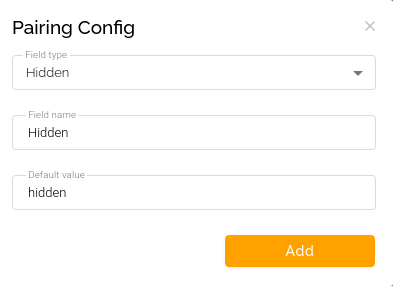
There are 5 types of fields that can be added:
input,
list,
toggle,
geolocation (invisible for the end user),
hidden (invisible for the end user) - such a field name and value are set by the Admin during creation.
Fields can be edited, deleted, mark as required or not. For each of the fields, Admin should enter the field label and field type. For the “Input” there is a possibility to add a placeholder too.
Don’t foget to click the “Save” button to apply new settings.
Please note that if only "geolocation" and/or "hidden" fields are added to the additional pairing settings, the additional window isn’t shown to the user during the pairing, but data is sent anyway.
Build config for ESP32 with Others firmware
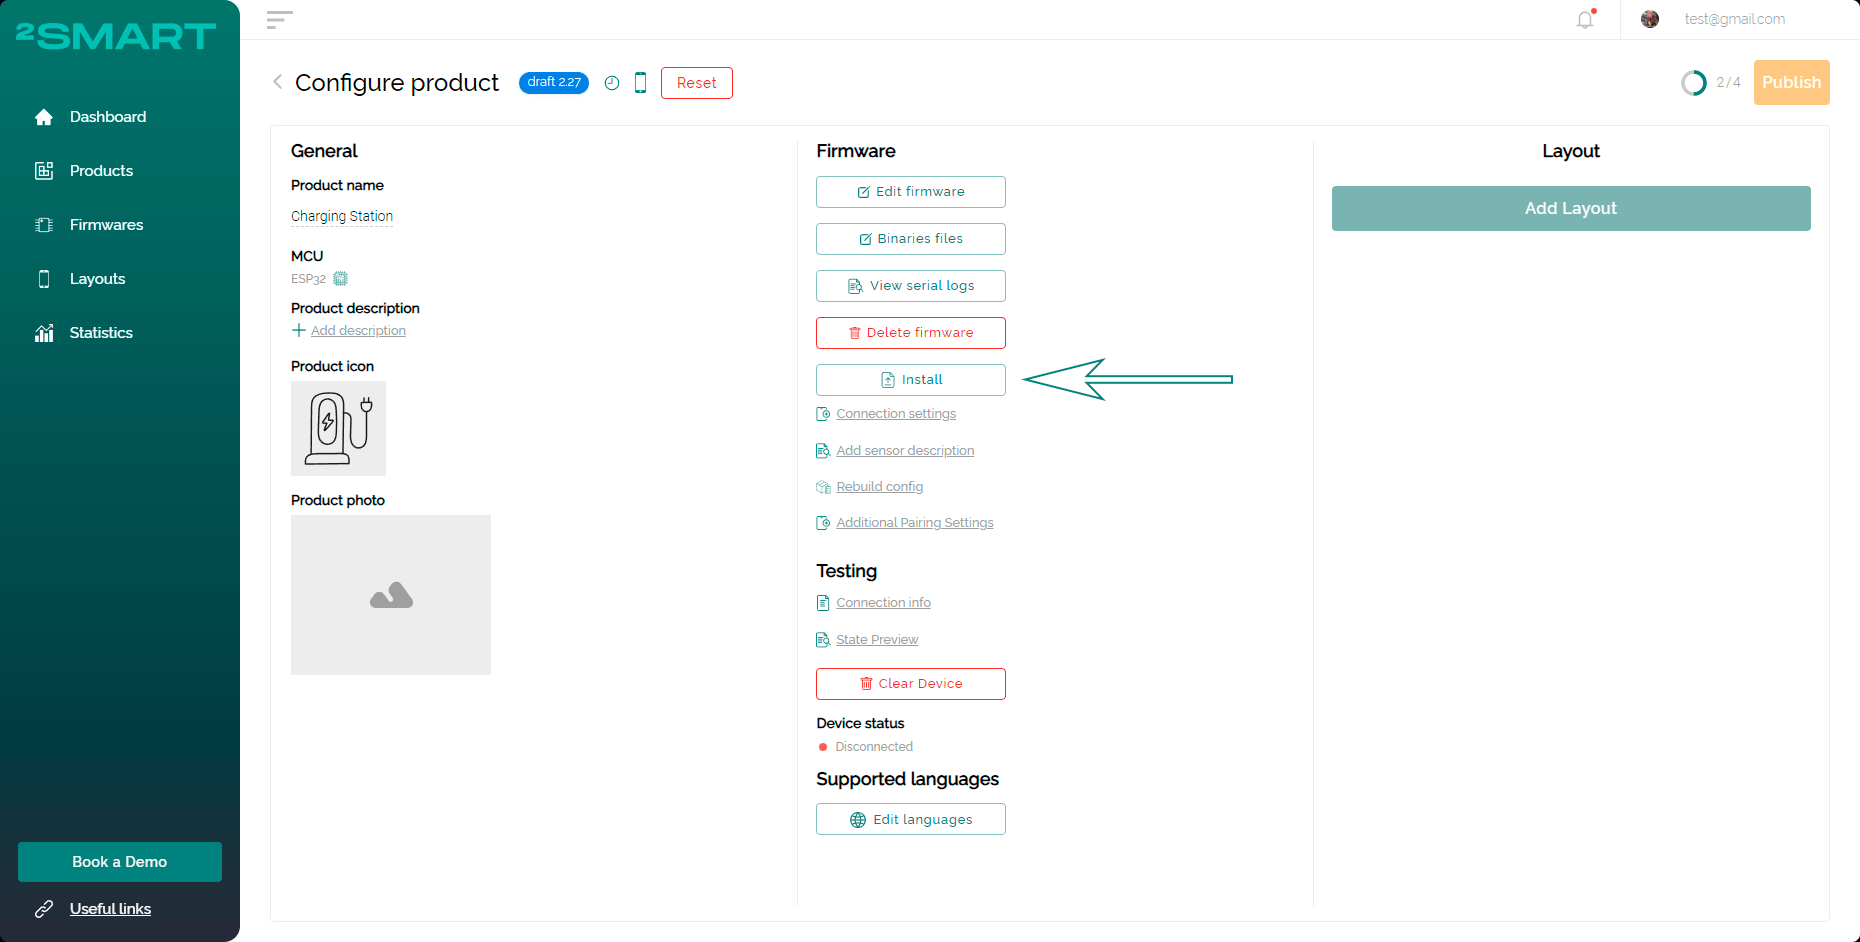
Test devices of the ESP32 products with the custom firmware can be flashing from the vendor panel. To make it possible, you need to upload valid firmware/binary files and click the “Build config” button.
Wait some seconds while configuration binary file is automatically built up-to-date for the test device by a cloud builder and the “Install” button will be shown on the vendor panel. Click the “Install” button to start the flashing process.
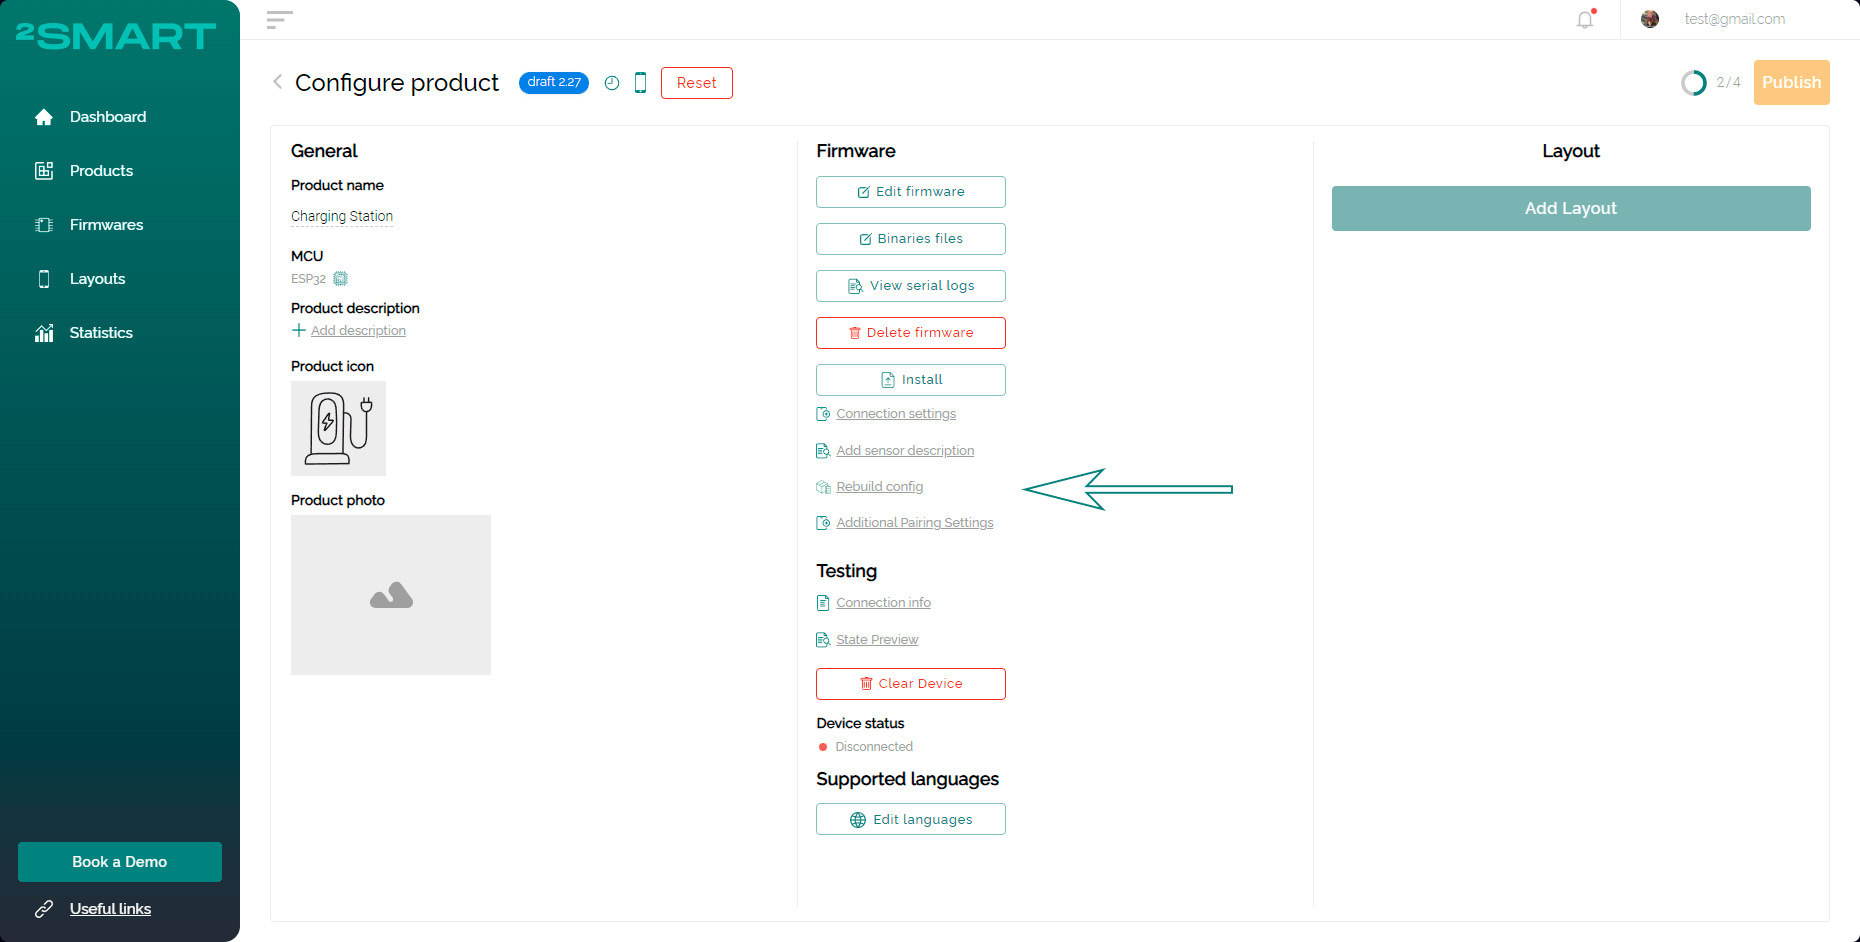
If you update the firmware/binary files, click the “Rebuild config” button to update the binary for test device too.
Here is a standard flashing process used and you can view device’s logs after its finishing.
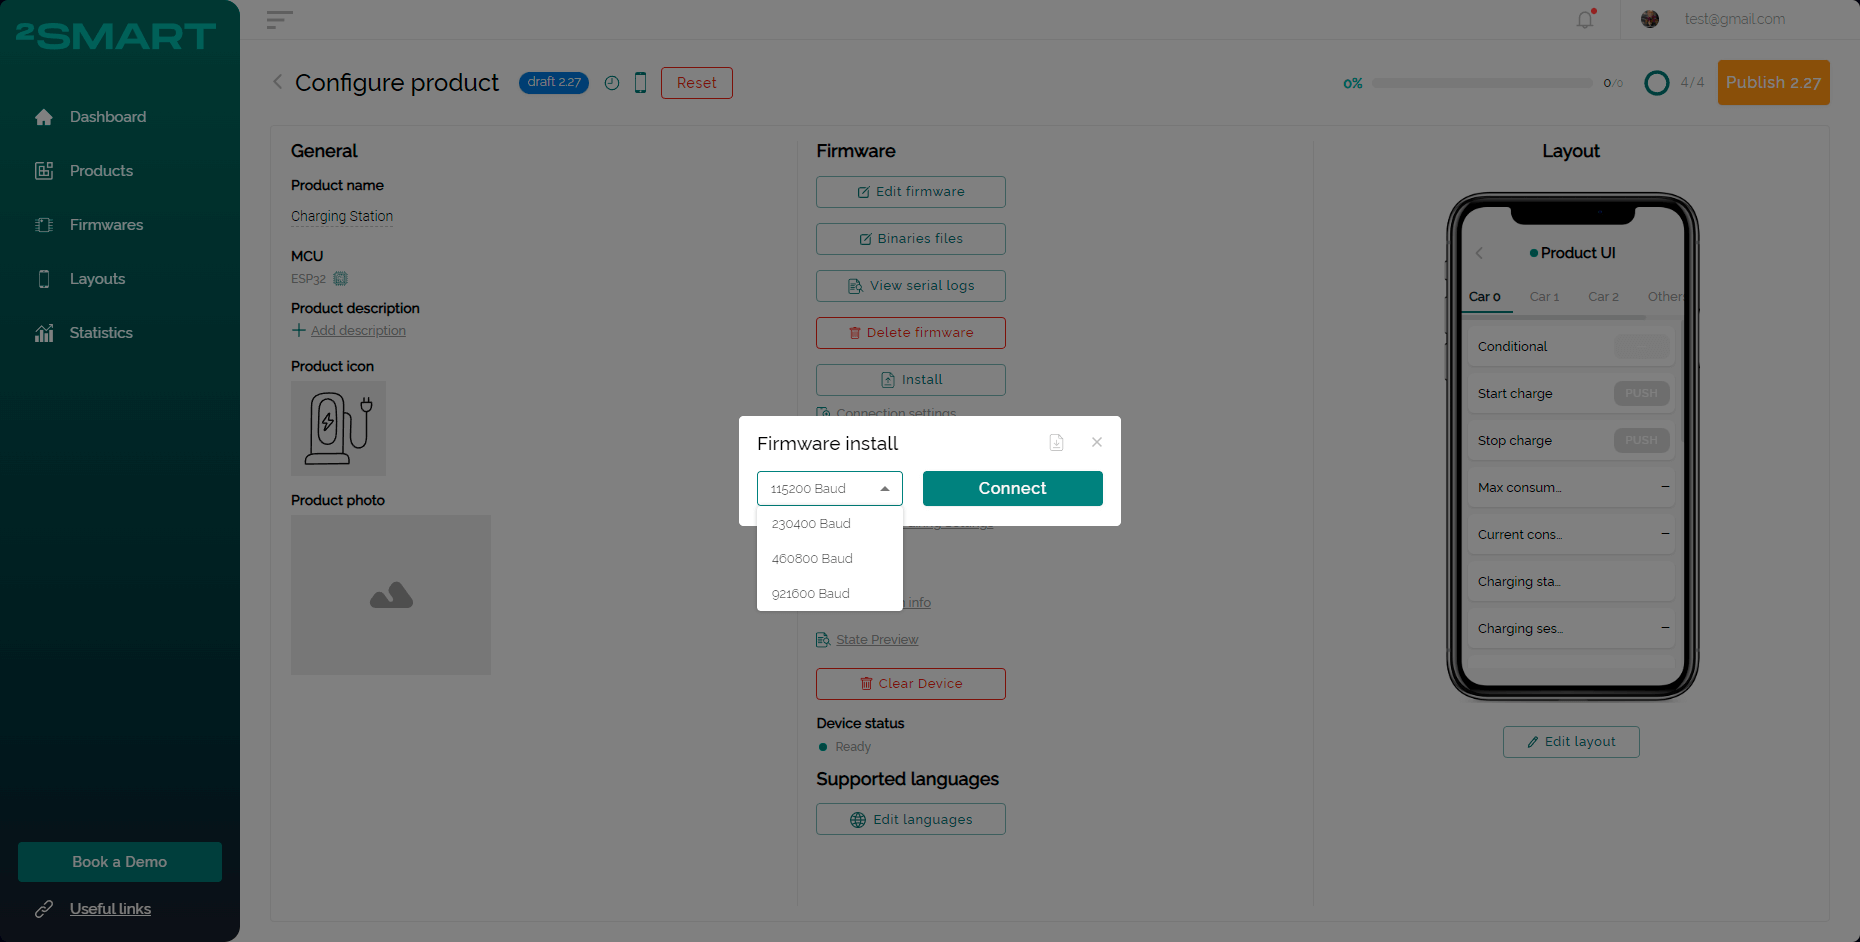
Ability to select higher baud rate for firmware flashing
This feature gives the possibility of using higher baud rate during firmware flashing via browser. To use it, click the “Baud” field during the device flashing, choose the available baud and click the “Connect” button. After that, follow the general flashing steps.
Ability to select version of the layout during opening “Edit Layout” page
The admins receive an ability to choose the layout version for editing from the product’s page. As soon as the “Edit layout” button is clicked, there is a “Choose layout” modal window shown up.
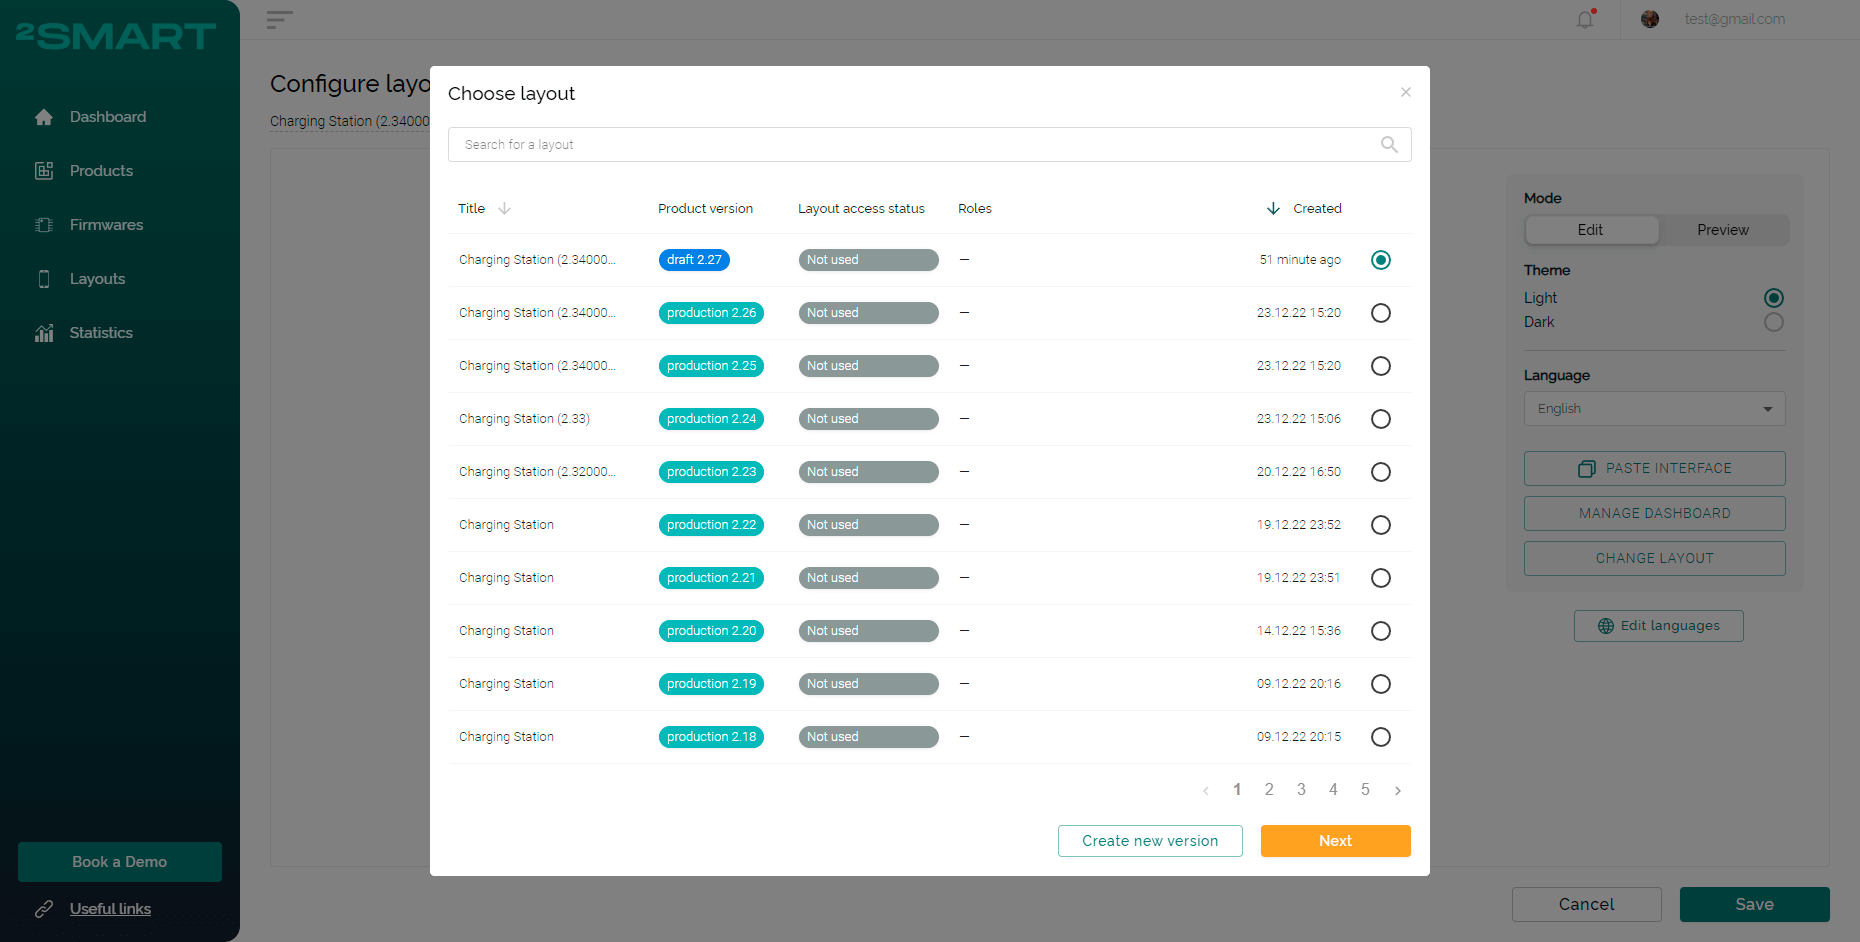
By default, the latest layout is chosen but you can choose and click any previous version to edit it. After choosing the layout with the radio button, click the “Next” button to start the layout editing. You’ll see the last state of the chosen layout on the emulator, could edit it and save.
If you don’t want to choose the layout and click anywhere beyond the modal window, you also get the latest layout for editing.
This feature is really useful as there is a possibility to assign different layouts to different roles and the admin shouldn’t make a big effort to find and edit the required layout now.
By clicking the “Create new version” button, the admin can create a new layout and not just edit the existing versions.
As there can be really many layout versions for one product, there is a possibility to search the layout by its title.